Each type of timer bar in PageUni Countdown Timer comes with its own preset placement options. For example, the Product Page Bar includes two default placements: Add-to-cart top and Add-to-cart bottom.
However, in some cases, these preset positions might not meet your specific needs. Or, if you're using an older store theme that doesn't support Shopify Online Store 2.0 app blocks, you may need to place the timer bar manually using a code snippet.
That’s where the custom placement comes in. It gives you full control over where to display your timer bar. In this guide, we’ll walk you through how to use it.
Where to Setup Custom Placement
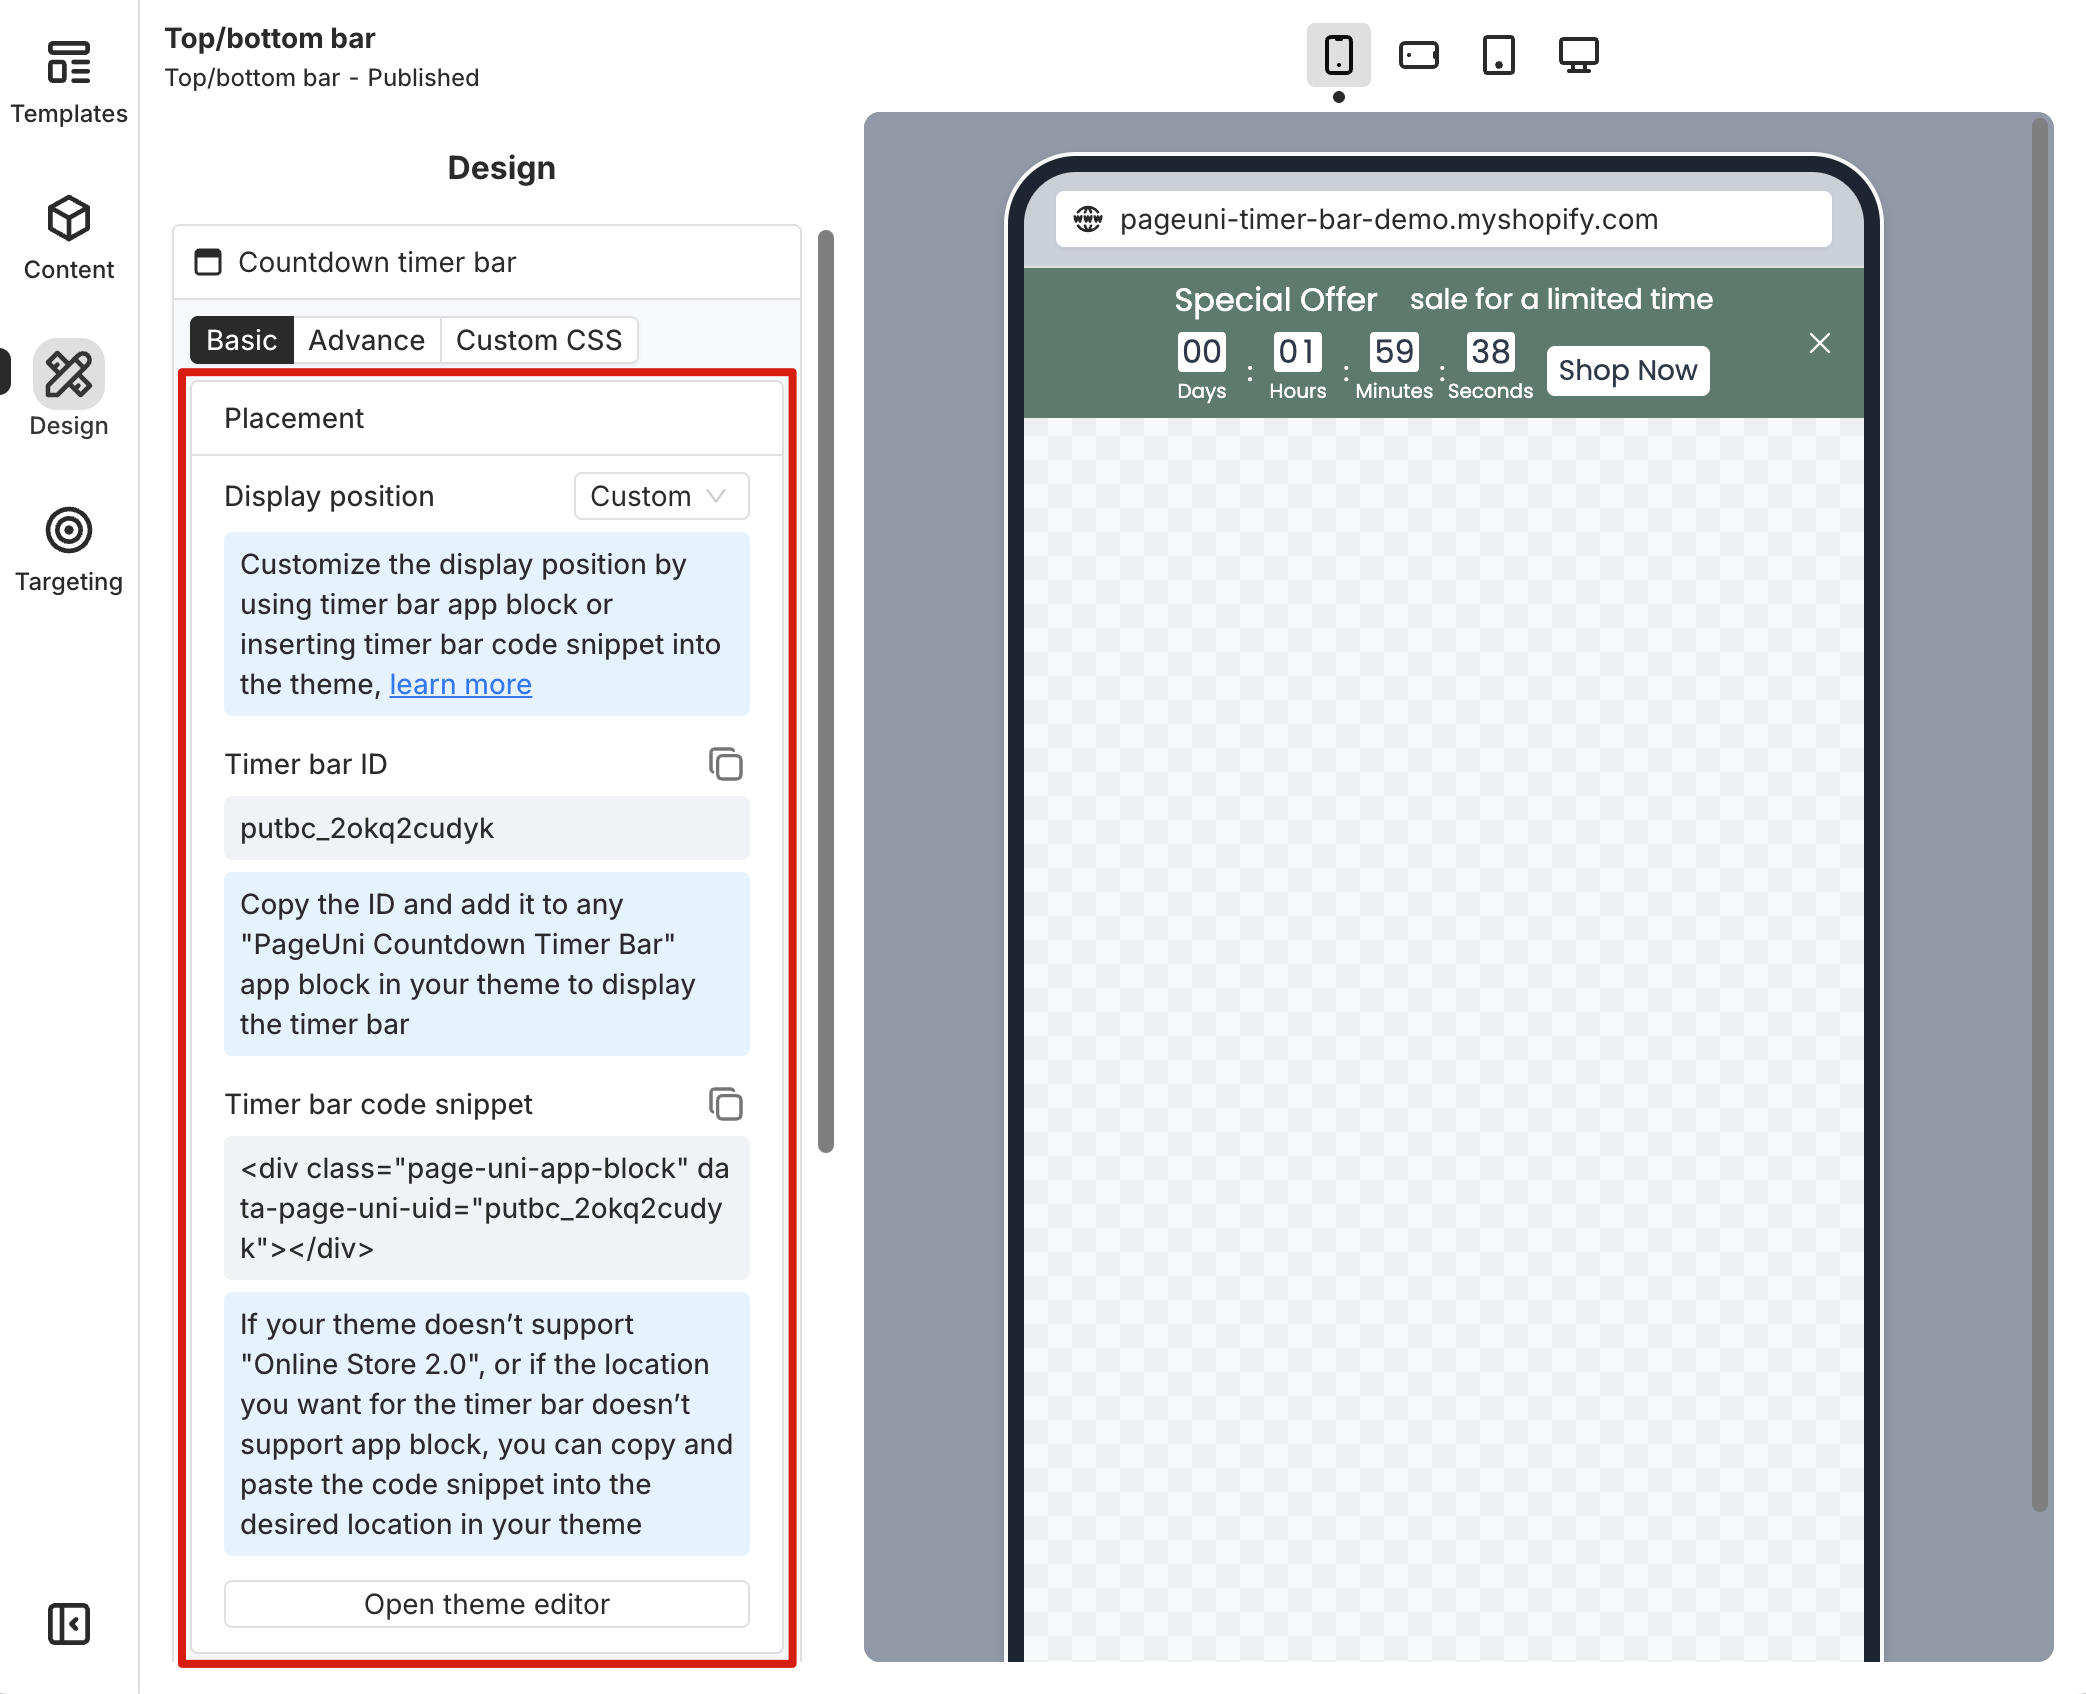
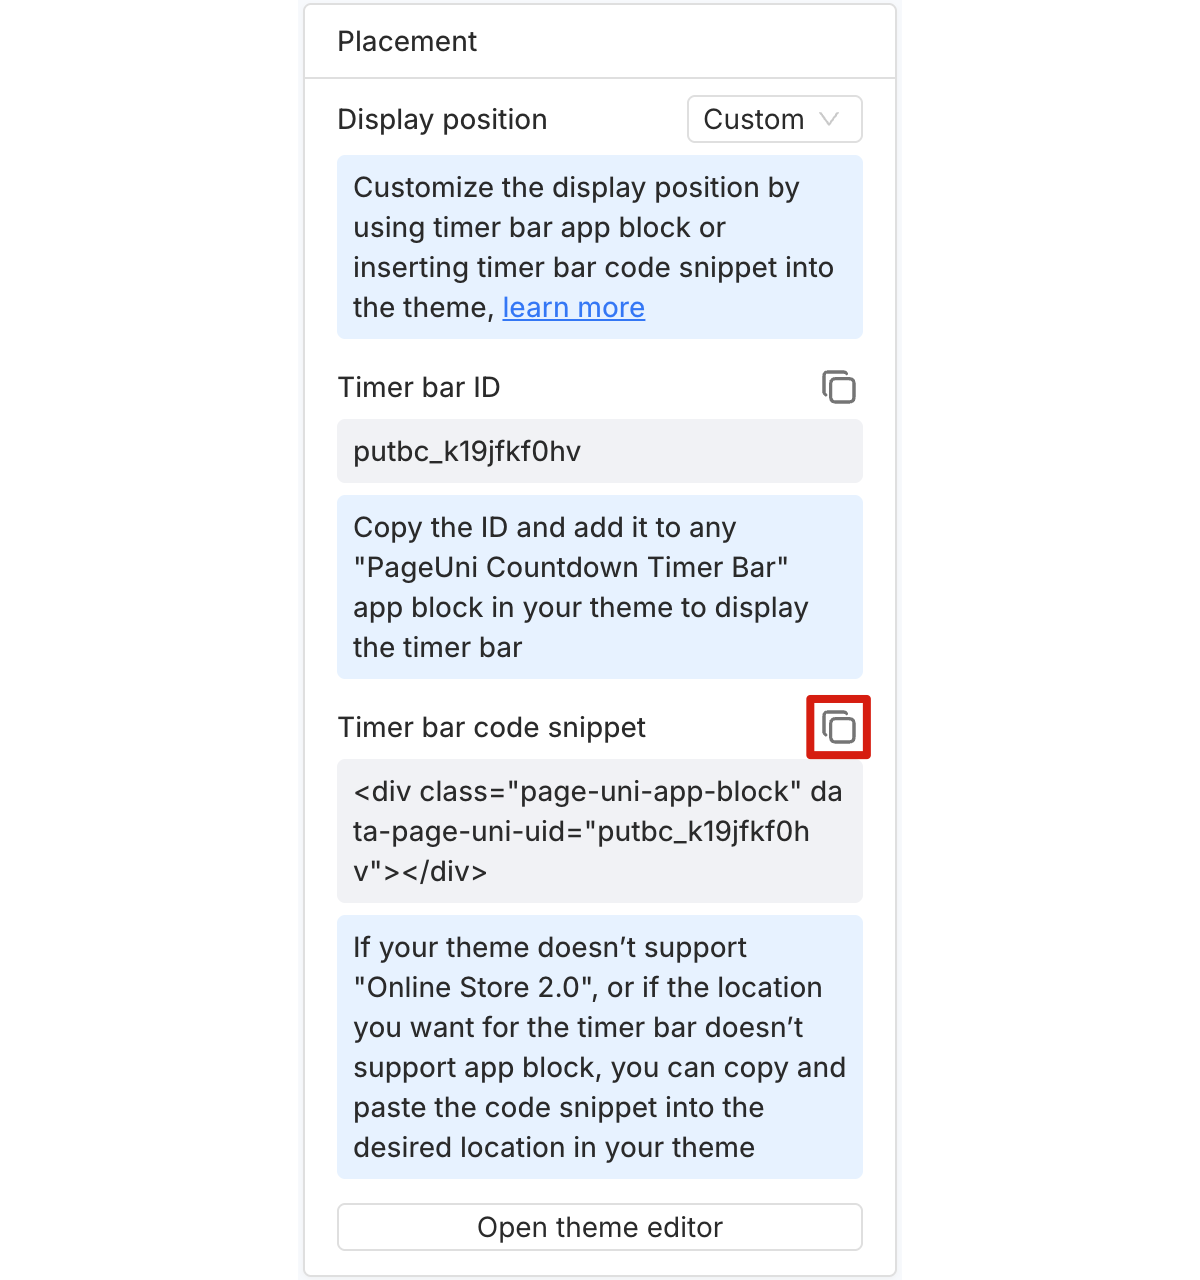
In the Design tab of the timer bar builder, open the "Timer bar" card. In the "Placement" section, set the "Display position" to "Custom". After setting it to "Custom", save and publish your campaign. Then, you can continue in the Shopify theme editor to complete your custom placement setup.
Using Custom Placement with Shopify App Blocks
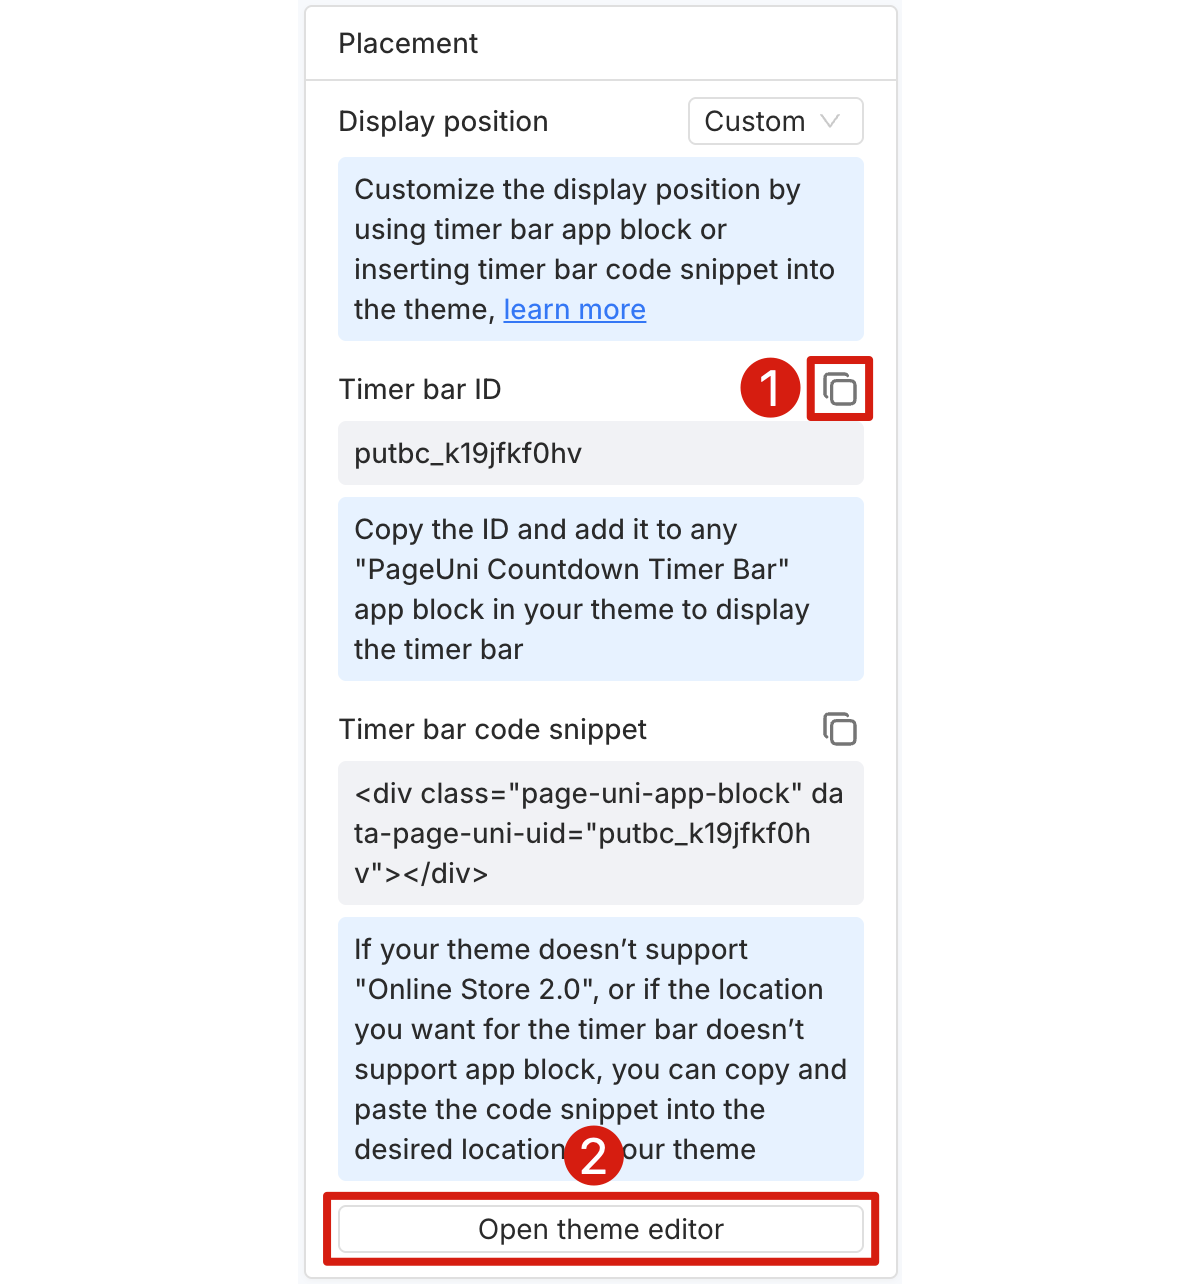
Using Shopify app blocks is a quick and easy way to set up custom placement. First, click the copy button next to "Timer bar ID", then click "Open theme editor" to go to the Shopify theme editor page.
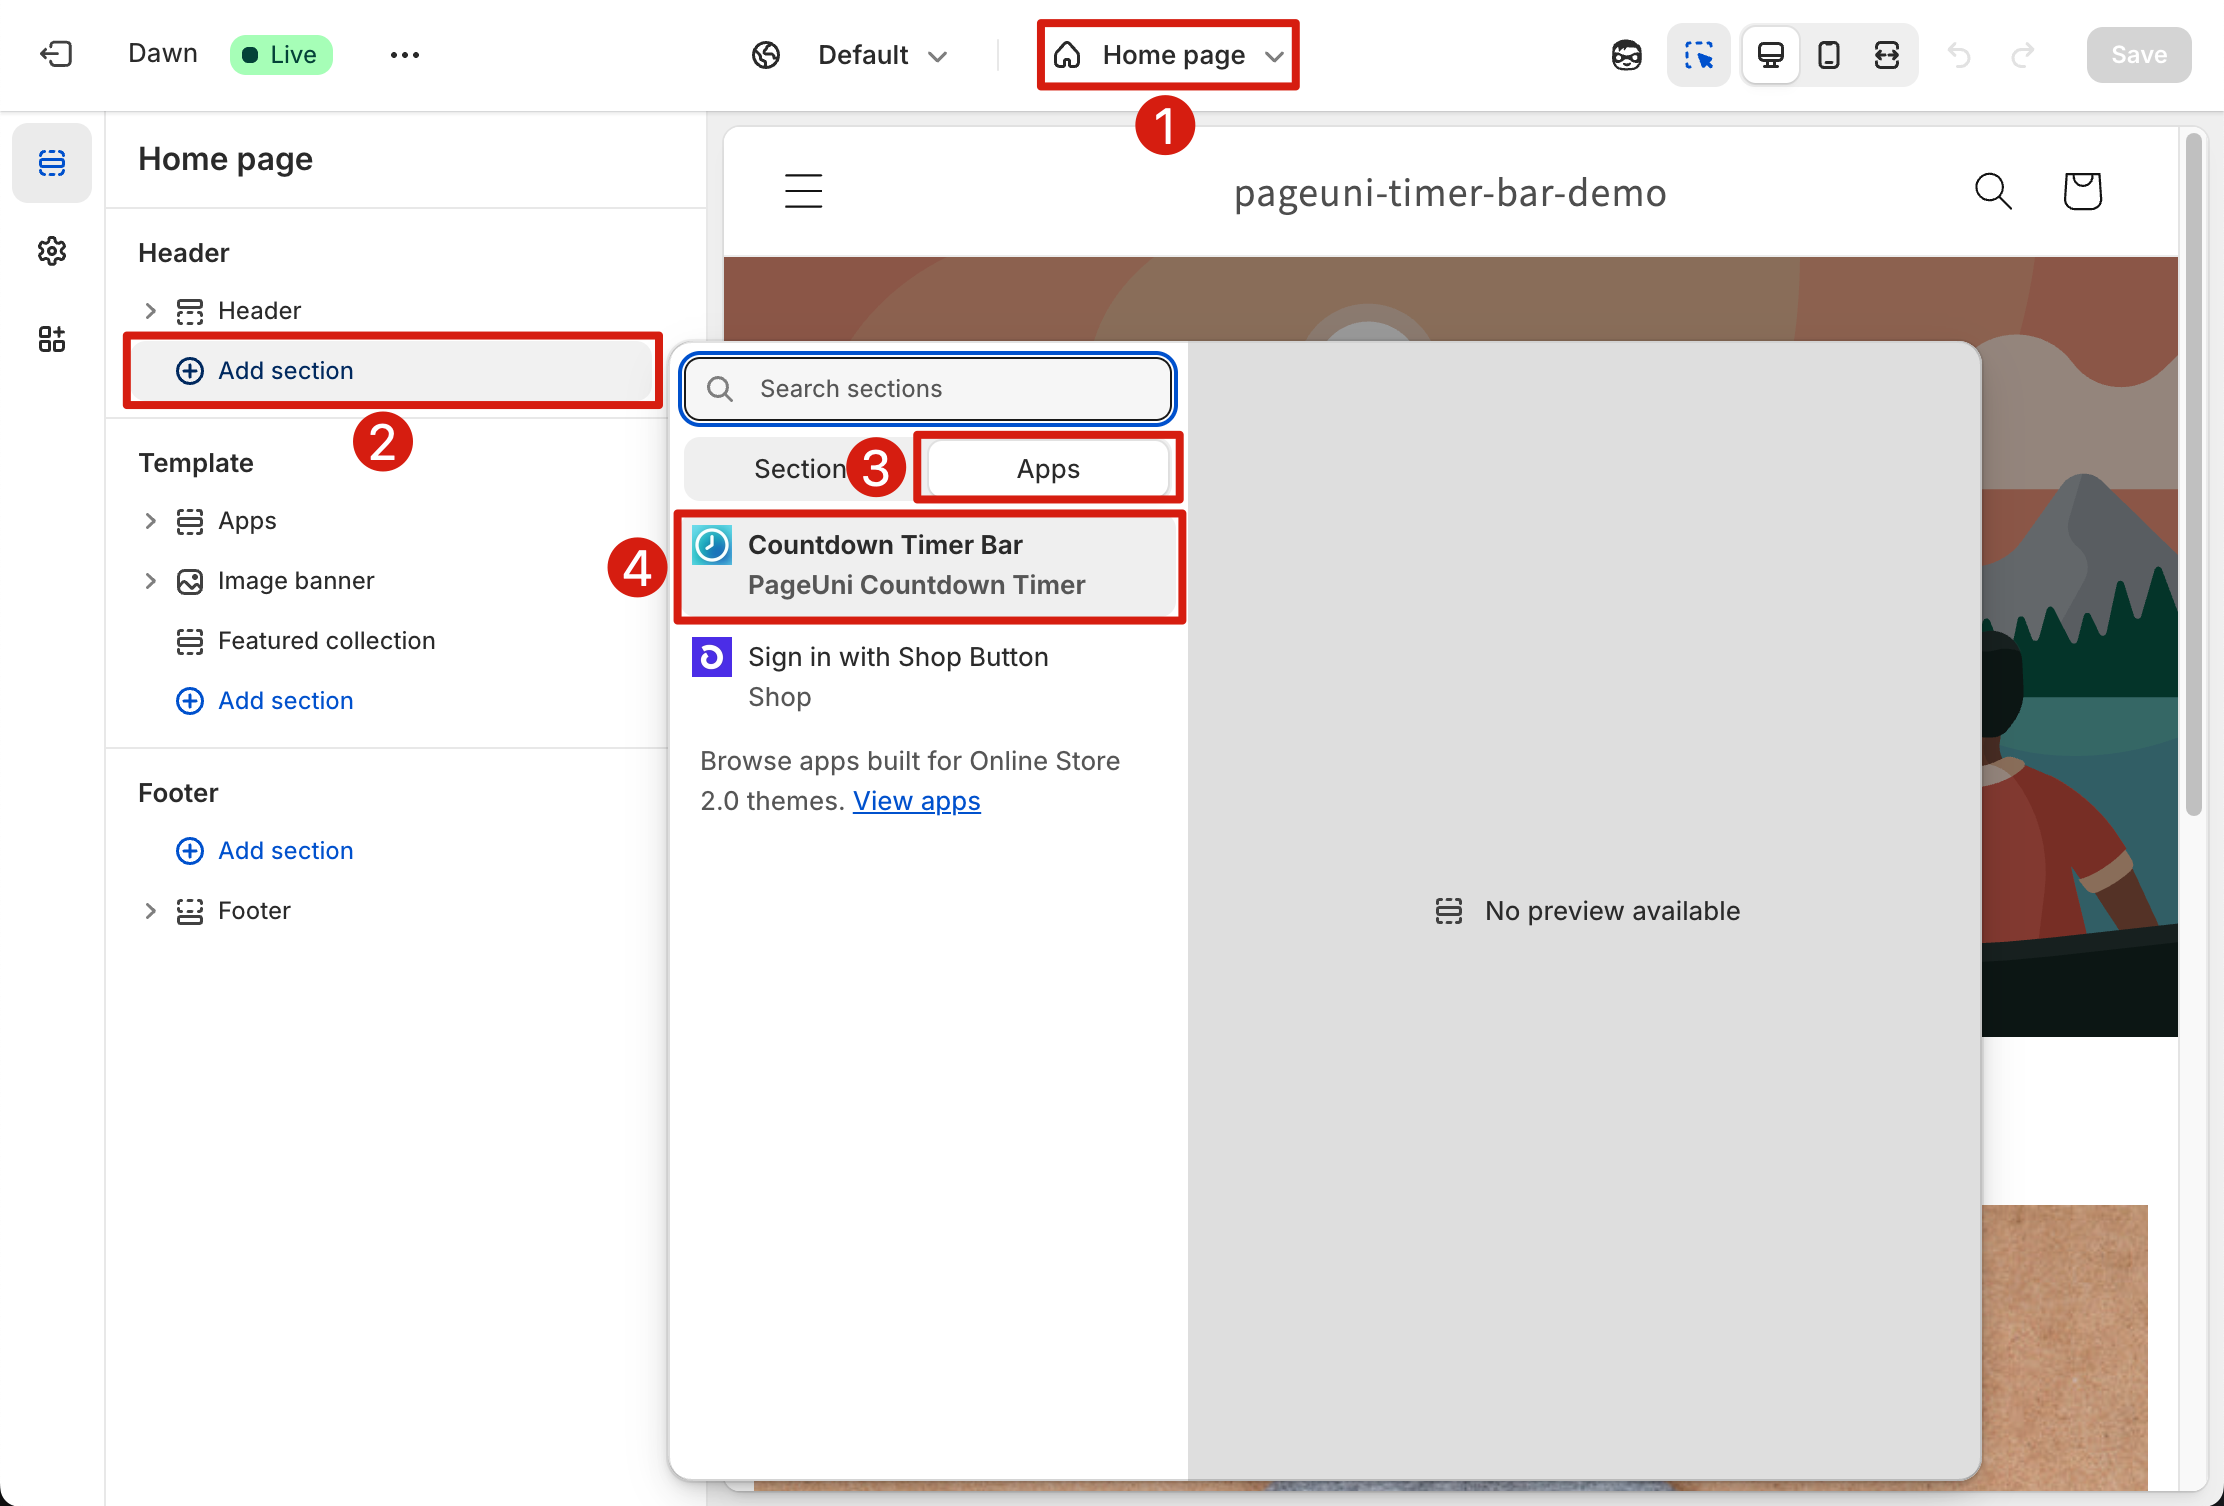
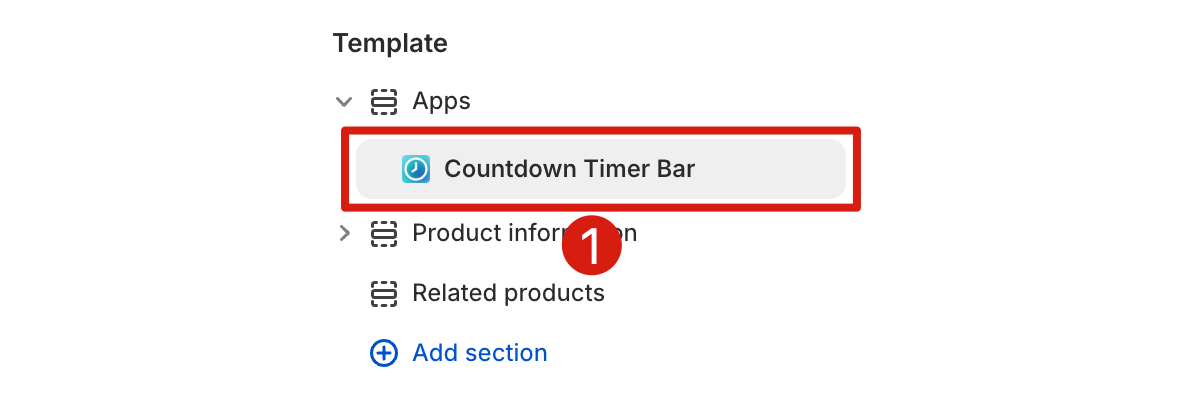
In the opened theme editor, switch to the page where you want the timer bar to appear. Find the place where you'd like to place the timer bar, then click "Add section" or "Add block". In the pop-up, go to the Apps tab and select PageUni Countdown Timer.
For example, as shown below, the timer bar is added right below the Header section on the Home page.
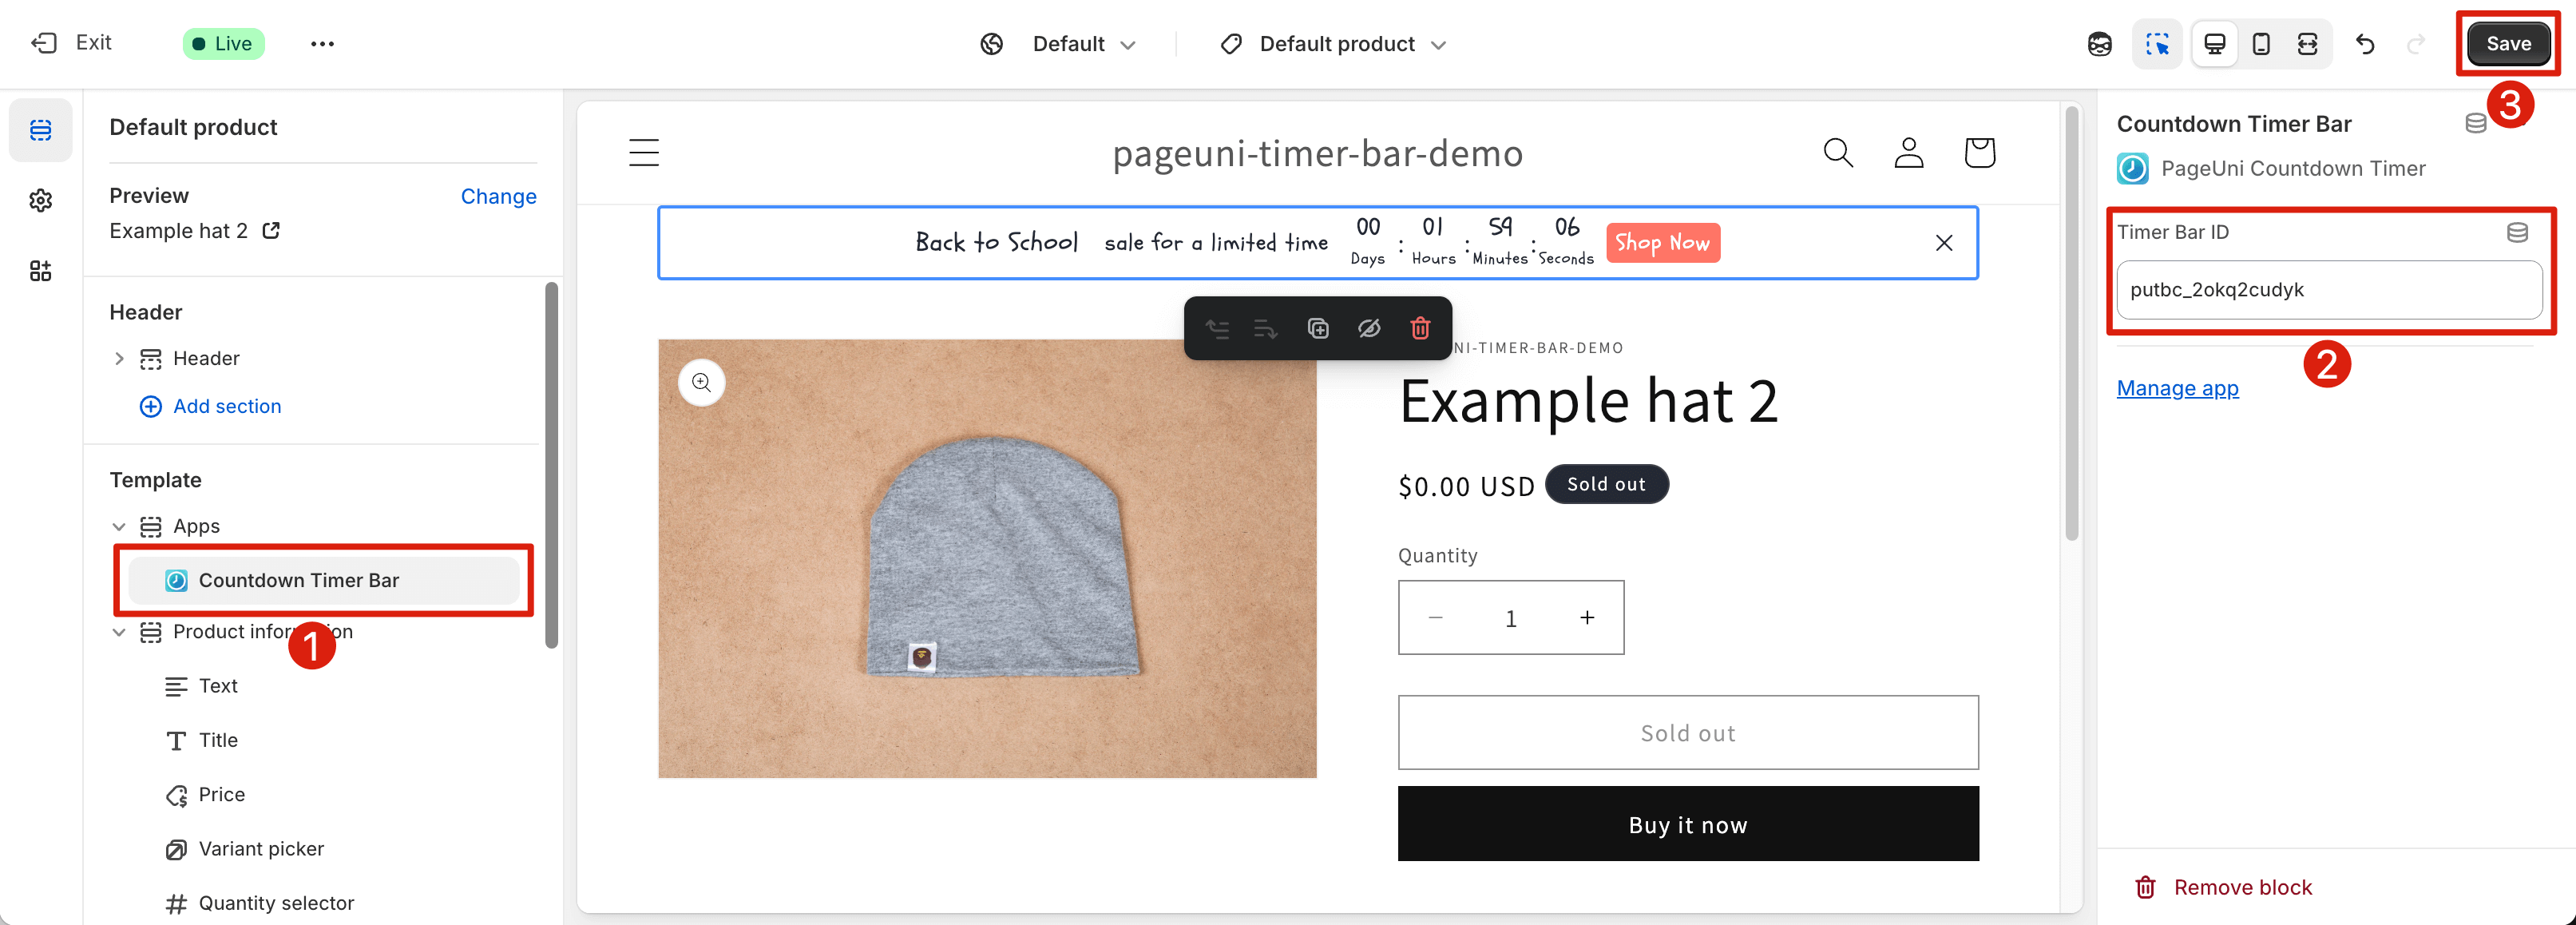
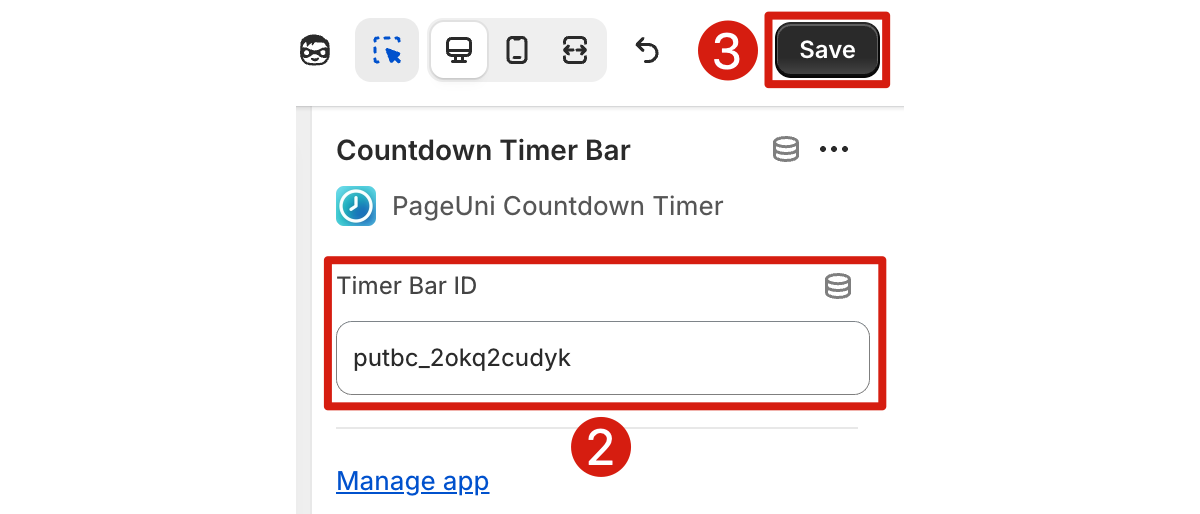
After adding the block, you’ll see the PageUni Countdown Timer block appear in the sidebar. Click the block to open its settings. Paste the timer bar ID you copied earlier into the input field, then click Save.
The timer bar, based on your campaign settings, will appear exactly where you placed the block in the theme editor. That’s it—your custom placement is now all set.
Note: You can move the timer bar block by dragging the "six dots" icon on the left side of the app block.

If you run into any issues along the way, feel free to reach out to our support team — we’re always happy to help!
Using Custom Placement with Code Snippet
Using the code snippet method is not recommended in most cases. It’s mainly provided to support older themes that don’t work with Shopify app blocks. If you choose to use this method, we recommend working with a developer, and making all changes on a duplicated version of your theme to avoid any issues with your live store.
First, click the copy button next to the "Timer bar code snippet" to copy the code.
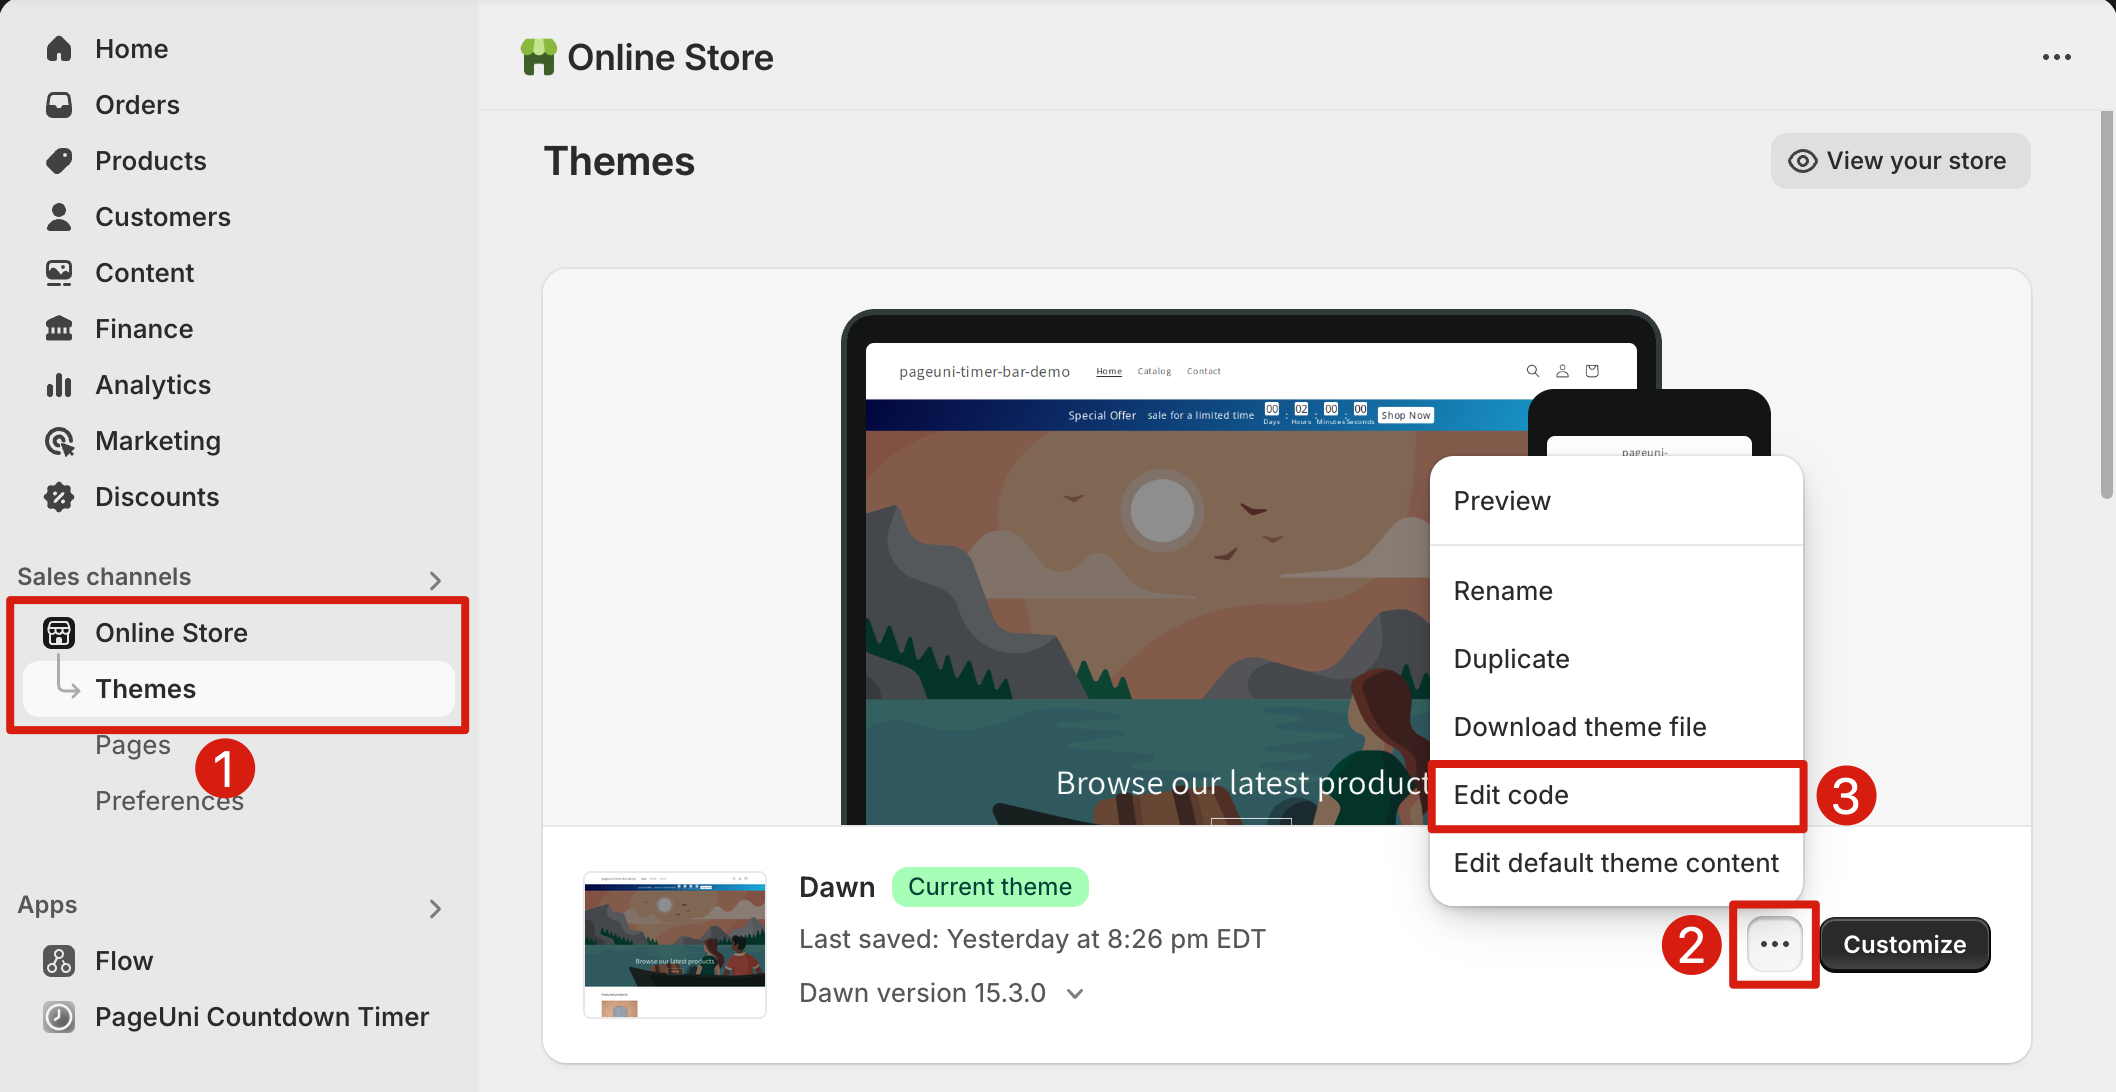
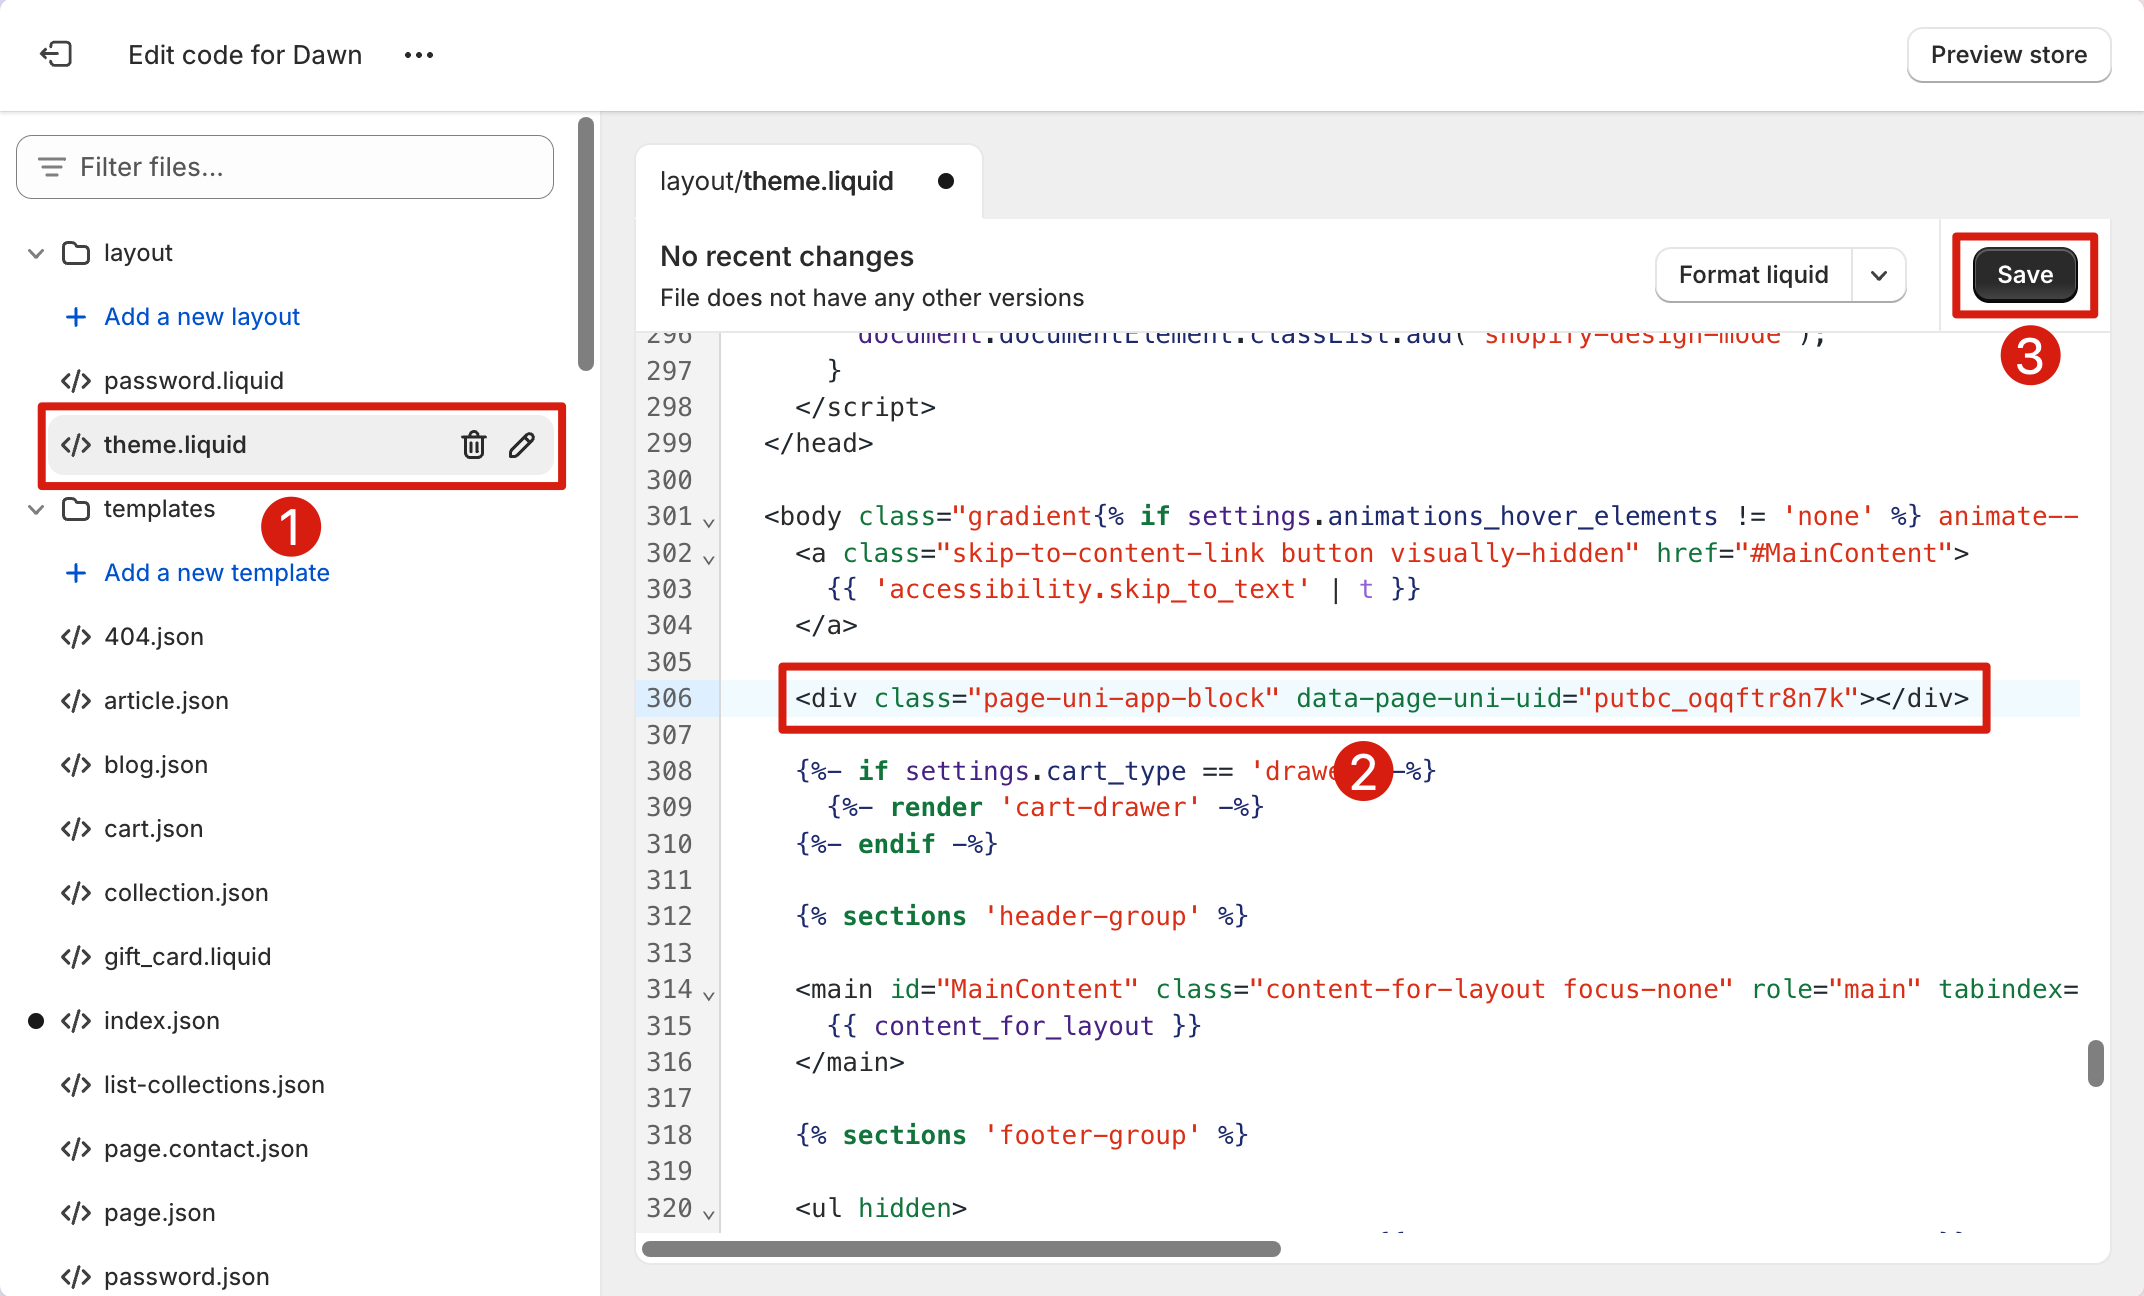
In your Shopify admin, go to Online Store > Themes, find the theme you want to update, click the three dots, and choose Edit code. You’ll then be taken to the theme’s code editor.
In the theme code editor, open the file where you want to place the timer bar, paste the code snippet you copied earlier, and save your changes.
After that, the timer bar will appear exactly where you inserted the code snippet, following your campaign settings.
Note: If the timer bar doesn't display properly after following the steps above, try using a custom theme section that includes the timer bar code snippet. For more details on how to create a custom theme section, please refer to this guide and this reference.