HTML element targeting lets you show campaigns based on specific content on the page—like an “Add to Cart” button, a banner, or a custom element added by your developer. This gives you full control over when and where your campaign appears. For example, you can show different campaigns on pages with the same URL, so visitors only see what’s relevant to them.
With PageUni apps, setting up HTML element targeting is simple—no coding required.
Check out this guide to learn how to add an HTML element targeting rule to your campaign.
Note: To set up HTML element targeting, you’ll need to enter the CSS selector of the target HTML element. Click here to learn how to find it.
Once you’ve added the targeting rule, you can setup how it checks the HTML element. HTML element targeting uses targeting rule conditions to decide whether the rule should apply. Check this article to learn more.
An HTML element targeting rule includes one or more condition groups. These groups follow OR logic—if any one group matches, the rule applies. Inside each group, conditions follow AND logic—all conditions in the group must be true for it to pass.
Here are a few real-world examples to help you understand how it works.
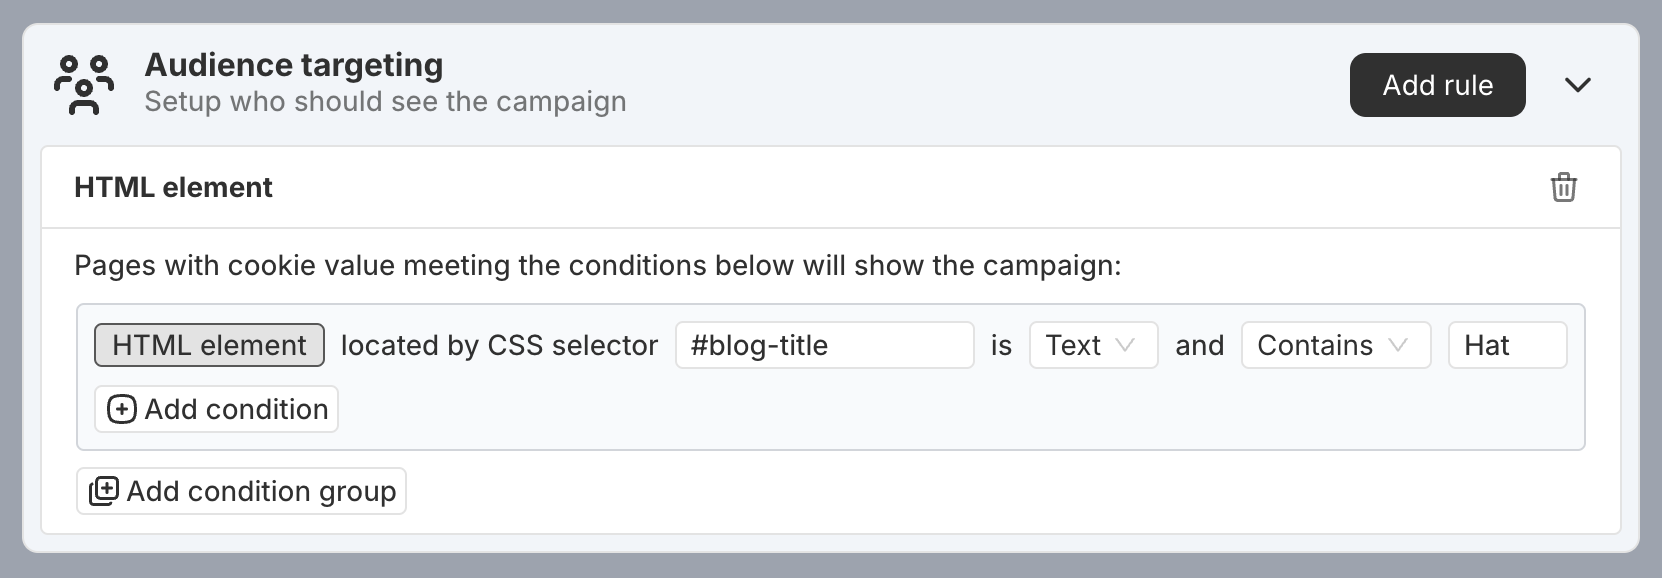
Example 1: The HTML element selected by the CSS selector #blog-title should have a content type of Text and contain the word "Hat". This is typically used to check if a blog post title includes the word "Hat," so you can show a campaign for hat products on those pages.
The following HTML elements will pass the targeting rule:
-
<h1 id="blog-title">All About Women's Hats</h1> -
<h1 id="blog-title">How to Pick Hats for Small Heads</h1>
The following HTML elements will not pass the targeting rule:
-
<h1 id="blog-title">Tips for choosing the right T-shirt</h1> -
<h1 id="blog-title">Top T-Shirt Print Designs</h1>
Note: If the page doesn’t have an HTML element that matches the CSS selector #blog-title, the targeting rule won’t be triggered. This applies to all HTML element targeting rules.
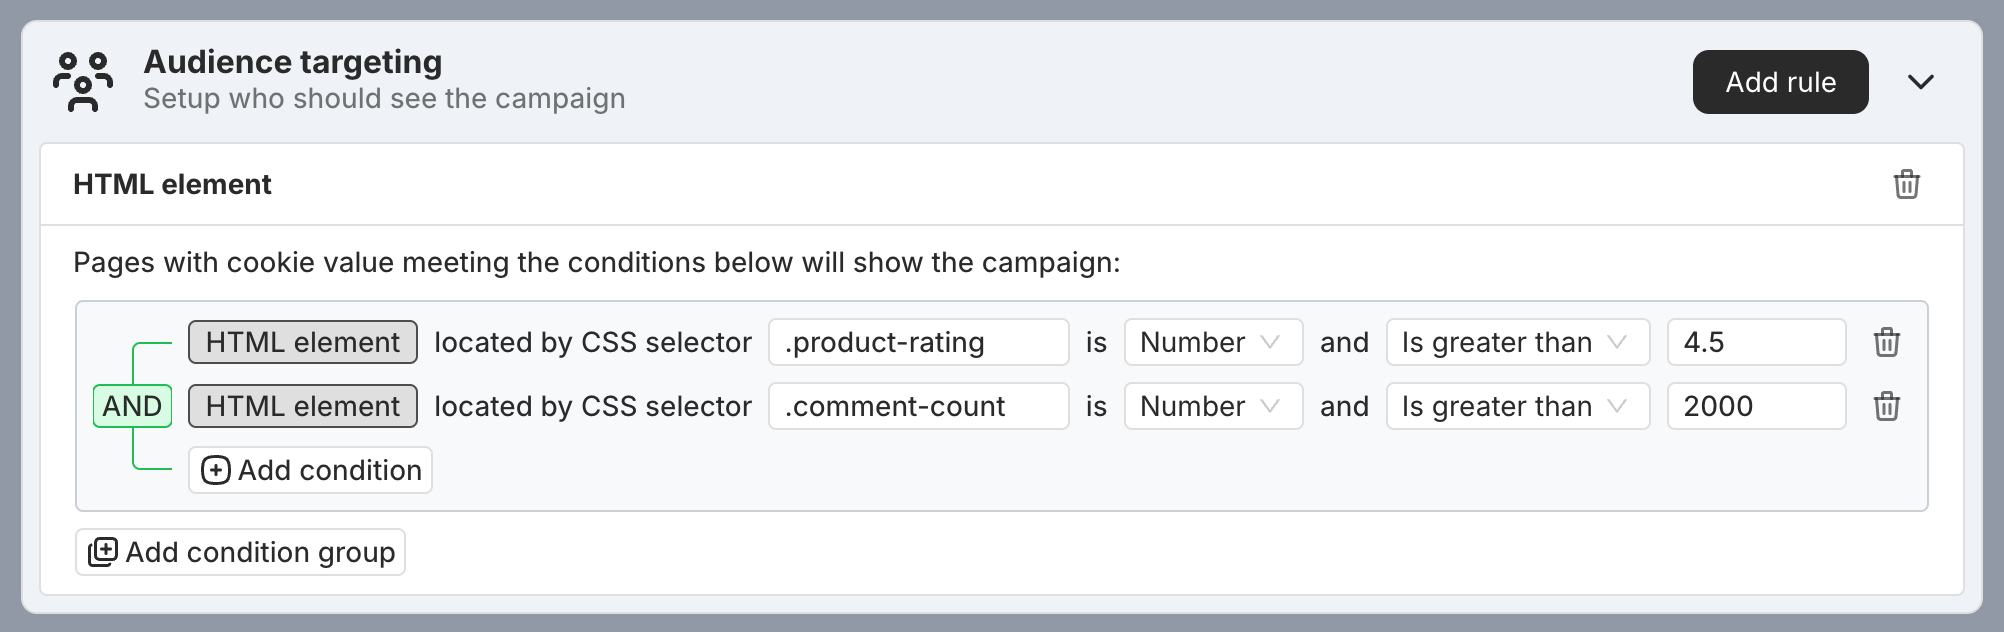
Example 2: The HTML element selected by the CSS selector .product-rating should have a content type of Number and a value greater than 4.5. At the same time, the element selected by .comment-count should also be a Number and greater than 2,000.
This setup is typically used to identify products that continue to receive high ratings (above 4.5) even after more than 2,000 reviews—so you can show campaigns like a “Popular Pick” label or a limited-time promotion to new visitors.
The following HTML elements will pass the targeting rule:
-
<div class="product-rating">4.6</div><div class="comment-count">2186</div> -
<div class="product-rating">4.9</div><div class="comment-count">2598</div>
The following HTML elements will not pass the targeting rule:
-
<div class="product-rating">4.5</div><div class="comment-count">2186</div> -
<div class="product-rating">4.2</div><div class="comment-count">2186</div> -
<div class="product-rating">4.9</div><div class="comment-count">1598</div> -
<div class="product-rating">Great</div><div class="comment-count">2598</div>
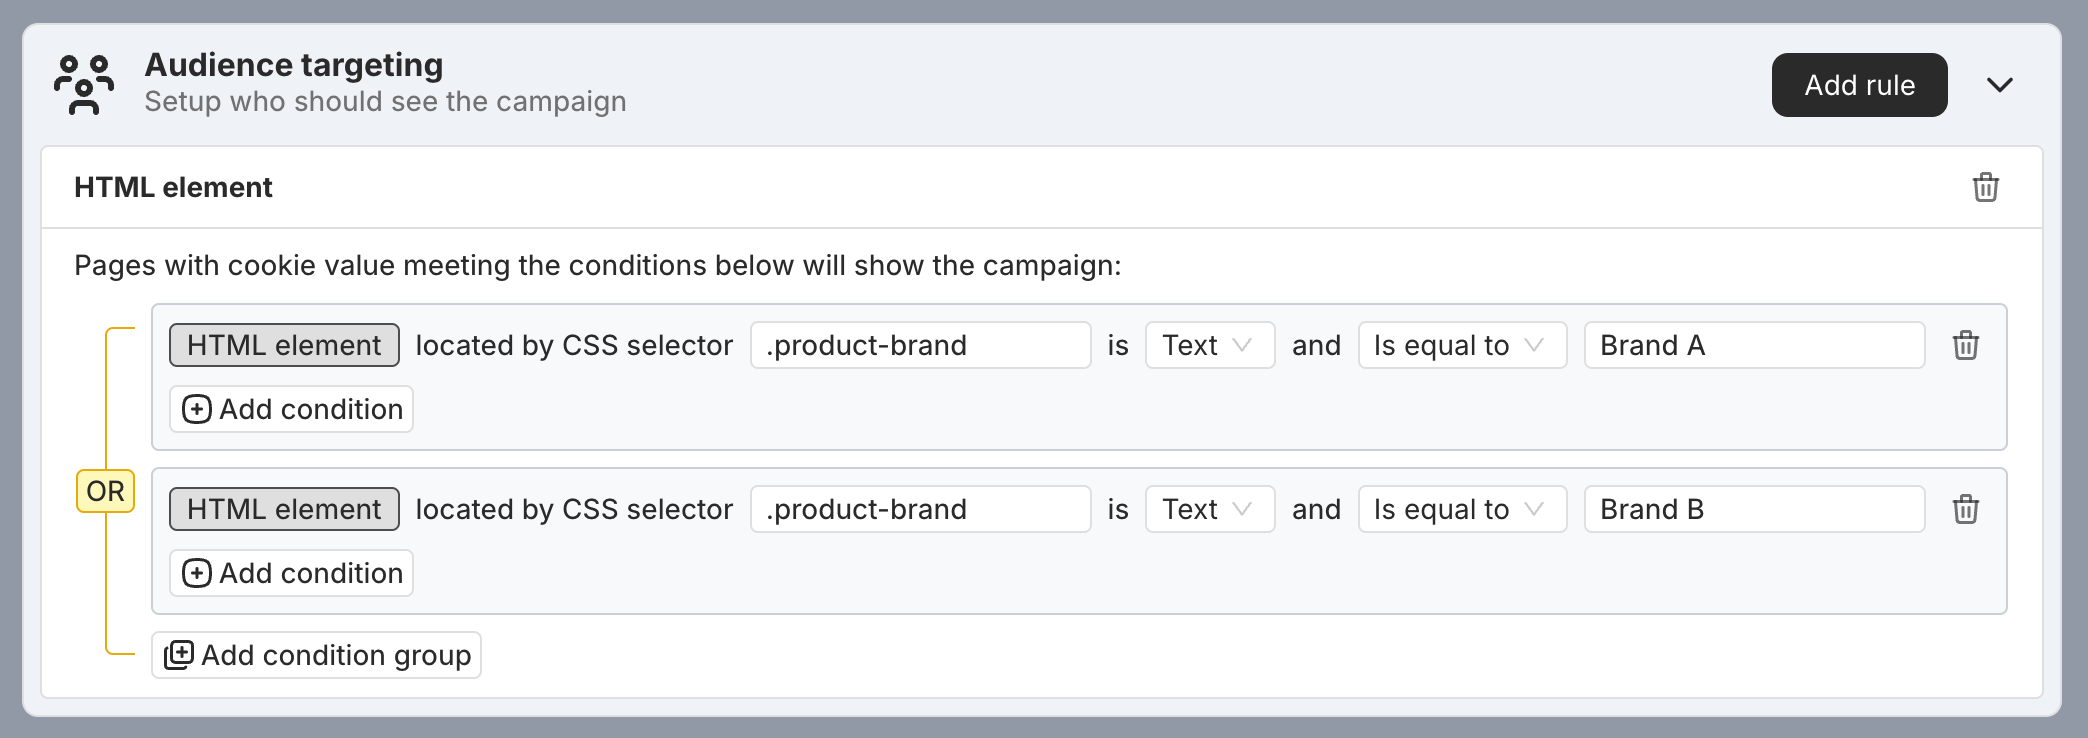
Example 3: The HTML element selected by the CSS selector .product-brand should have a content type of Text and be equal to either "Brand A" or "Brand B".
This setup is typically used to detect whether the current product belongs to a specific brand, so you can show targeted campaigns just for those brands.
In this setup, there are two condition groups linked by OR. If either group meets all its conditions, the rule applies.
The following HTML elements will pass the targeting rule:
-
<div class="product-brand">Brand A</div> -
<div class="product-brand">Brand B</div>
The following HTML elements will not pass the targeting rule:
-
<div class="product-brand">Brand C</div> -
<div class="product-brand">A Brand</div>