PageUni Countdown Timer offers a variety of schedule types to fit different campaign needs:
-
Specified time – Great for longer campaigns, such as a product promotion week/month.
-
Fixed duration – Perfect for creating urgency and prompting quicker buying decisions.
-
Interval – Useful for recurring flash deals, like offering a 10-minute discount every 60 minutes.
-
Recurring daily – Ideal for daily promotions, such as next-day shipping for orders placed before a cutoff time.
-
Recurring weekly – Suitable for weekly campaigns, like weekend sales.
Here, we’ll walk you through how to use the "Interval" schedule type.
This type is great for countdowns that repeat on a regular cycle. It’s perfect for limited-time offers that run every few minutes, hours, or days. You can set how long the timer stays visible, how long it pauses, and the cycle will repeat automatically. For example, you could show a 5-minute flash sale every hour throughout the day, with the timer resetting automatically—no need to set it up again each time.
Where to Set the Schedule
In the Content tab of the timer bar builder, open the "Countdown timer" card. Inside, you’ll find the "Schedule" section, where you can set up the timer’s schedule.
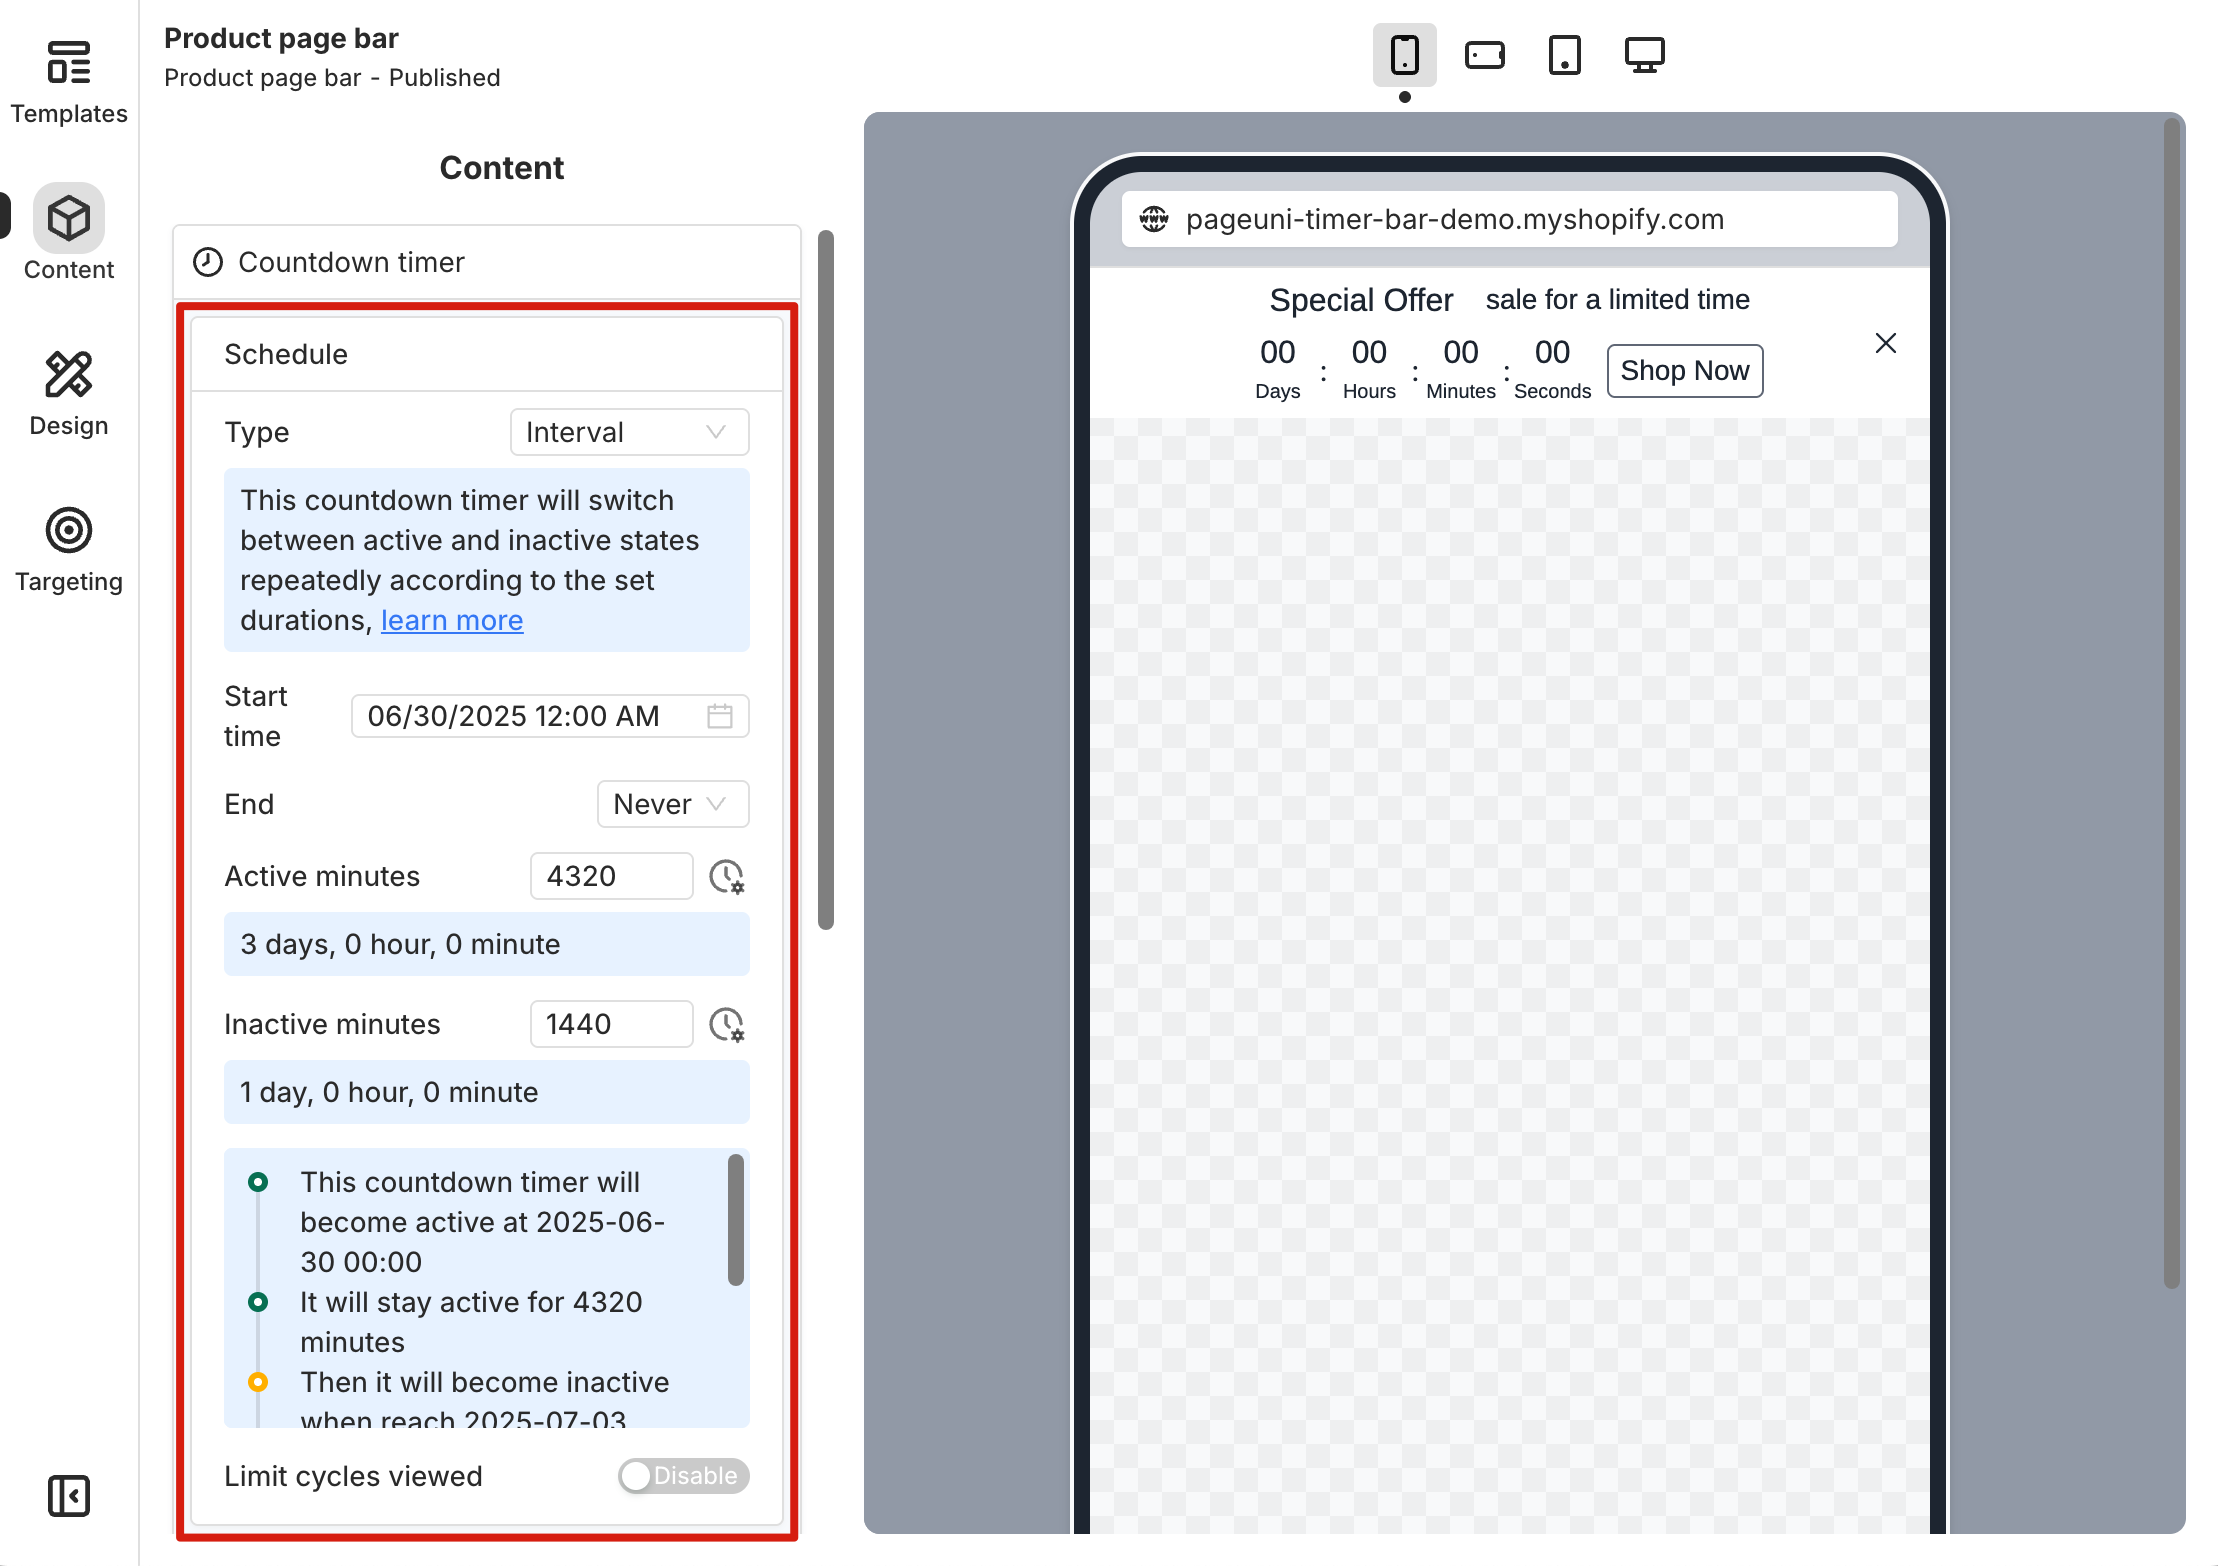
Set Up the Timer Schedule
Start time and End time define when the timer bar will be shown. Active minutes set how long the timer will stay visible in each cycle, while Inactive minutes determine how long it will pause before the next cycle begins.
Start time is required—it determines when the first cycle begins. Set a Start time for your campaign, and once that time is reached after publishing, the first active duration (when the timer is visible) will start and the timer bar will appear.
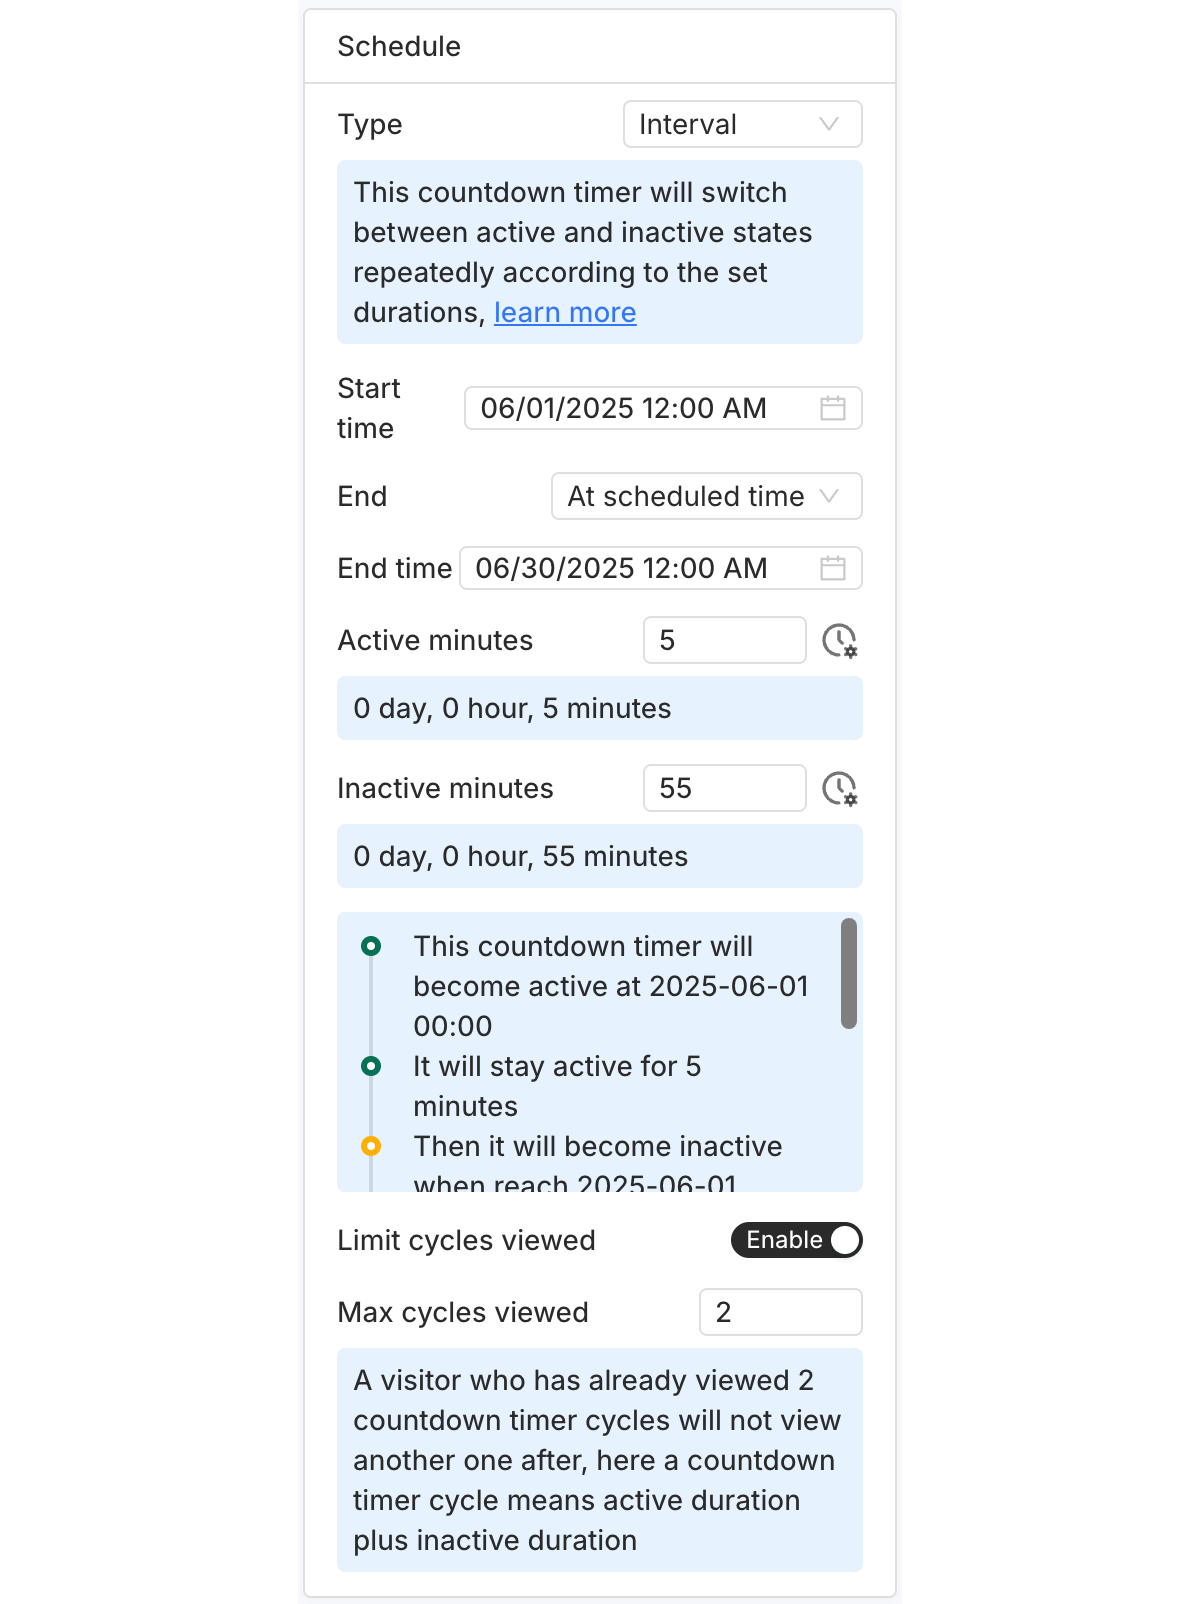
If you want the timer bar to stay visible with no end time, set the End option to "Never". Otherwise, choose "At scheduled time" and set the exact time you want the timer bar to stop showing.

The "Limit cycles viewed" option lets you control how many cycles a customer can see. A cycle includes both the active duration (when the timer is visible) and the inactive duration (when it’s hidden).
By setting a limit—like 2 in the example below—you decide how many cycles each customer can see. Here, "seeing a cycle" means the customer views the timer bar during that cycle’s active period. Once they reach the limit, the timer bar will no longer be shown to them.
Note: The timeline in the card gives you a quick overview of when the timer bar will be displayed based on your schedule.
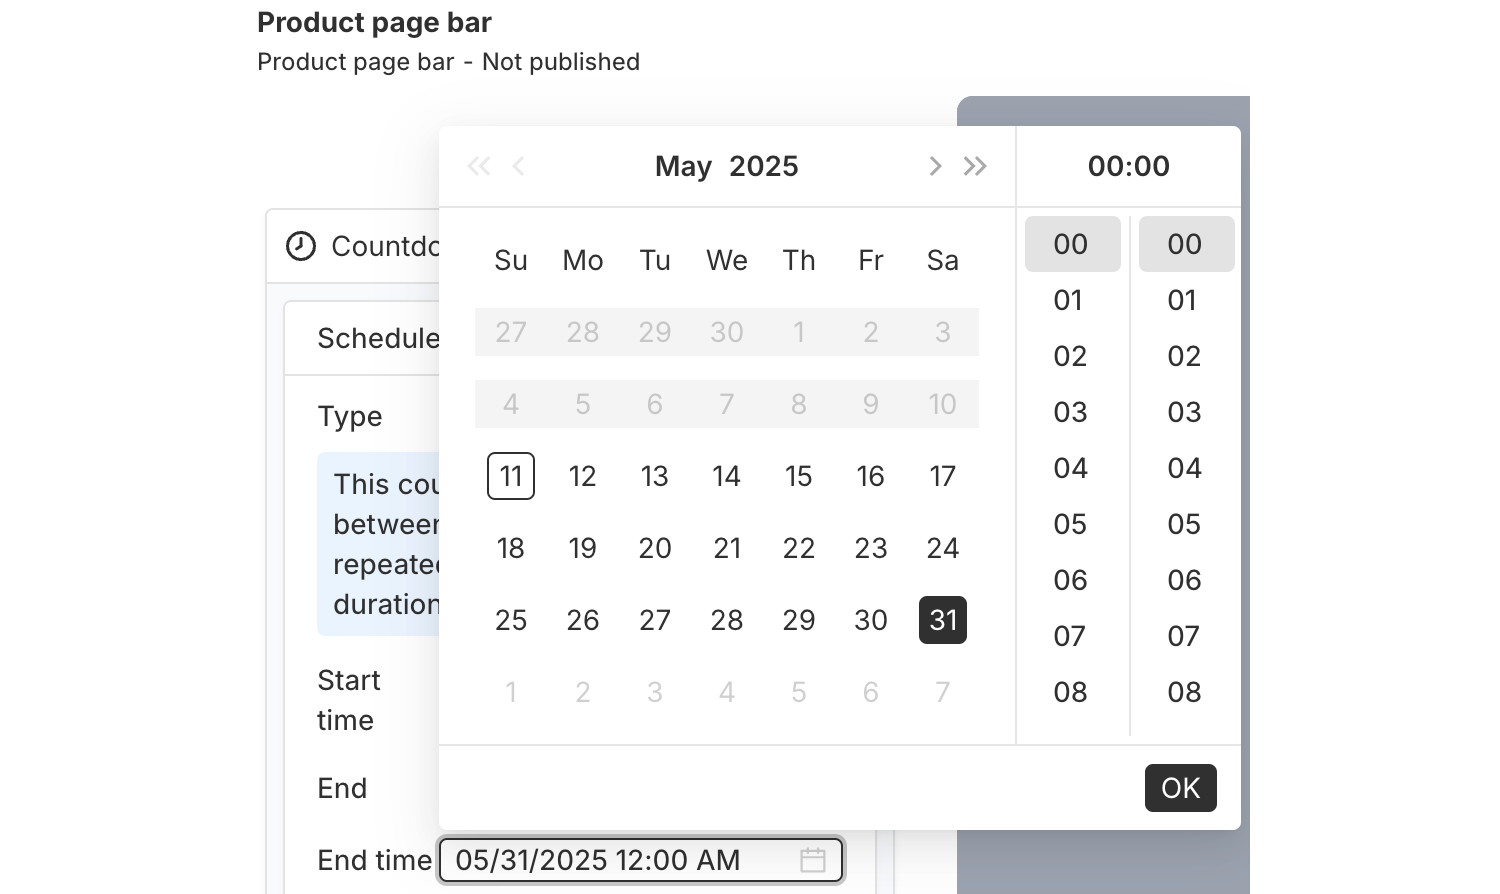
Click the time picker next to each time option to choose a specific date and time from the pop-up.