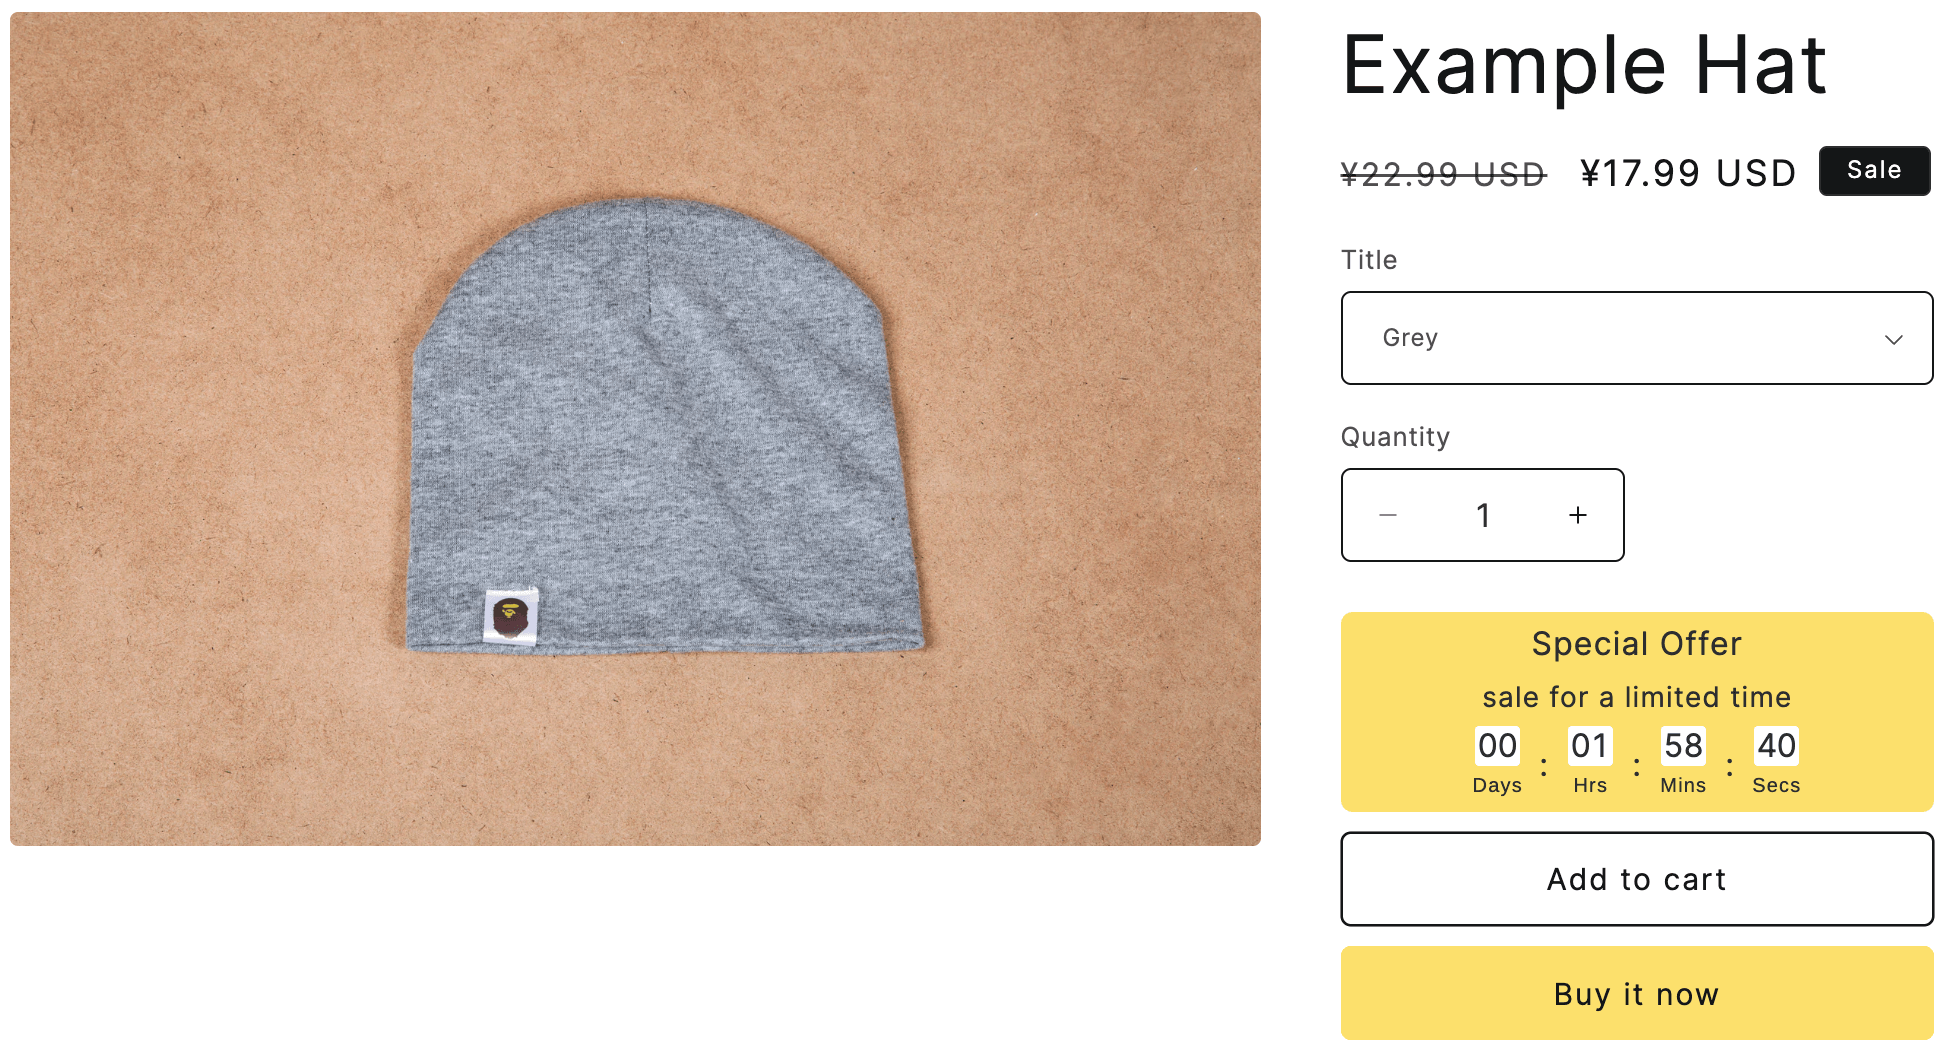
The product page is the most common place to add a timer bar because it plays a central role in the sales process. Merchants often place the Product Page Bar just above or below the add-to-cart button to highlight limited-time offers. This creates a sense of urgency and encourages customers to make quicker decisions—often resulting in higher conversions.
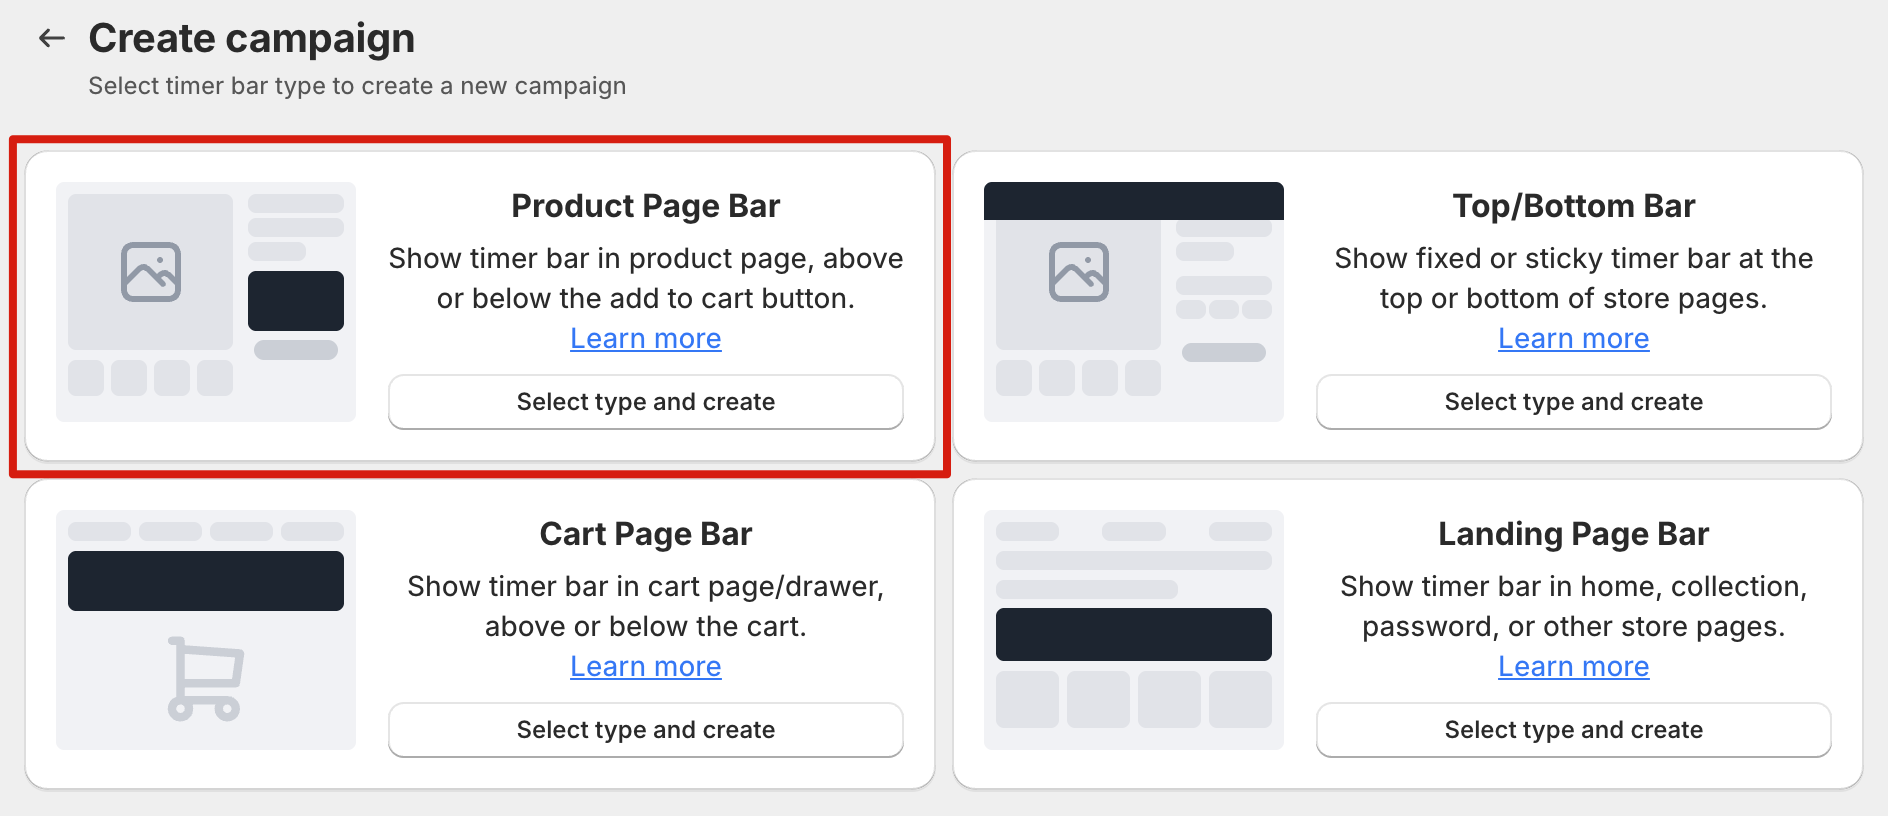
Create Product Page Bar
PageUni Countdown Timer offers a feature-rich and highly customizable Product Page Bar, you can select and create it when starting a new campaign.
Schedule Types
PageUni Countdown Timer offers a variety of schedule types to fit different campaign needs:
-
Specified time – Great for longer campaigns, such as a product promotion week/month.
-
Fixed duration – Perfect for creating urgency and prompting quicker buying decisions.
-
Interval – Useful for recurring flash deals, like offering a 10-minute discount every 60 minutes.
-
Recurring daily – Ideal for daily promotions, such as next-day shipping for orders placed before a cutoff time.
-
Recurring weekly – Suitable for weekly campaigns, like weekend sales.
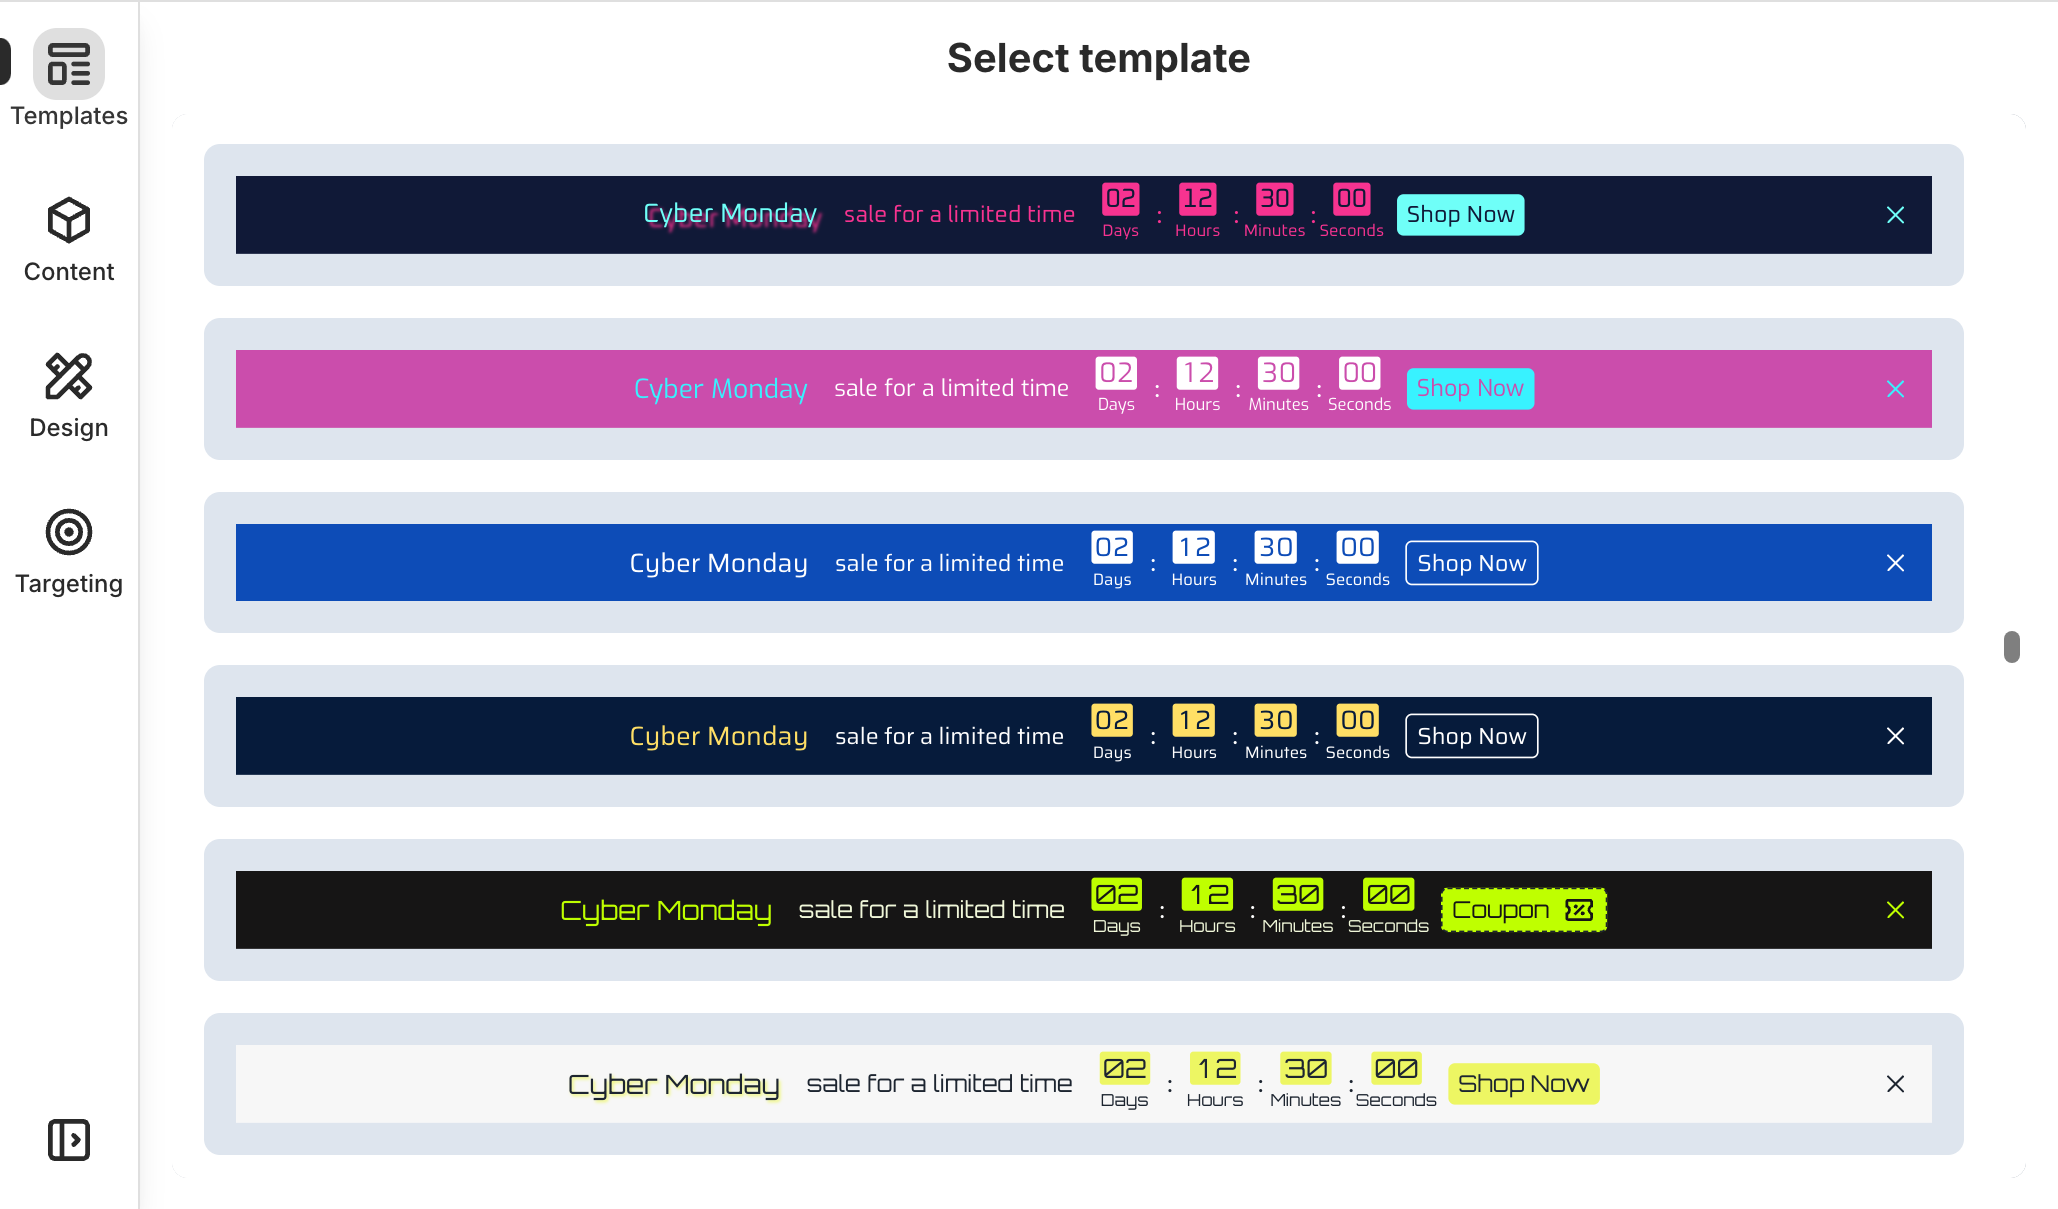
Fully Customizable with 200+ Templates
In different scenarios, you might want Product Page Bars with styles that better match your product pages—helping you support marketing campaigns and boost sales.
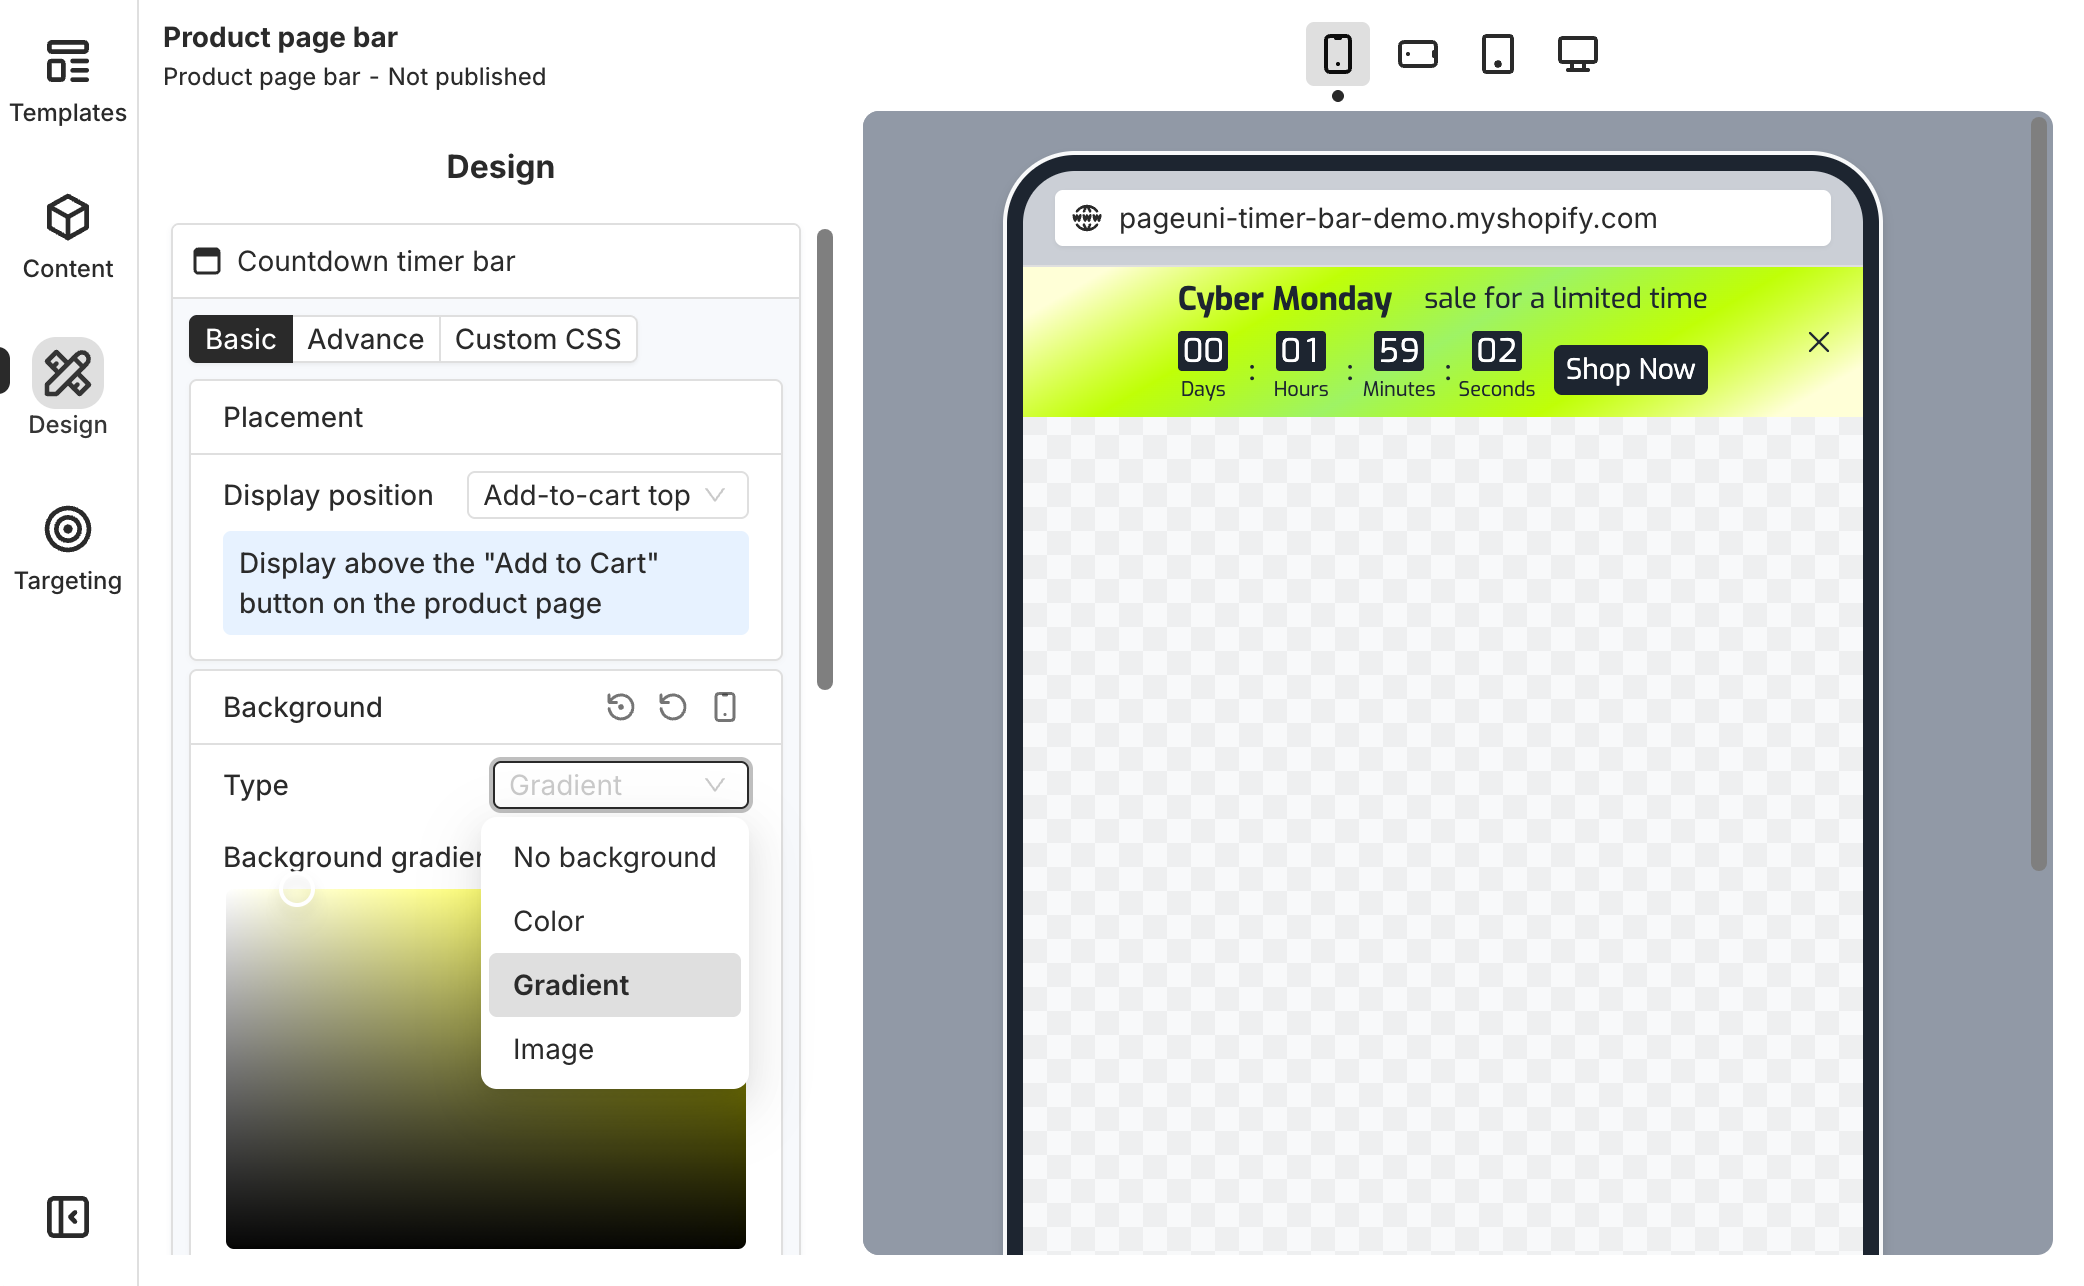
For example, if you’ve prepared a Cyber Monday promotion and styled your product page as a themed landing page, you’ll likely want the Product Page Bar to match the same look and feel.
PageUni Countdown Timer makes this easy by offering ready-made templates specifically designed for Cyber Monday. And thanks to our highly customizable timer bar builder, you have full control to tweak the bar’s appearance to perfectly match your vision.
You can customize your Product Page Bar’s background (image, color, or gradient), fonts, timer style (e.g., flip-clock style), spacing, border and more to align with your store’s design—you can even add animated backgrounds using Lottie animations for a more dynamic, eye-catching look.
Not just for Cyber Monday, we offer a variety of seasonal templates for events such as Black Friday, Christmas, Halloween, and more. In fact, we offer over 200 templates to choose from, designed to meet a wide range of needs.
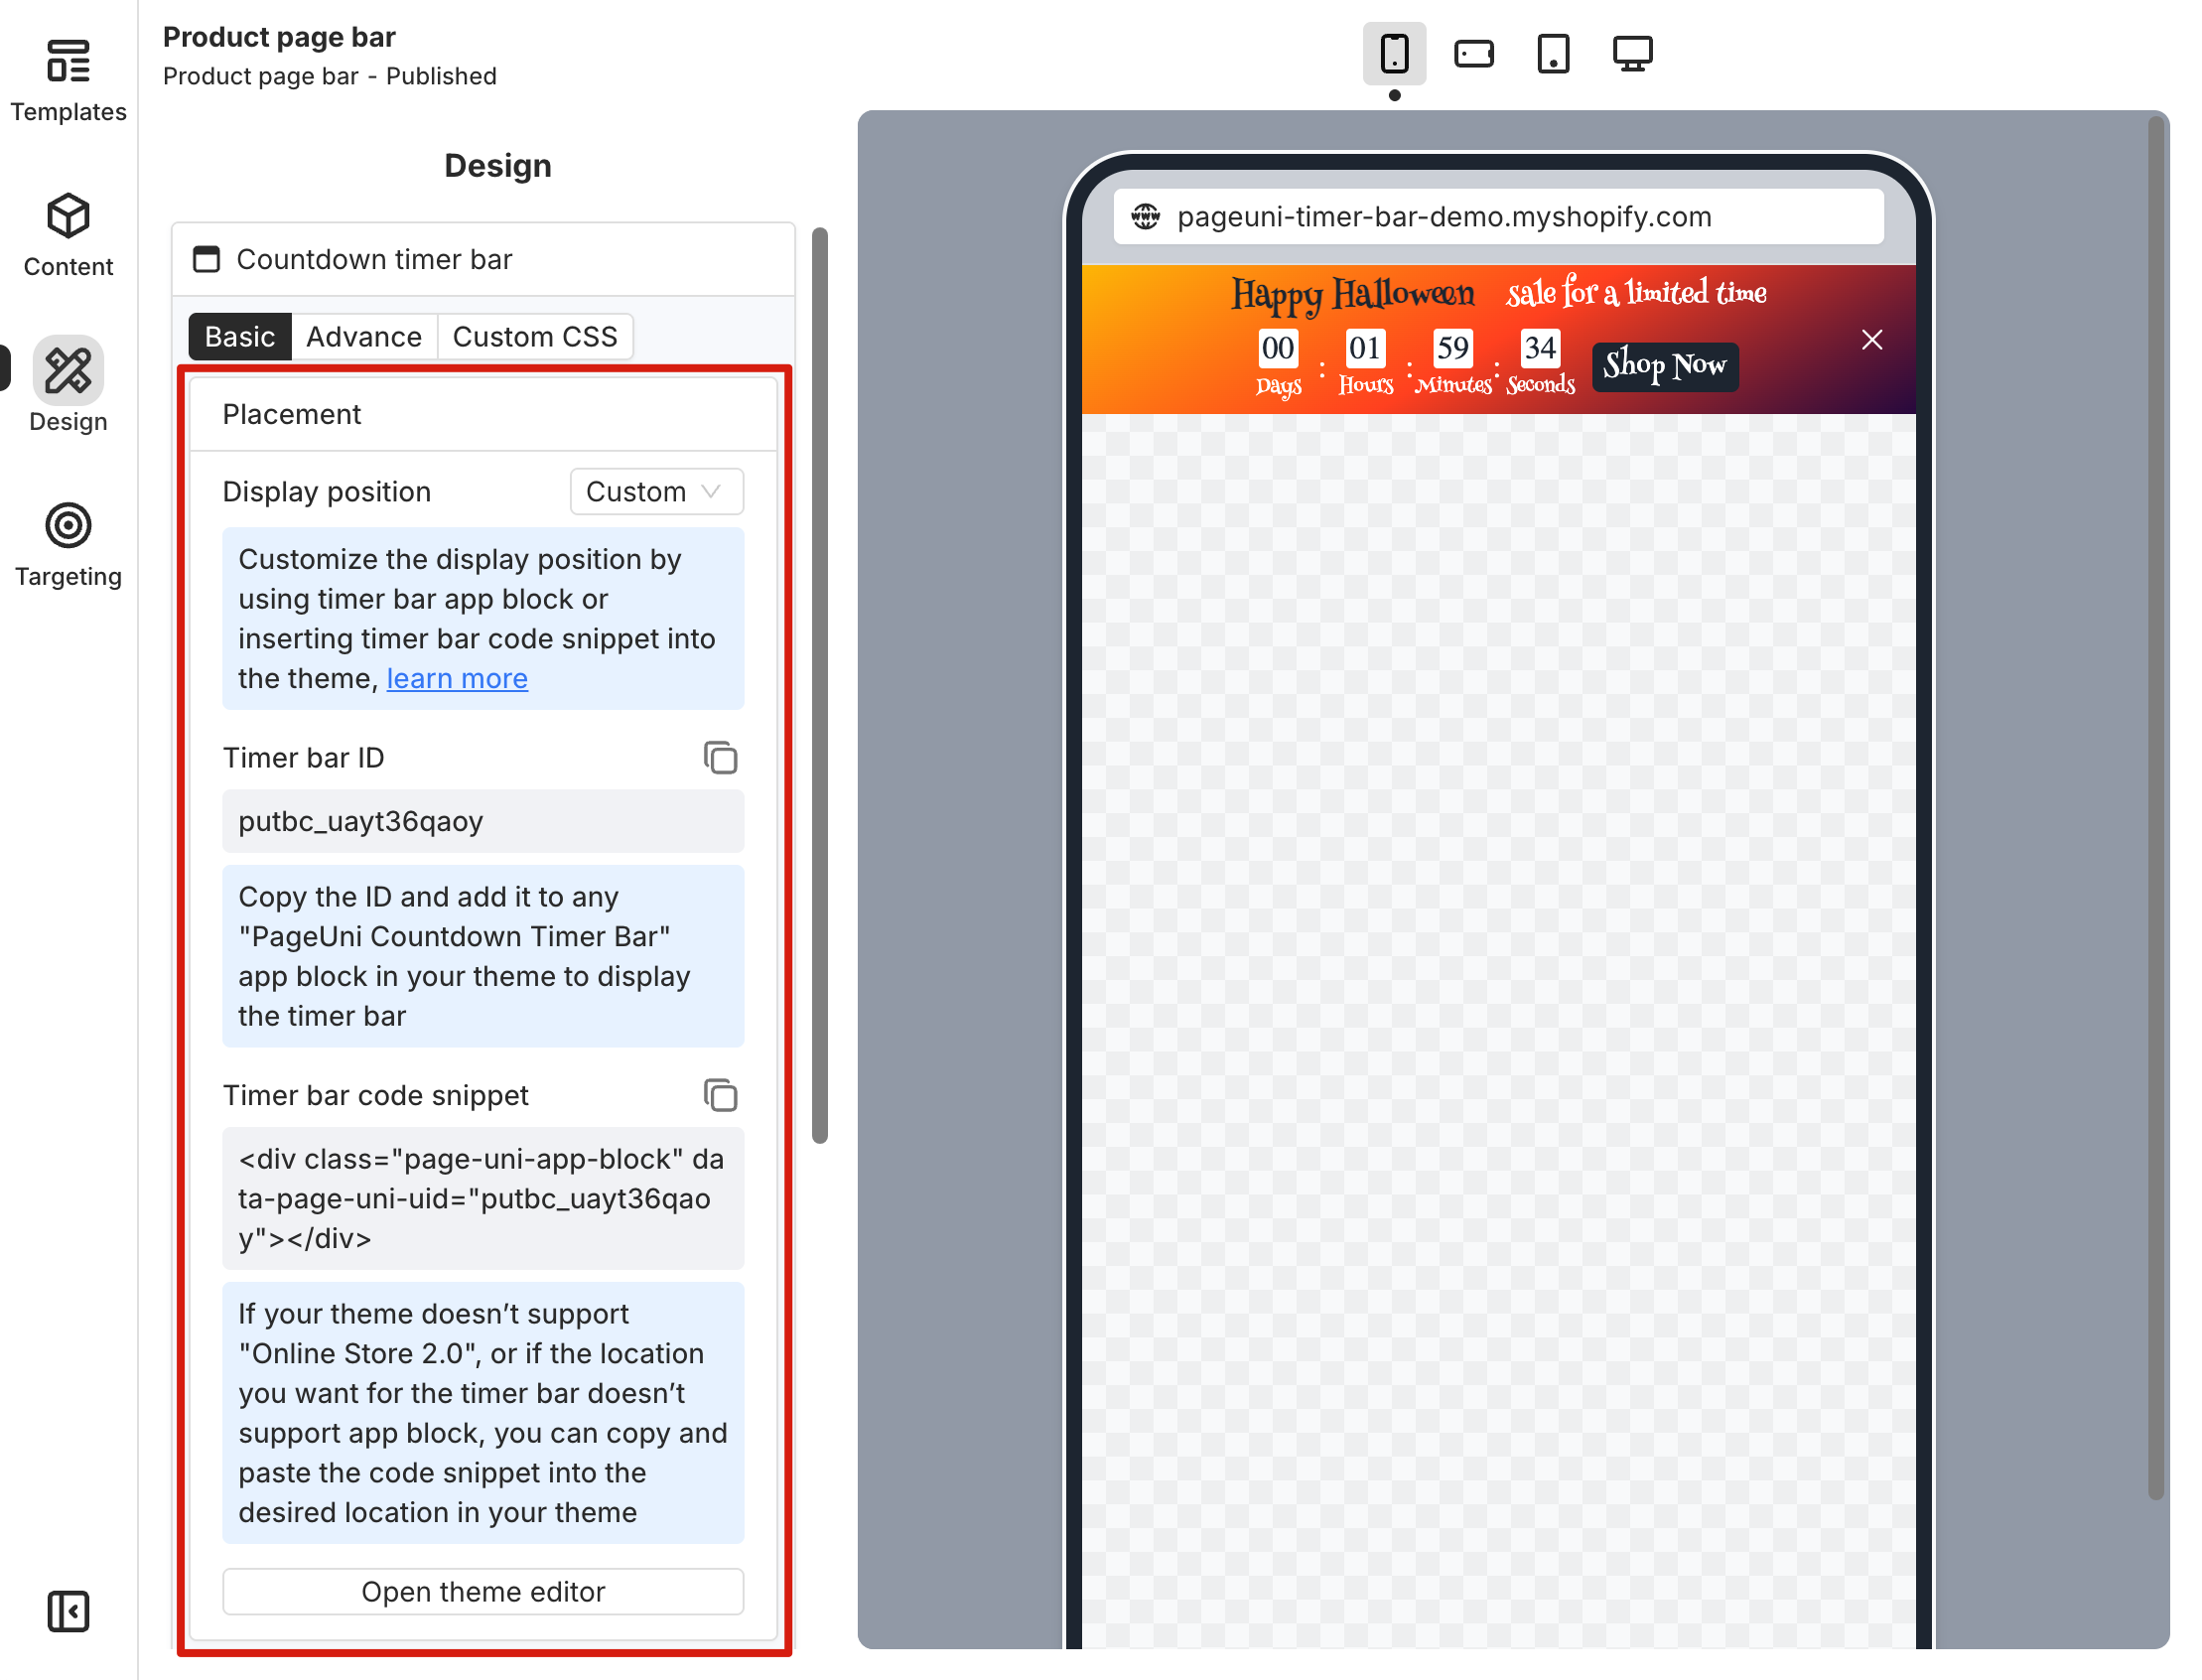
Flexible placement
On the Design page, in the Countdown timer bar card’s Placement sub-card, you can customize the placement of Product Page Bar.
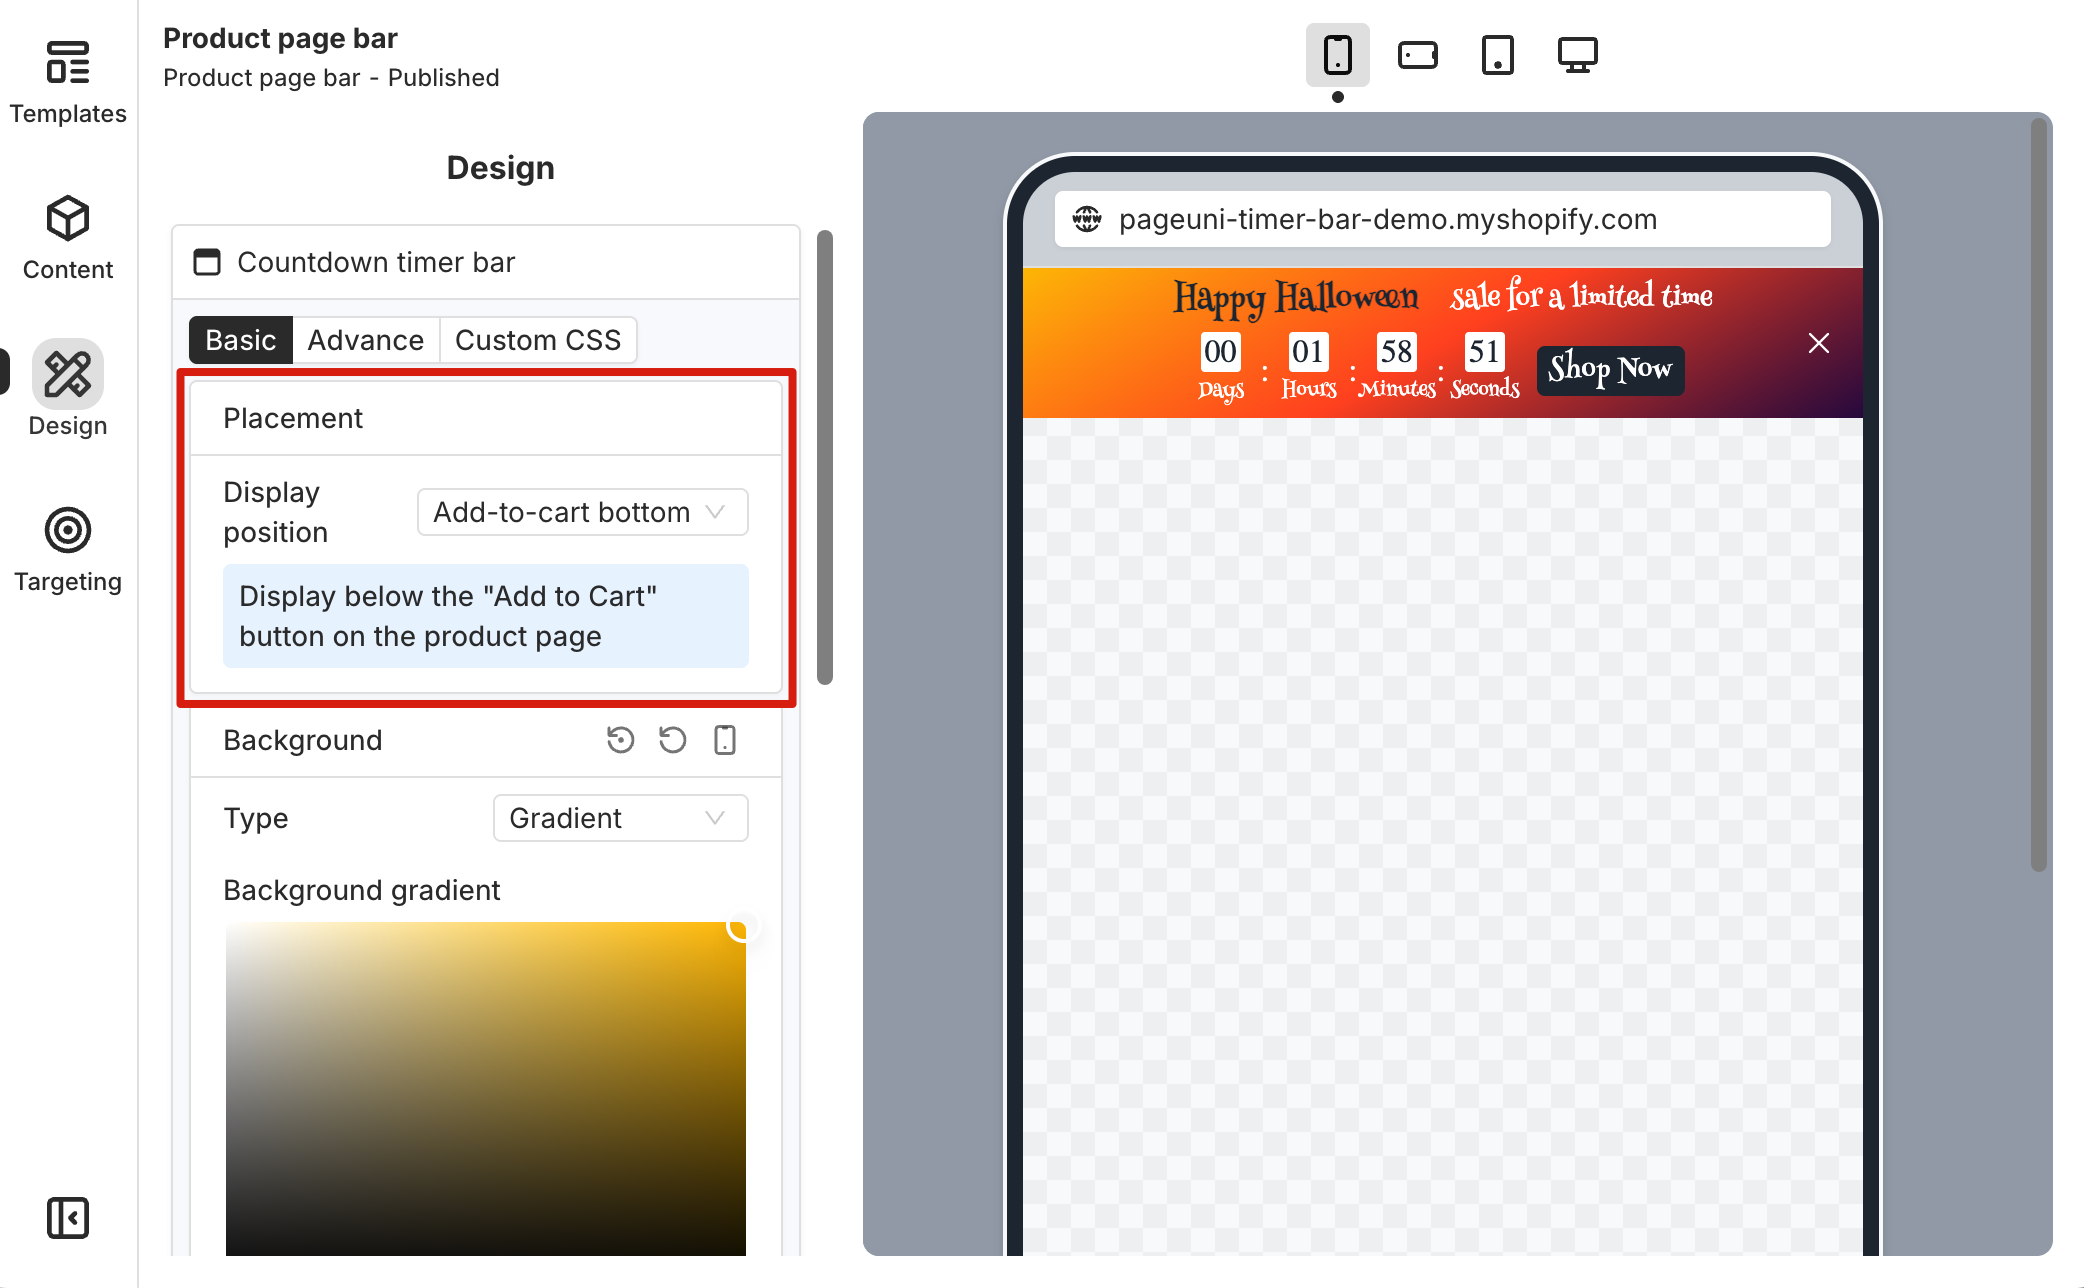
At the most basic level, you can choose to place the Product Page Bar above or below the add-to-cart button. You can also use the Custom display option to display the timer bar exactly where you want it on the store page.
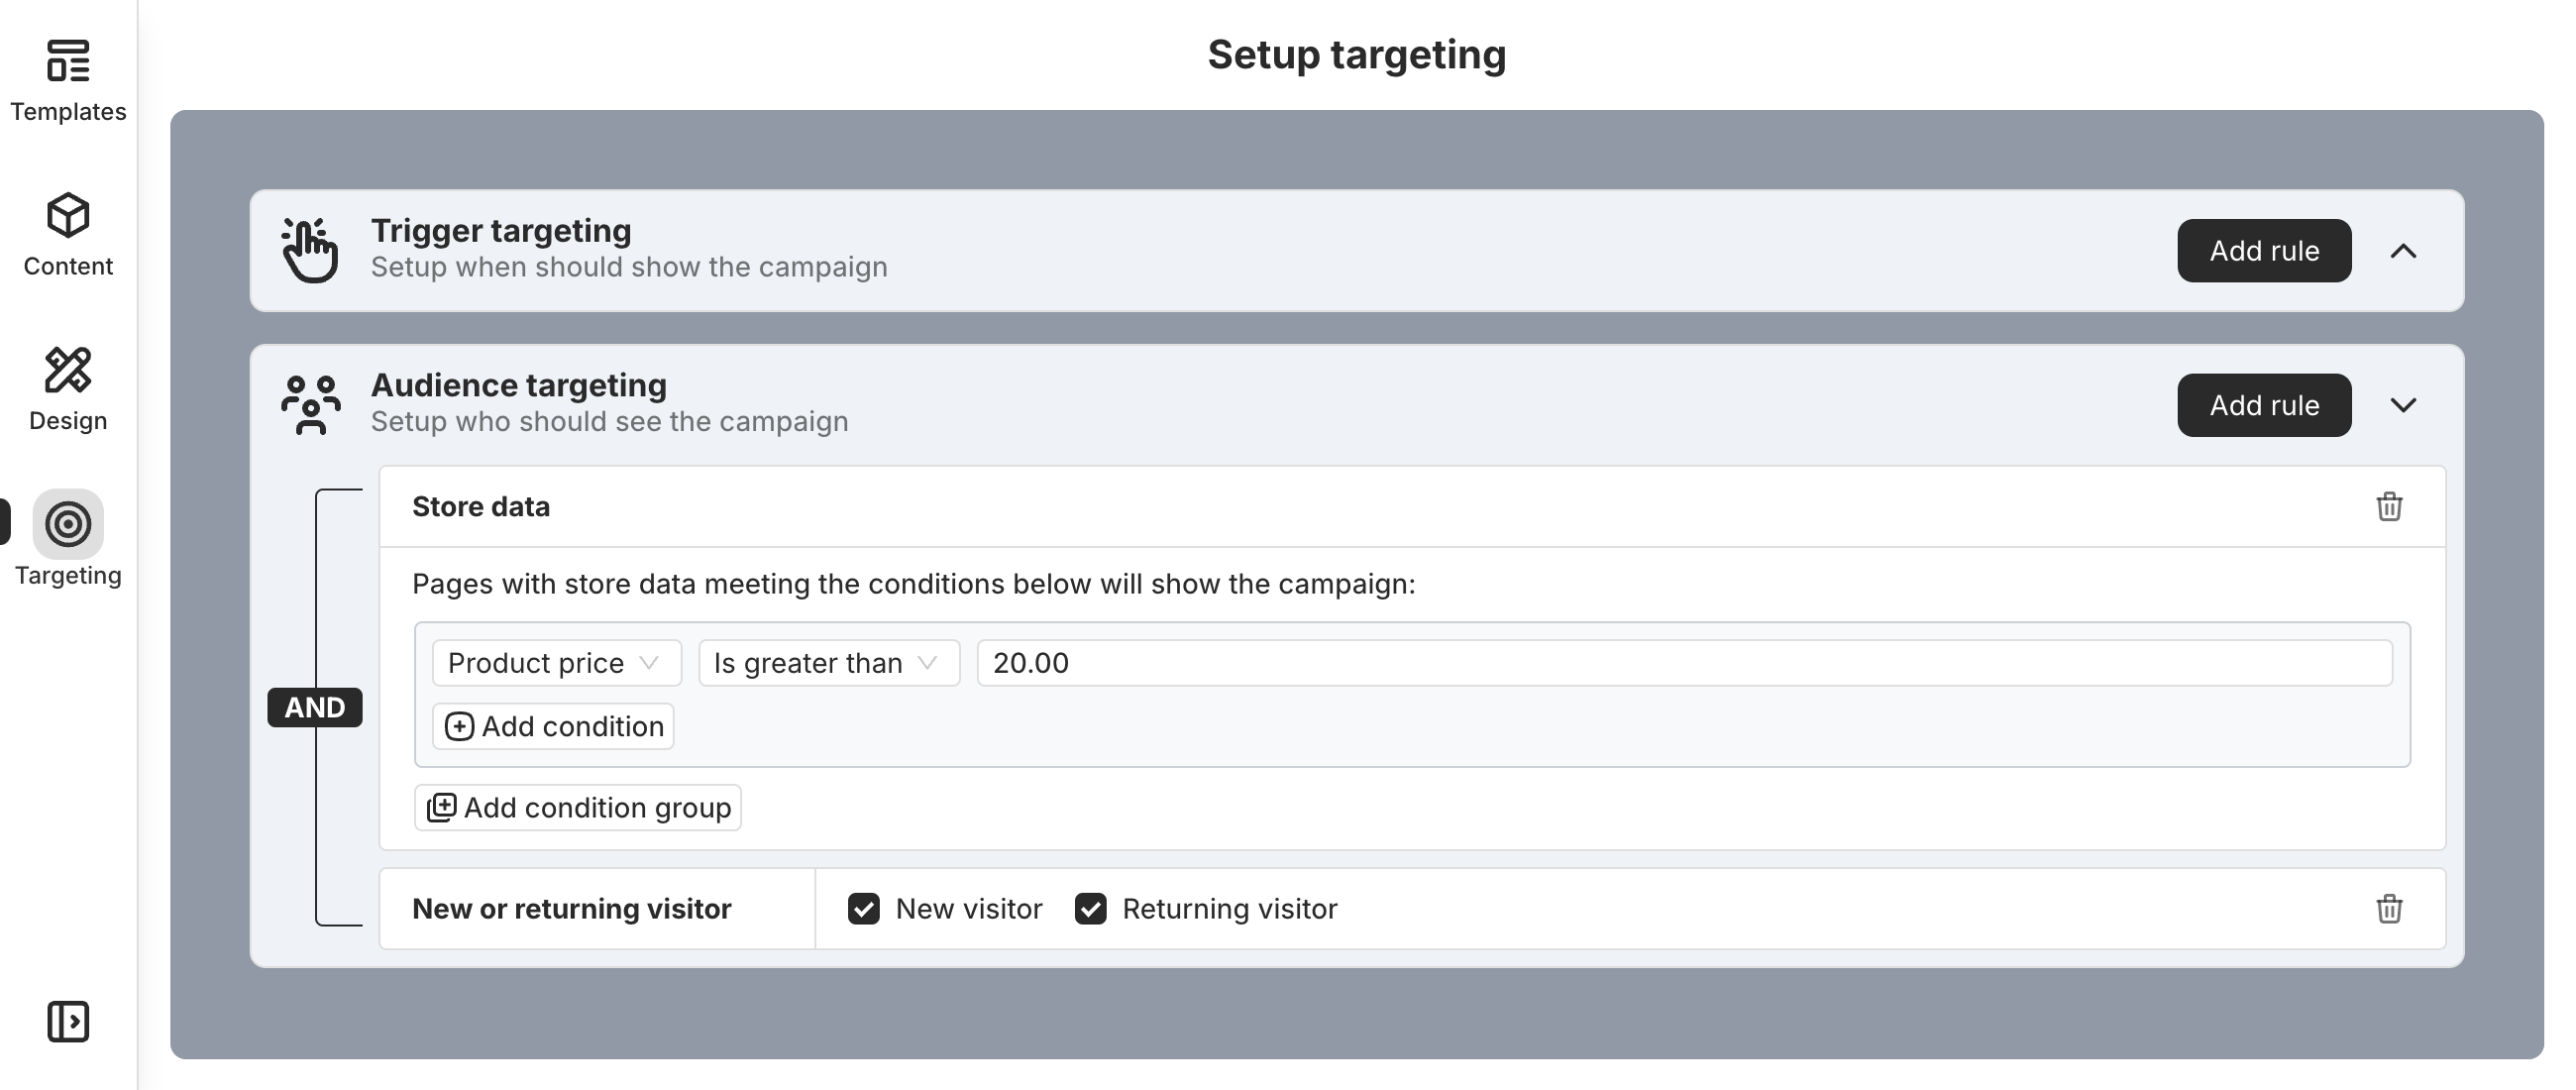
Beyond the basic setup, you can also use targeting rules to control which pages the timer bar shows on. Here are a few examples:
-
Use the traffic source rule to show the bar only to users coming from Google Ads.
-
Use the current page URL rule to show the timer bar only when the URL contains a specific utm_source, utm_medium, or other tracking parameters.
-
Use the visitor device rule to show the bar only to users on mobile devices.
-
Use the new or returning visitor rule to show the bar only to new visitors.
-
Use the product tags rule under store data to show the bar only on product pages with the "on-sale" tag.
-
Use the product price rule under store data to show the bar only on product pages where the price is above a certain amount.