A countdown timer bar is a powerful way to motivate customers. By creating urgency, scarcity, and FOMO (fear of missing out), it encourages faster decisions and can help boost conversions.
PageUni Countdown Timer is a simple yet professional app that lets you add countdown timers to your store. With its easy-to-use interface, you can get everything set up in just a few clicks—no coding needed.
You’ll also get access to 200+ professionally designed templates, a fully customizable builder, smart targeting options, and more—all to help you create the perfect timer bar for your needs.
How to Install
If you’ve already installed the app, you can skip this step and move on.
If not, head over to the PageUni Countdown Timer page on the Shopify App Store and click Install to add it to your store.
How to Access
Once the app is installed, you’ll be taken to the PageUni Countdown Timer Dashboard.
Note: After installing the app, make sure to activate PageUni Countdown Timer in your store theme. Otherwise, the timer bar won’t appear on your store pages. Check this guide for detailed instructions.
You can also access it anytime from your Shopify admin. Just click Apps in the sidebar, then select PageUni Countdown Timer.

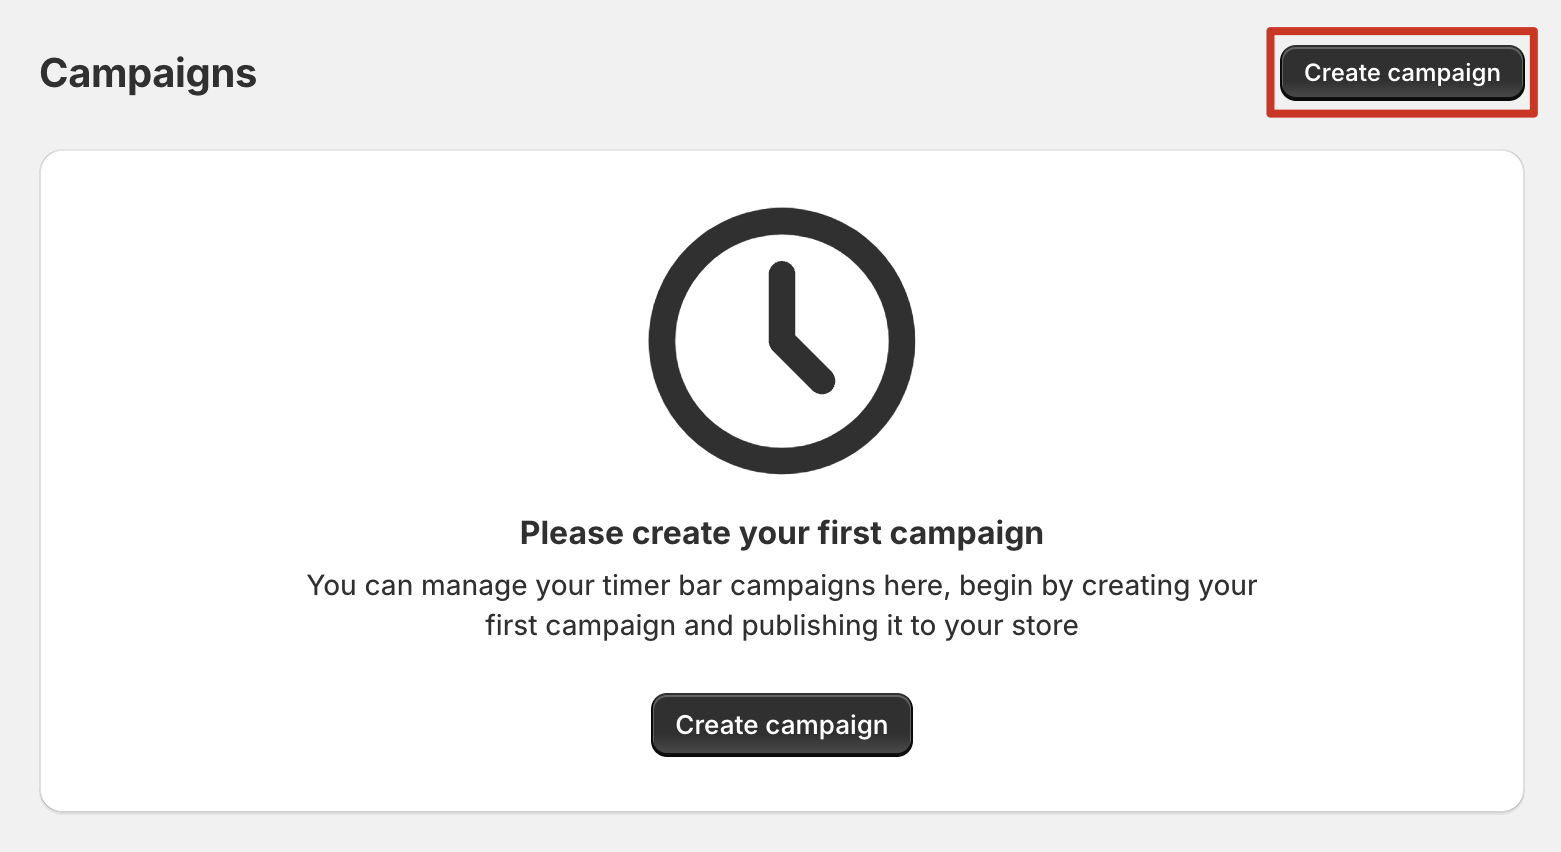
Create Your First Timer Bar Campaign
In the Dashboard, click the Create campaign button to open the timer bar campaign creation page.
Note: Learn more about how to manage campaigns here.
On the creation page, you’ll see different timer bar types: Product Page Bar, Top/Bottom Bar, Cart Page Bar, and Landing Page Bar. Select the one that best fits your needs to create your campaign.
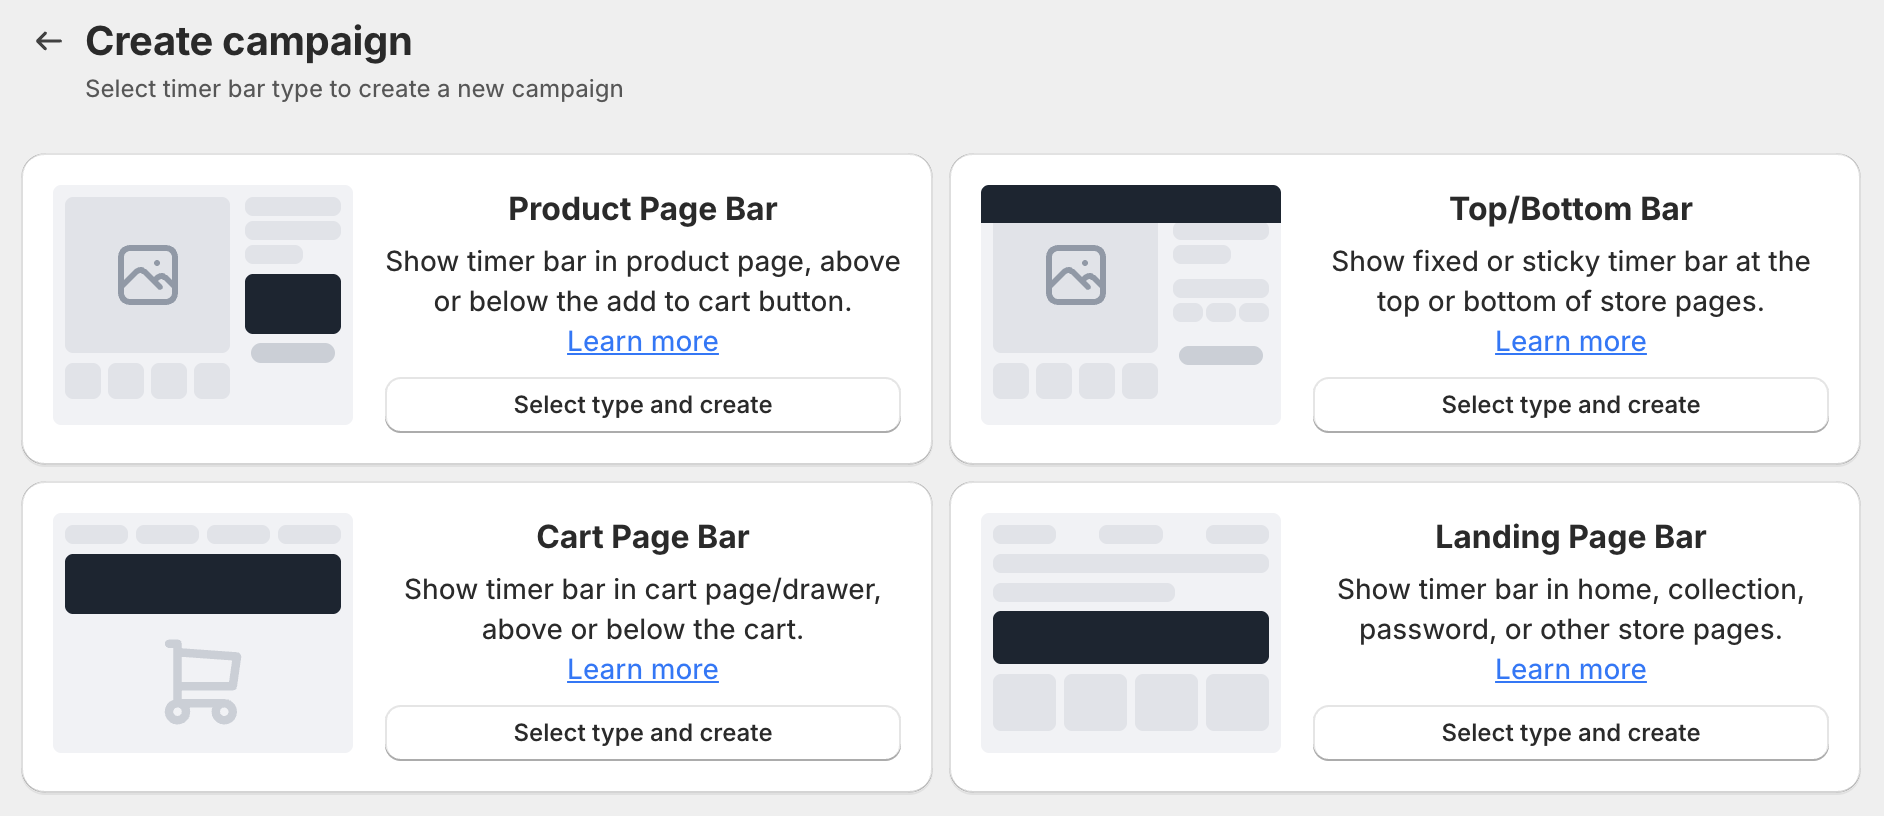
After that, you’ll enter the timer bar builder, where you can customize everything for your campaign.
Choose Your Template
For your newly created timer bar campaign, the next step is to choose a template.
PageUni Countdown Timer offers 200+ templates in various sizes, seasonal themes, design styles, and CTAs (call-to-actions). You can use the filters to quickly find the ones that best match your campaign goals.
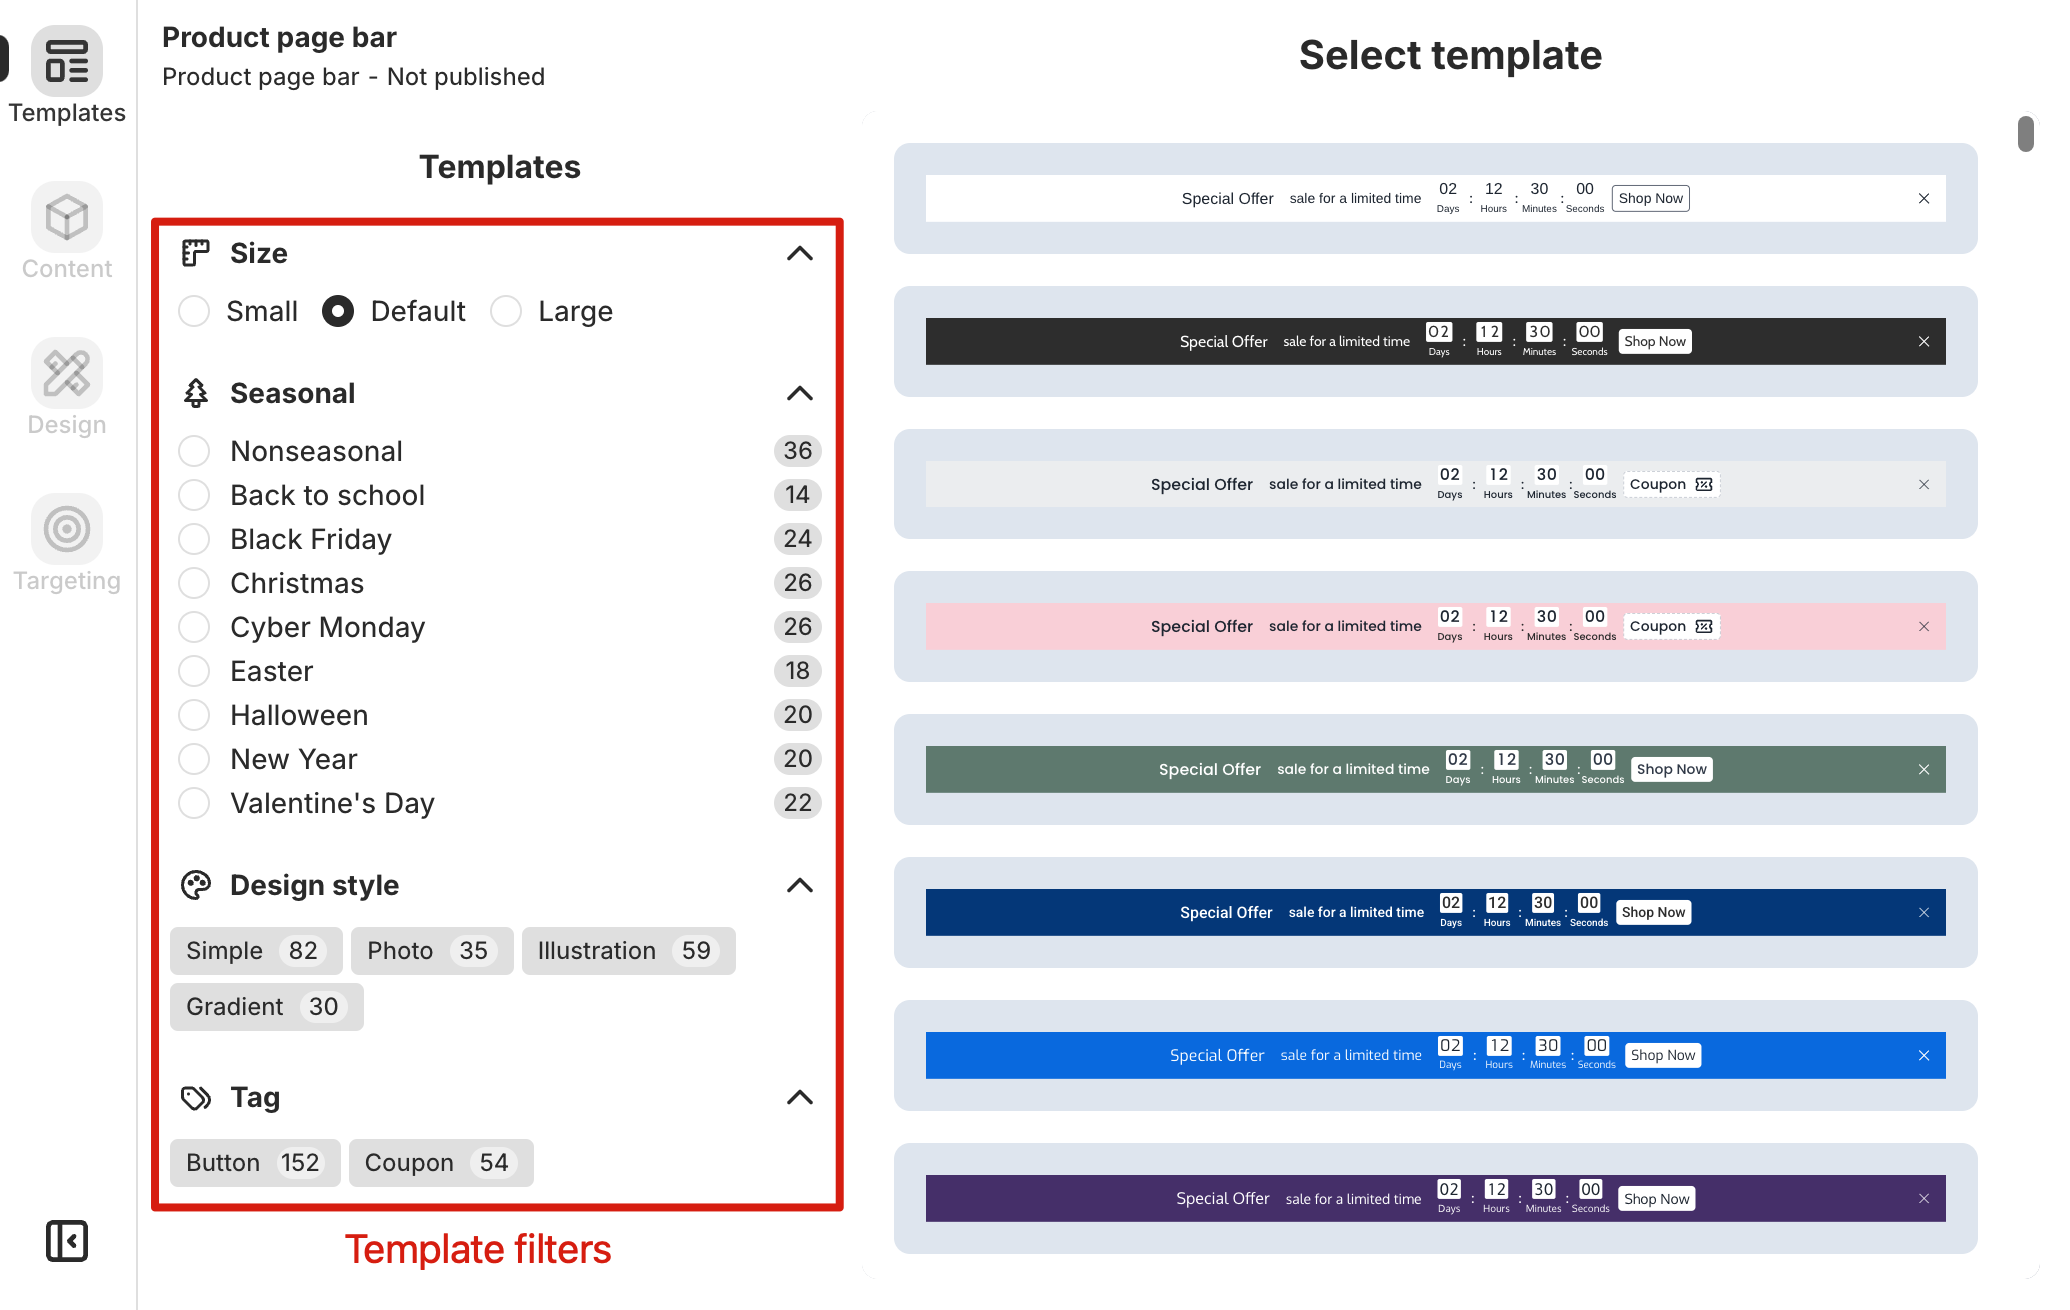
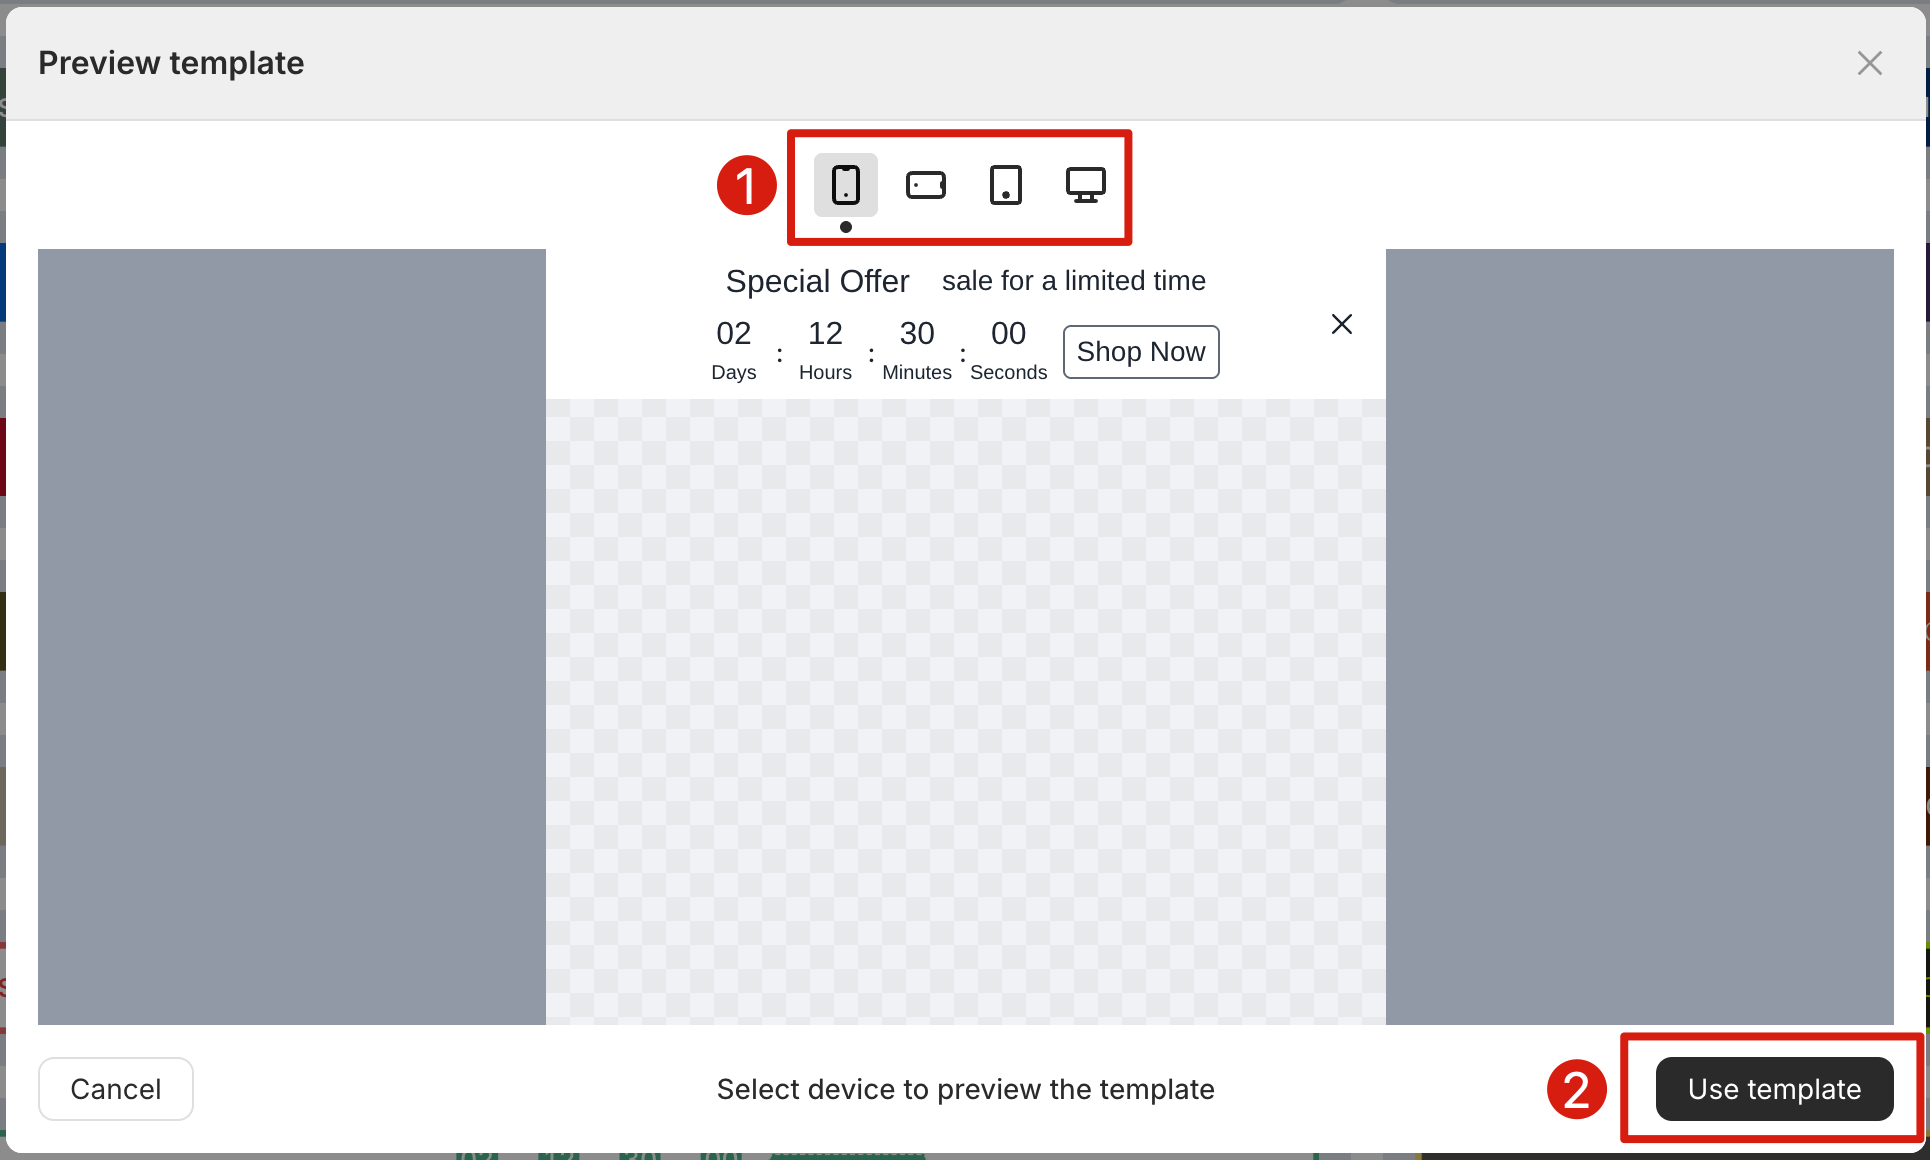
After you click on a template, a preview window will open. You can check the template details and see how it looks on different devices. Once you've confirmed your choice, click the Use template button to apply it to your timer bar campaign.
Customize Your Timer Bar
After selecting a template, you can further customize your timer bar. PageUni Countdown Timer offers flexible customization options—you can set the content, like schedule type, time units, and CTA, as well as the design, including background, fonts, and timer style.
Customize Content
Click the Content tab in the left sidebar to open the Content page, where you can customize the content of your timer bar.
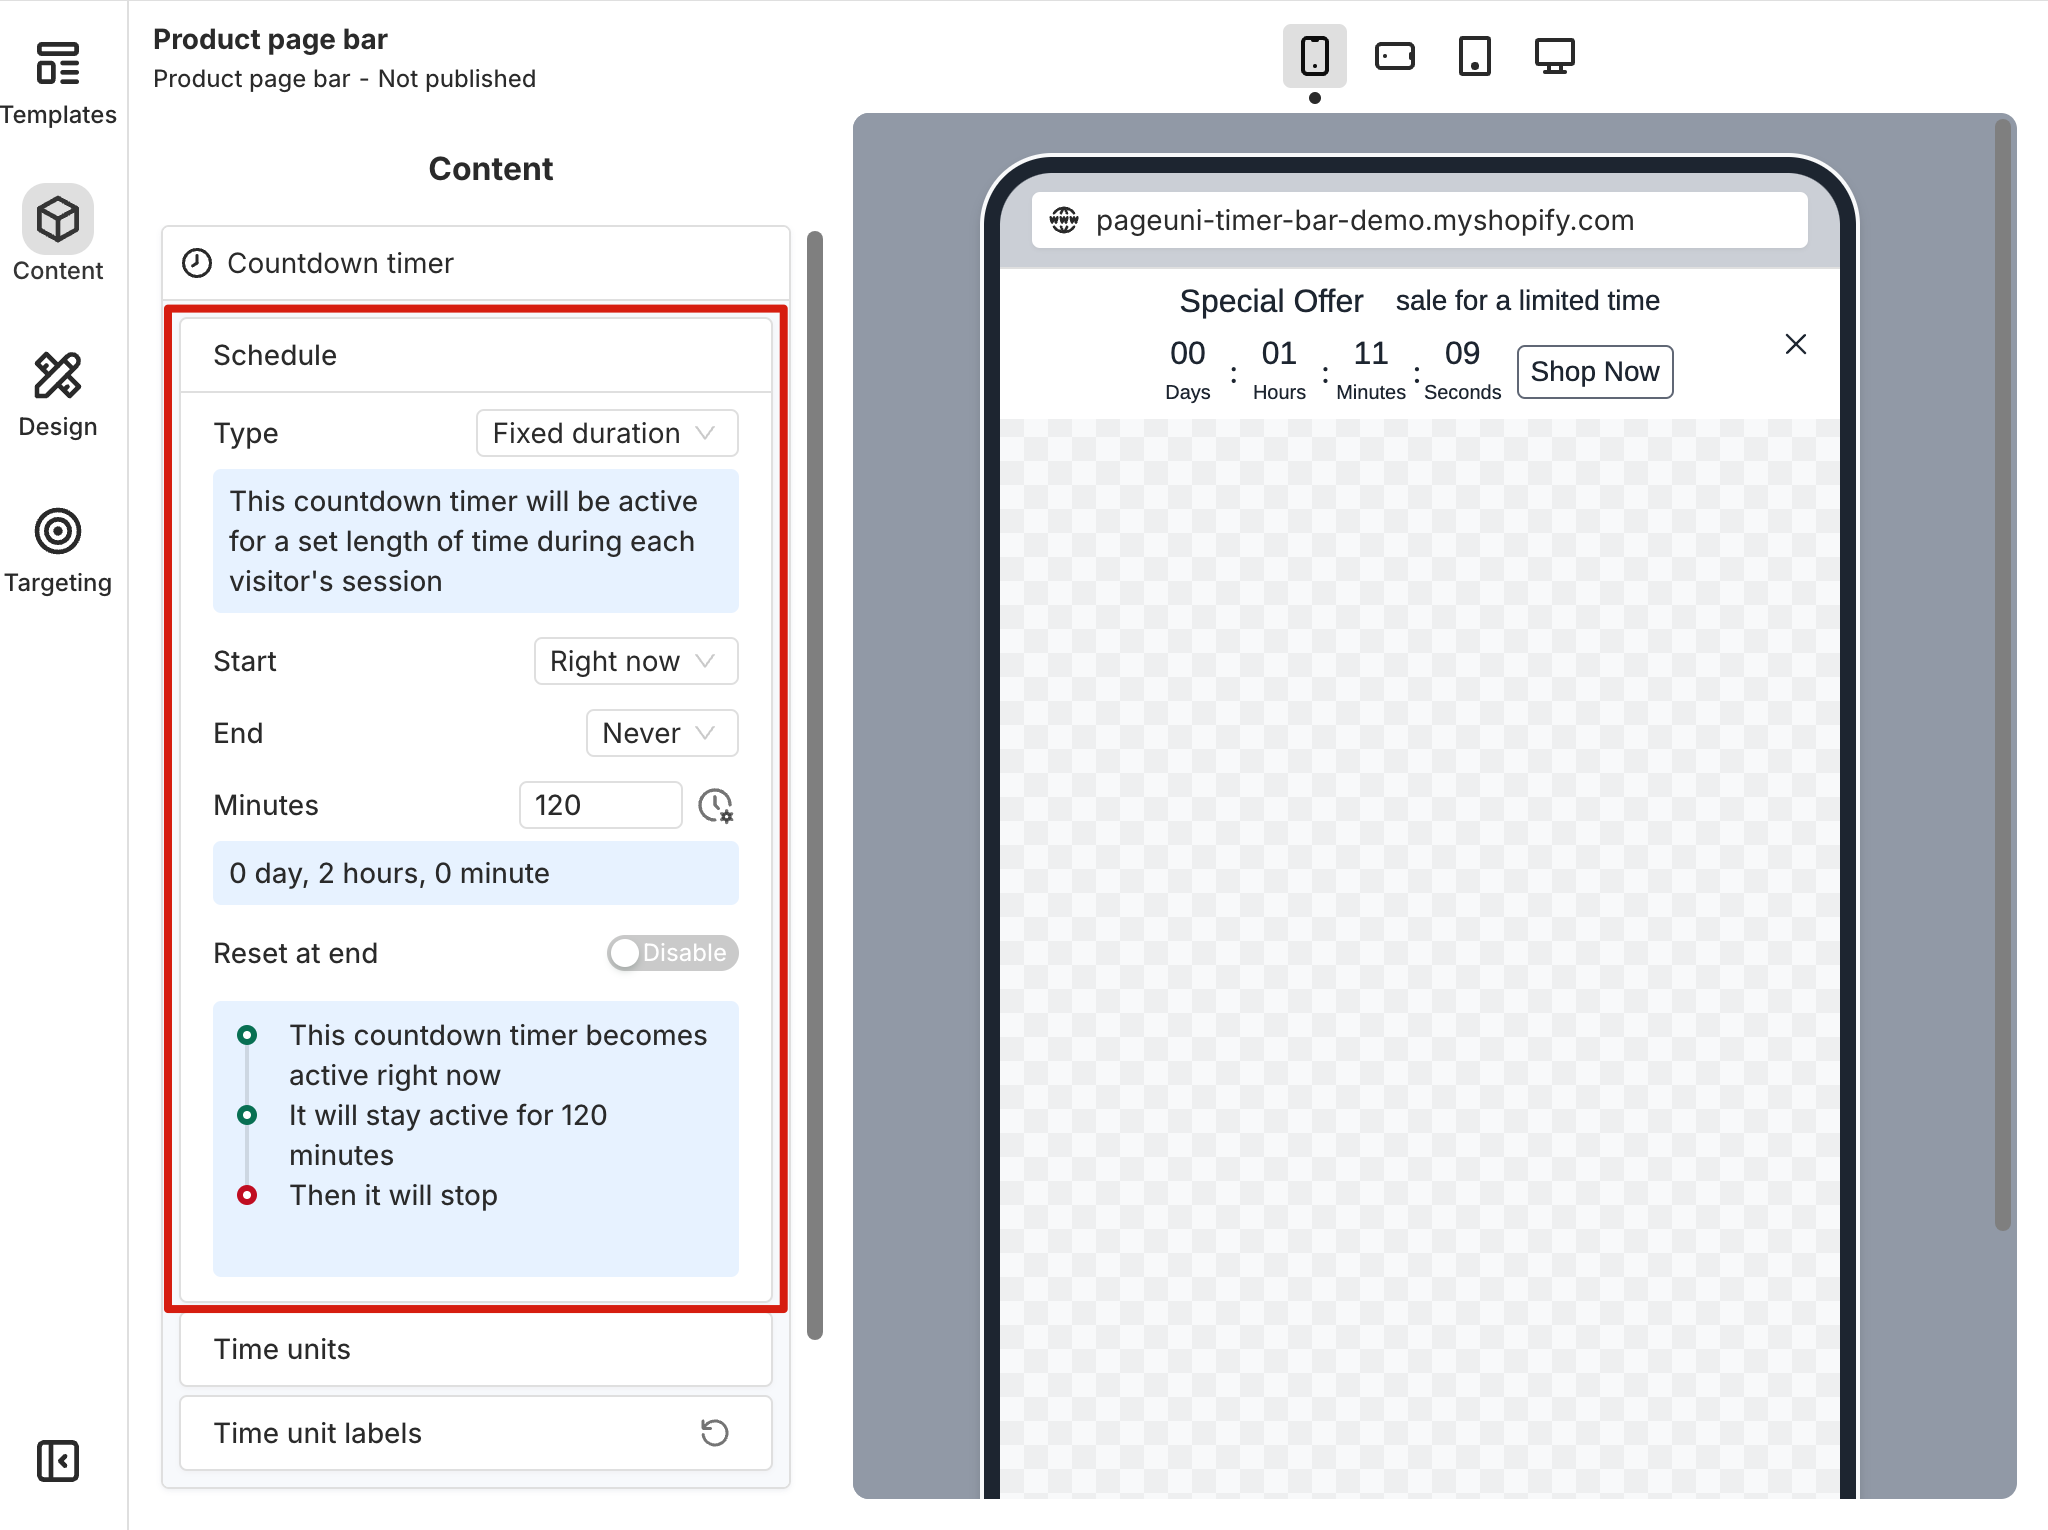
The schedule type controls when the timer is displayed and when it expires. PageUni Countdown Timer offers several schedule types to choose from: specified time, fixed duration, interval, recurring daily, and recurring weekly.
In the Schedule card, select the type you need and configure it based on the options that follow. The timeline in the card gives a brief overview of how the current schedule will be executed.
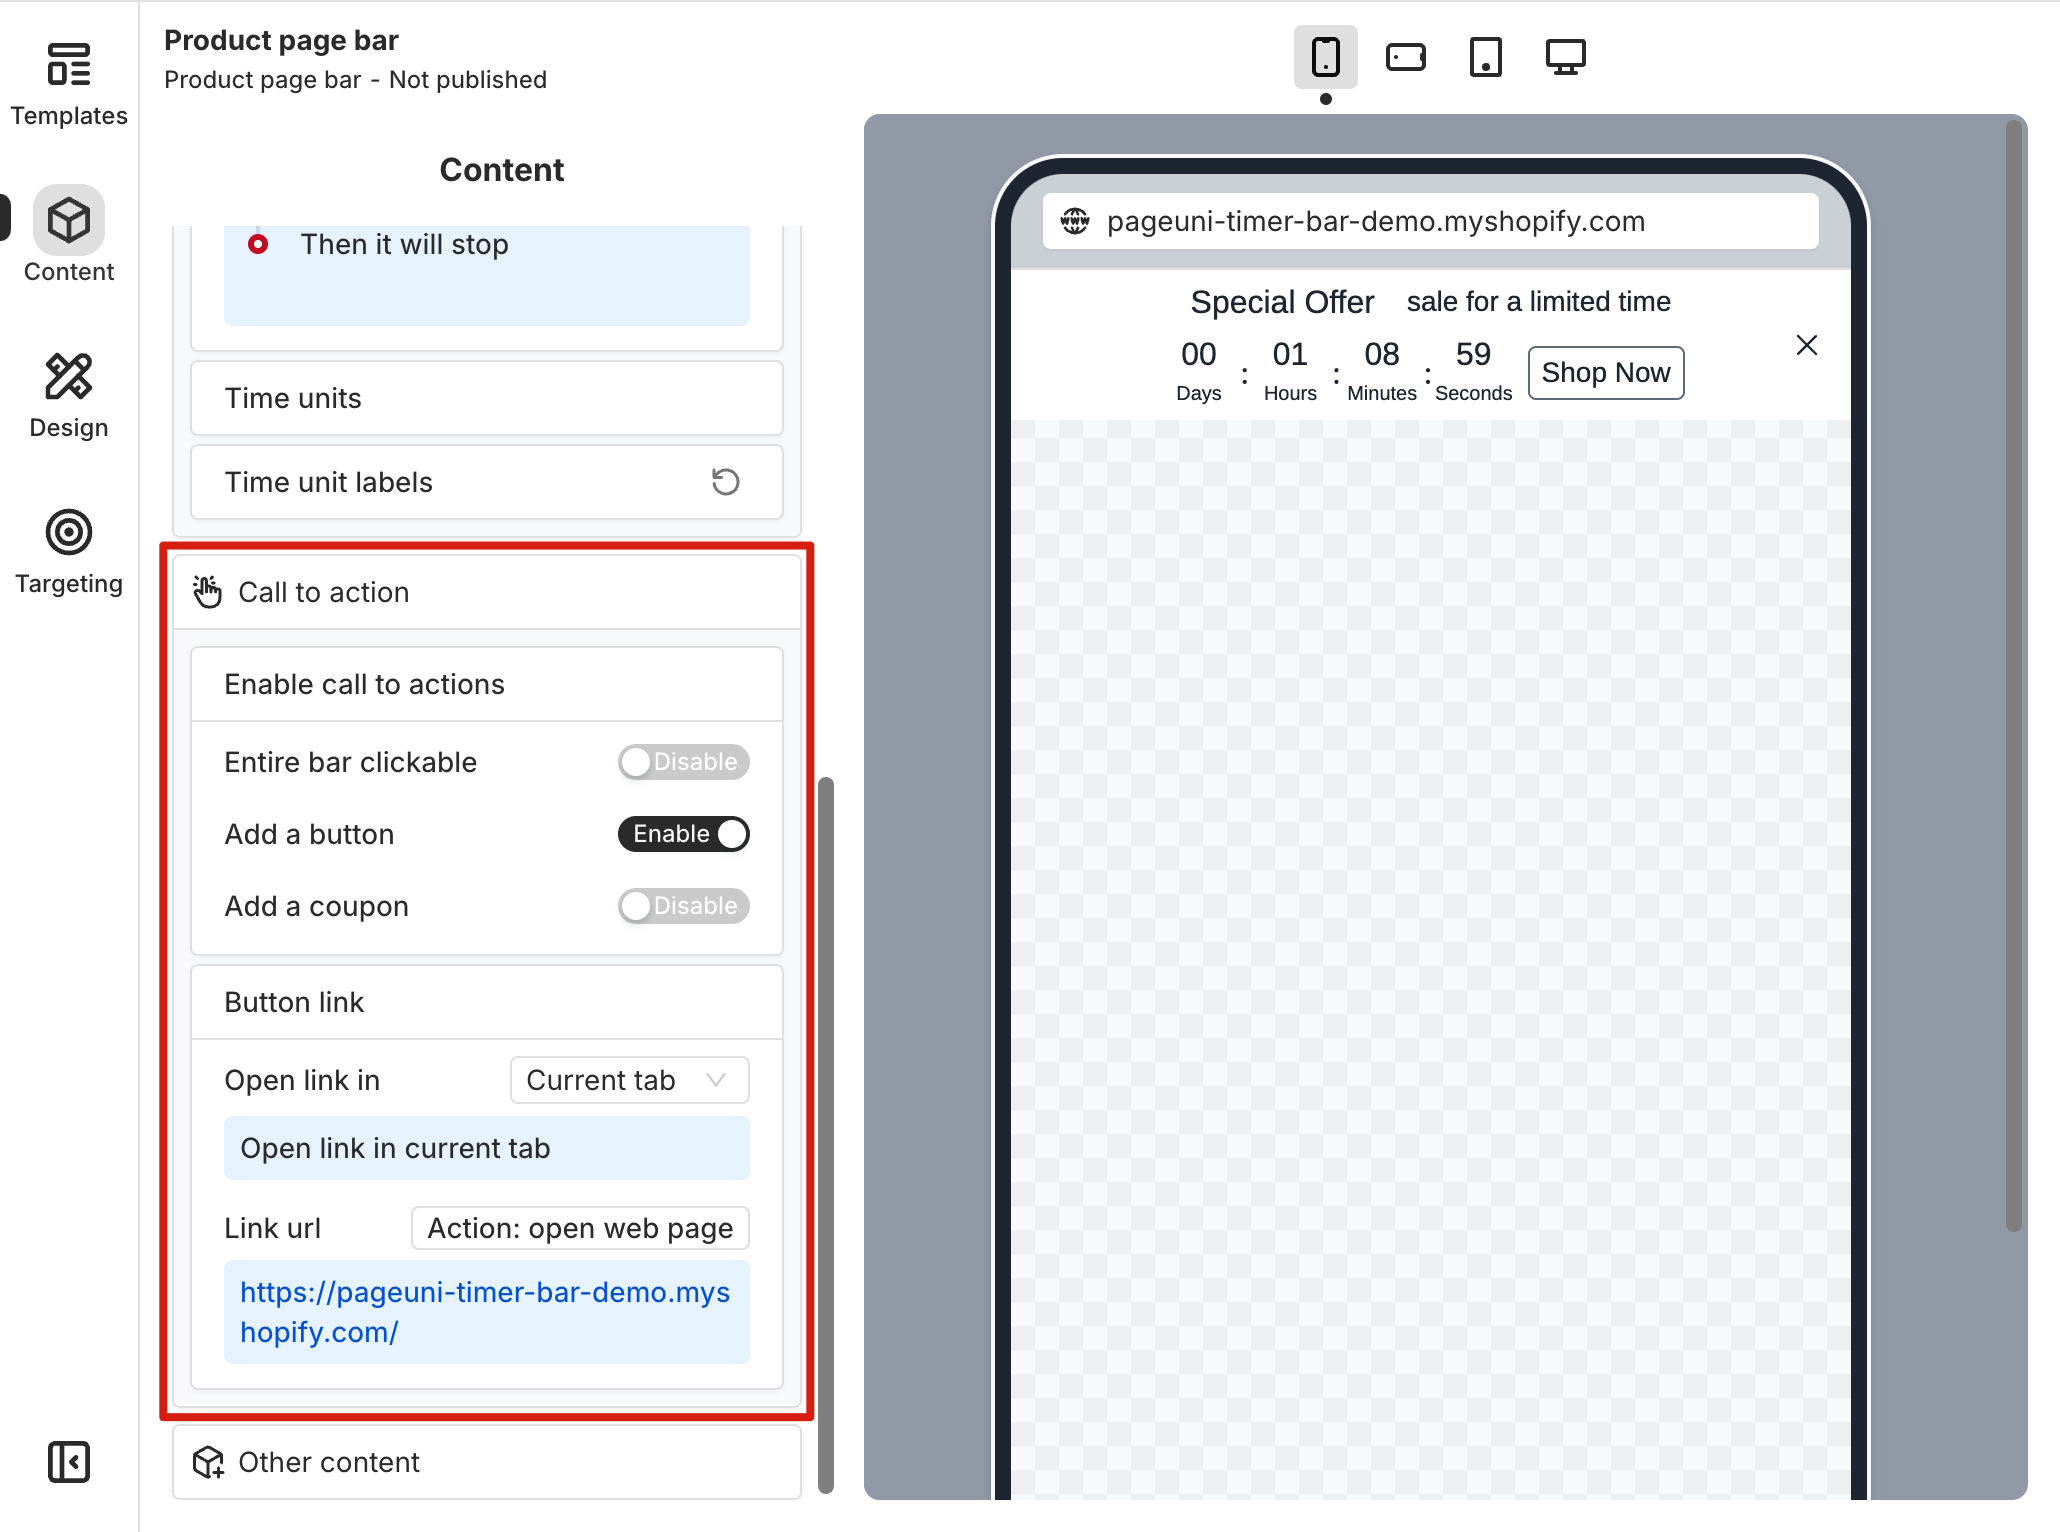
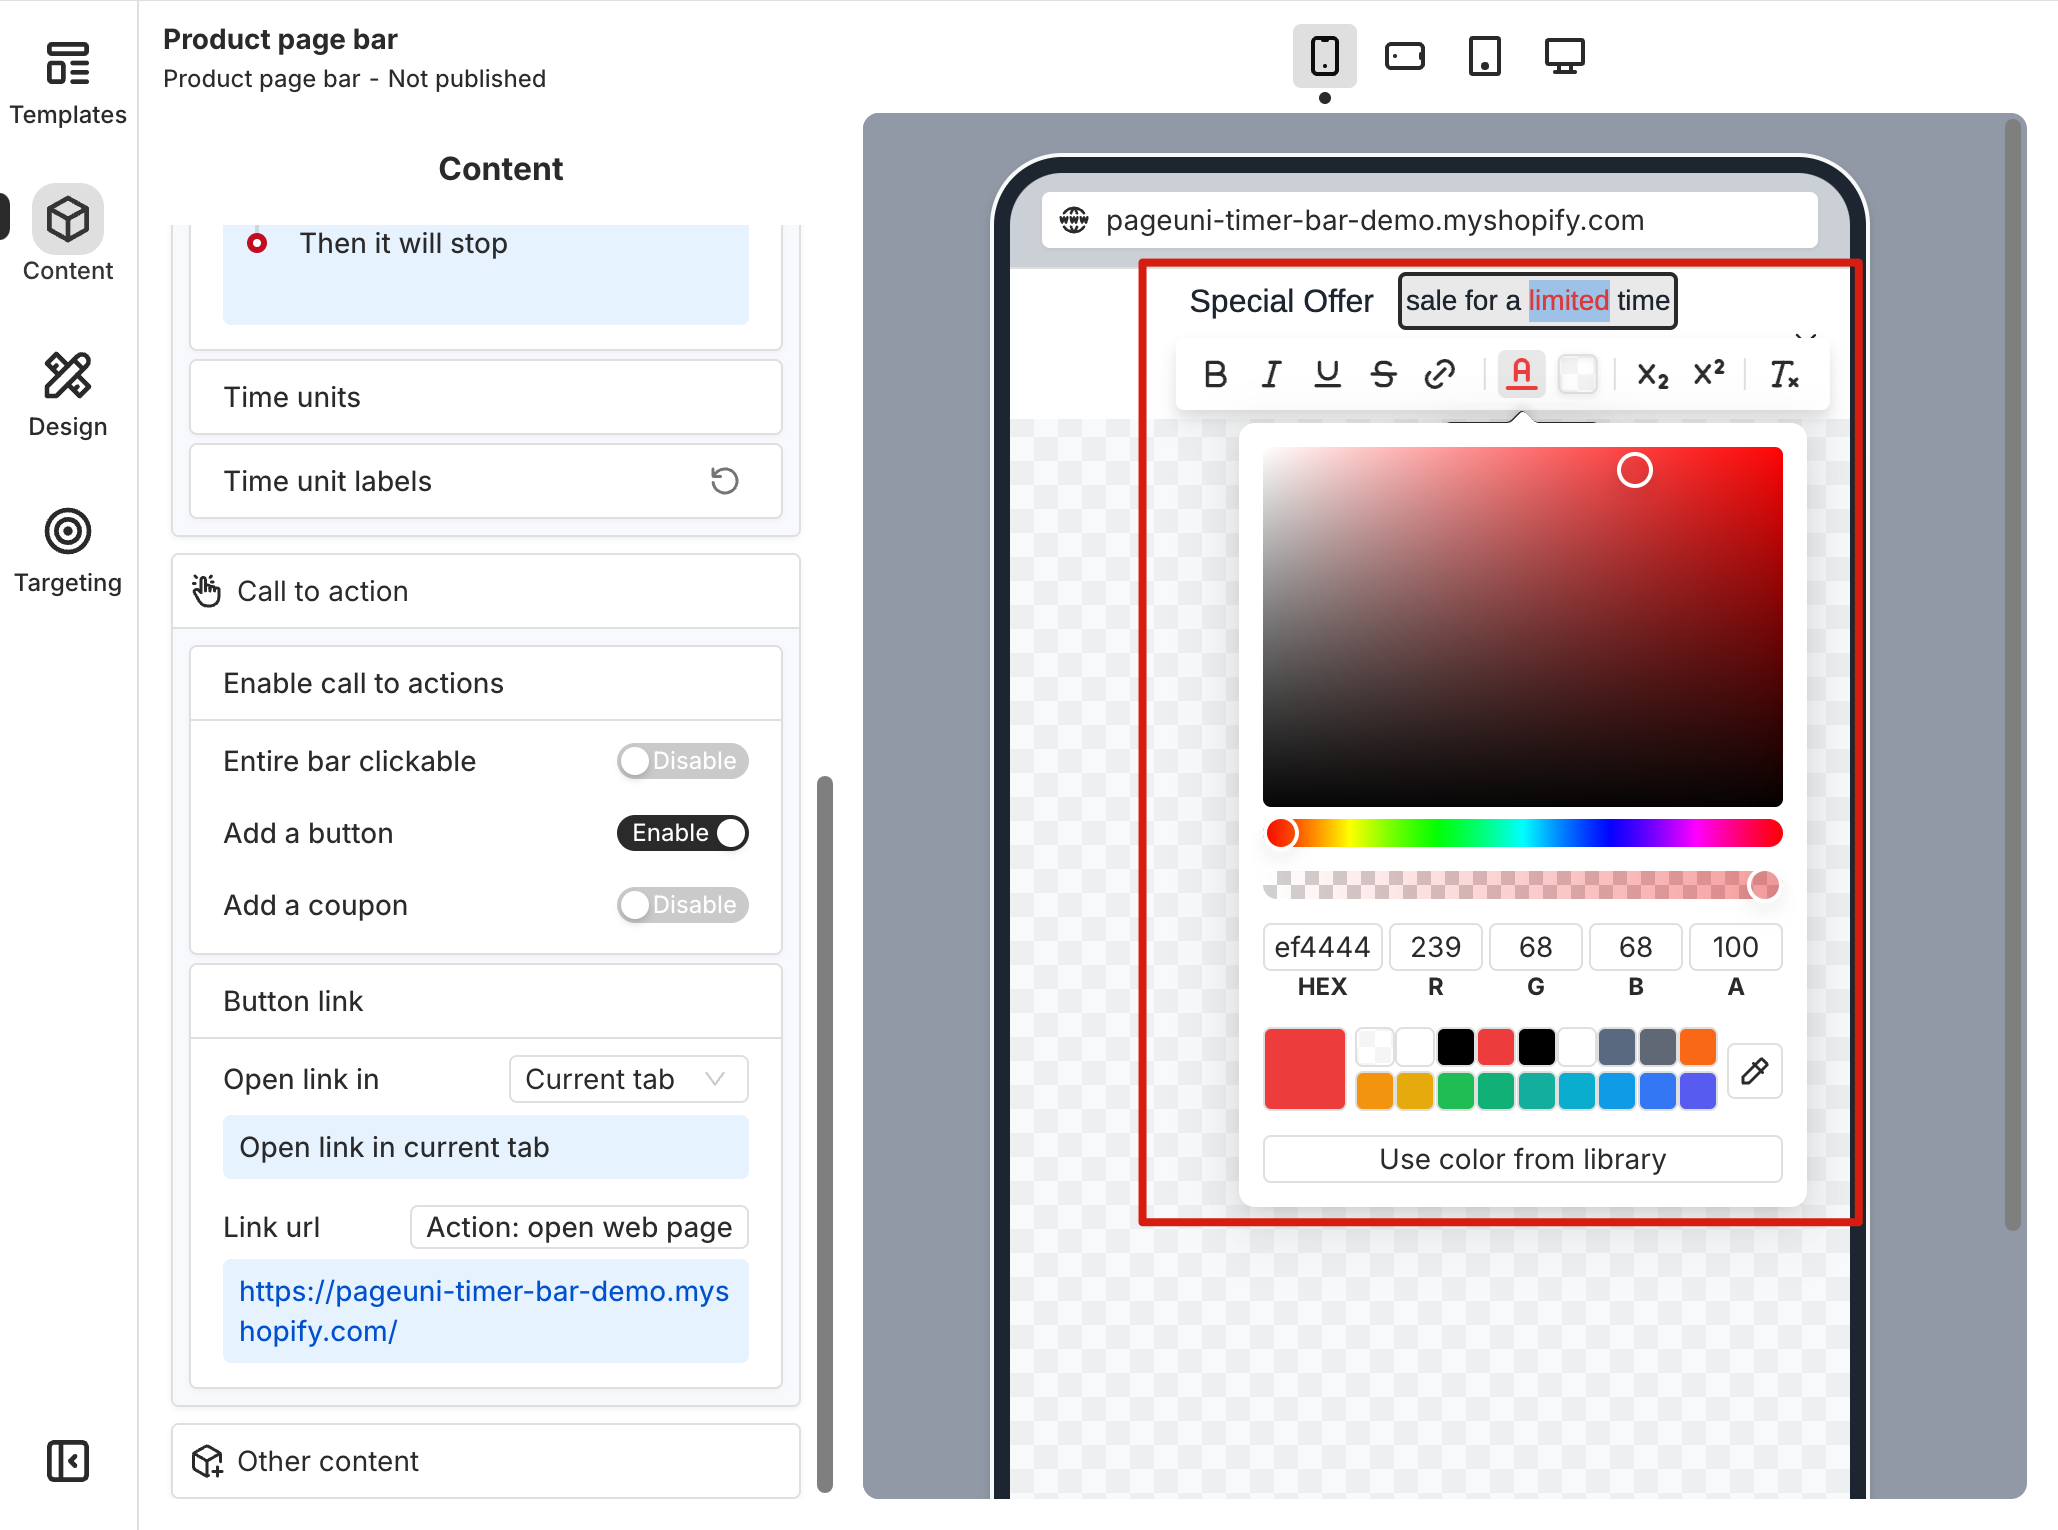
You can also customize the CTA (call-to-action) in your timer bar. For example, you can add a button that links to a product page or show a coupon that customers can copy and use at checkout.
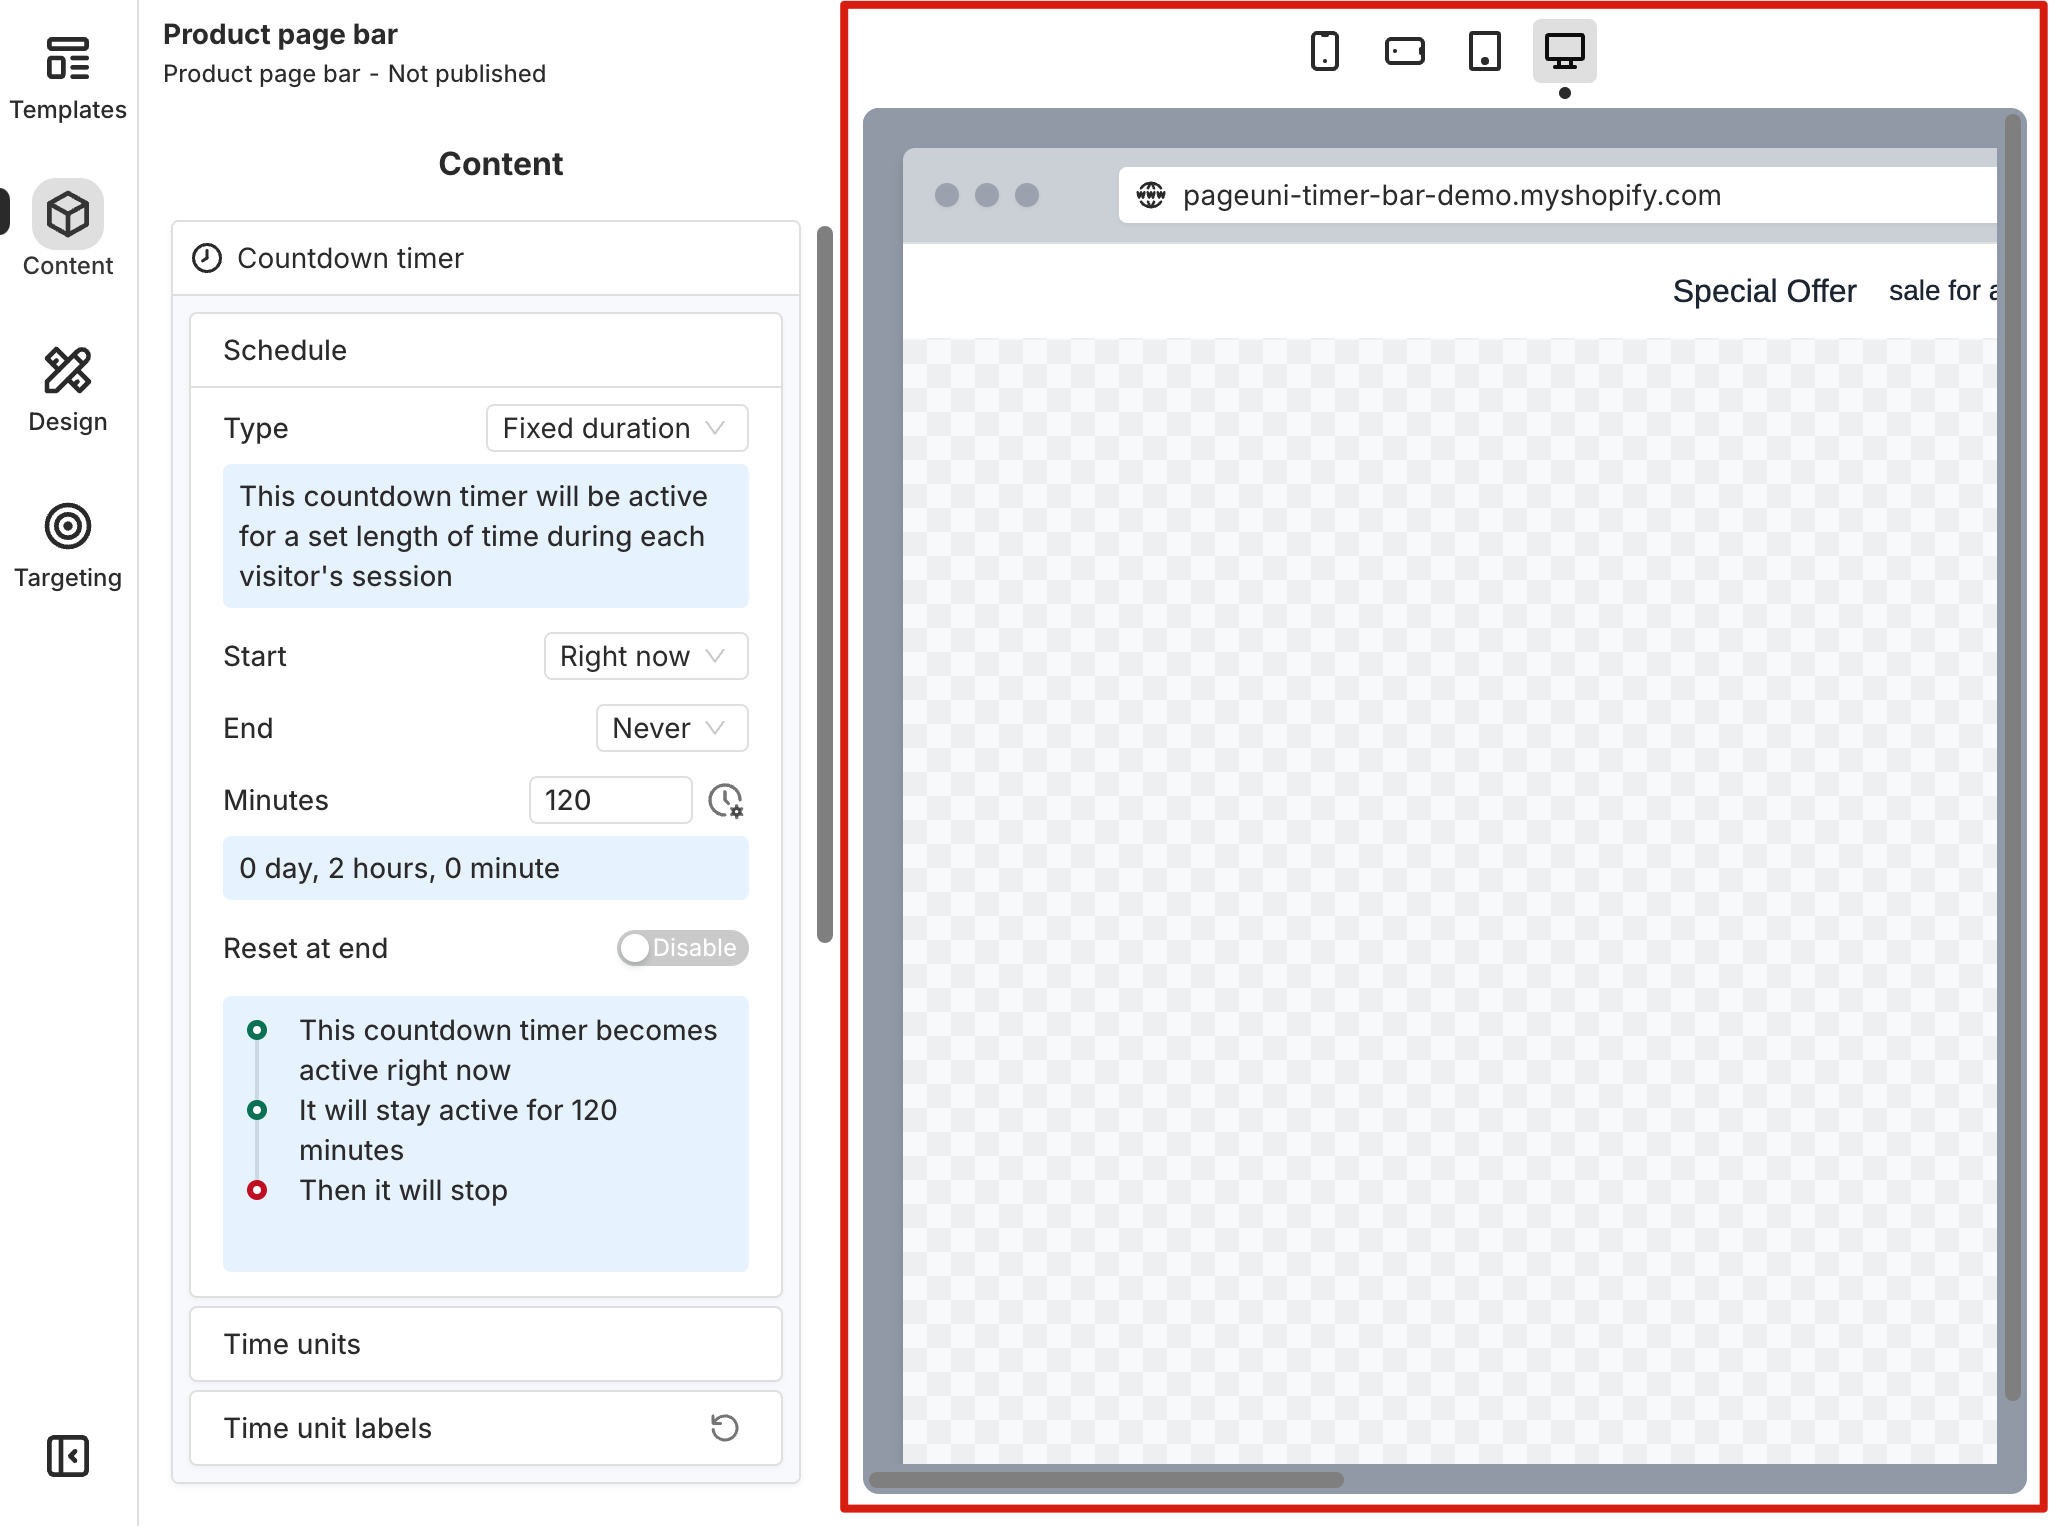
While customizing the content, you can use the preview area to see how your timer bar looks on different screen sizes. For example, you can check if a line of text is too long for mobile devices and make adjustments as needed.
Click on the text in the preview area to edit it directly. You can use the text toolbar to apply rich text formatting. Learn more about text customization here.
For more details on content customization, check out these articles.
Customize Design
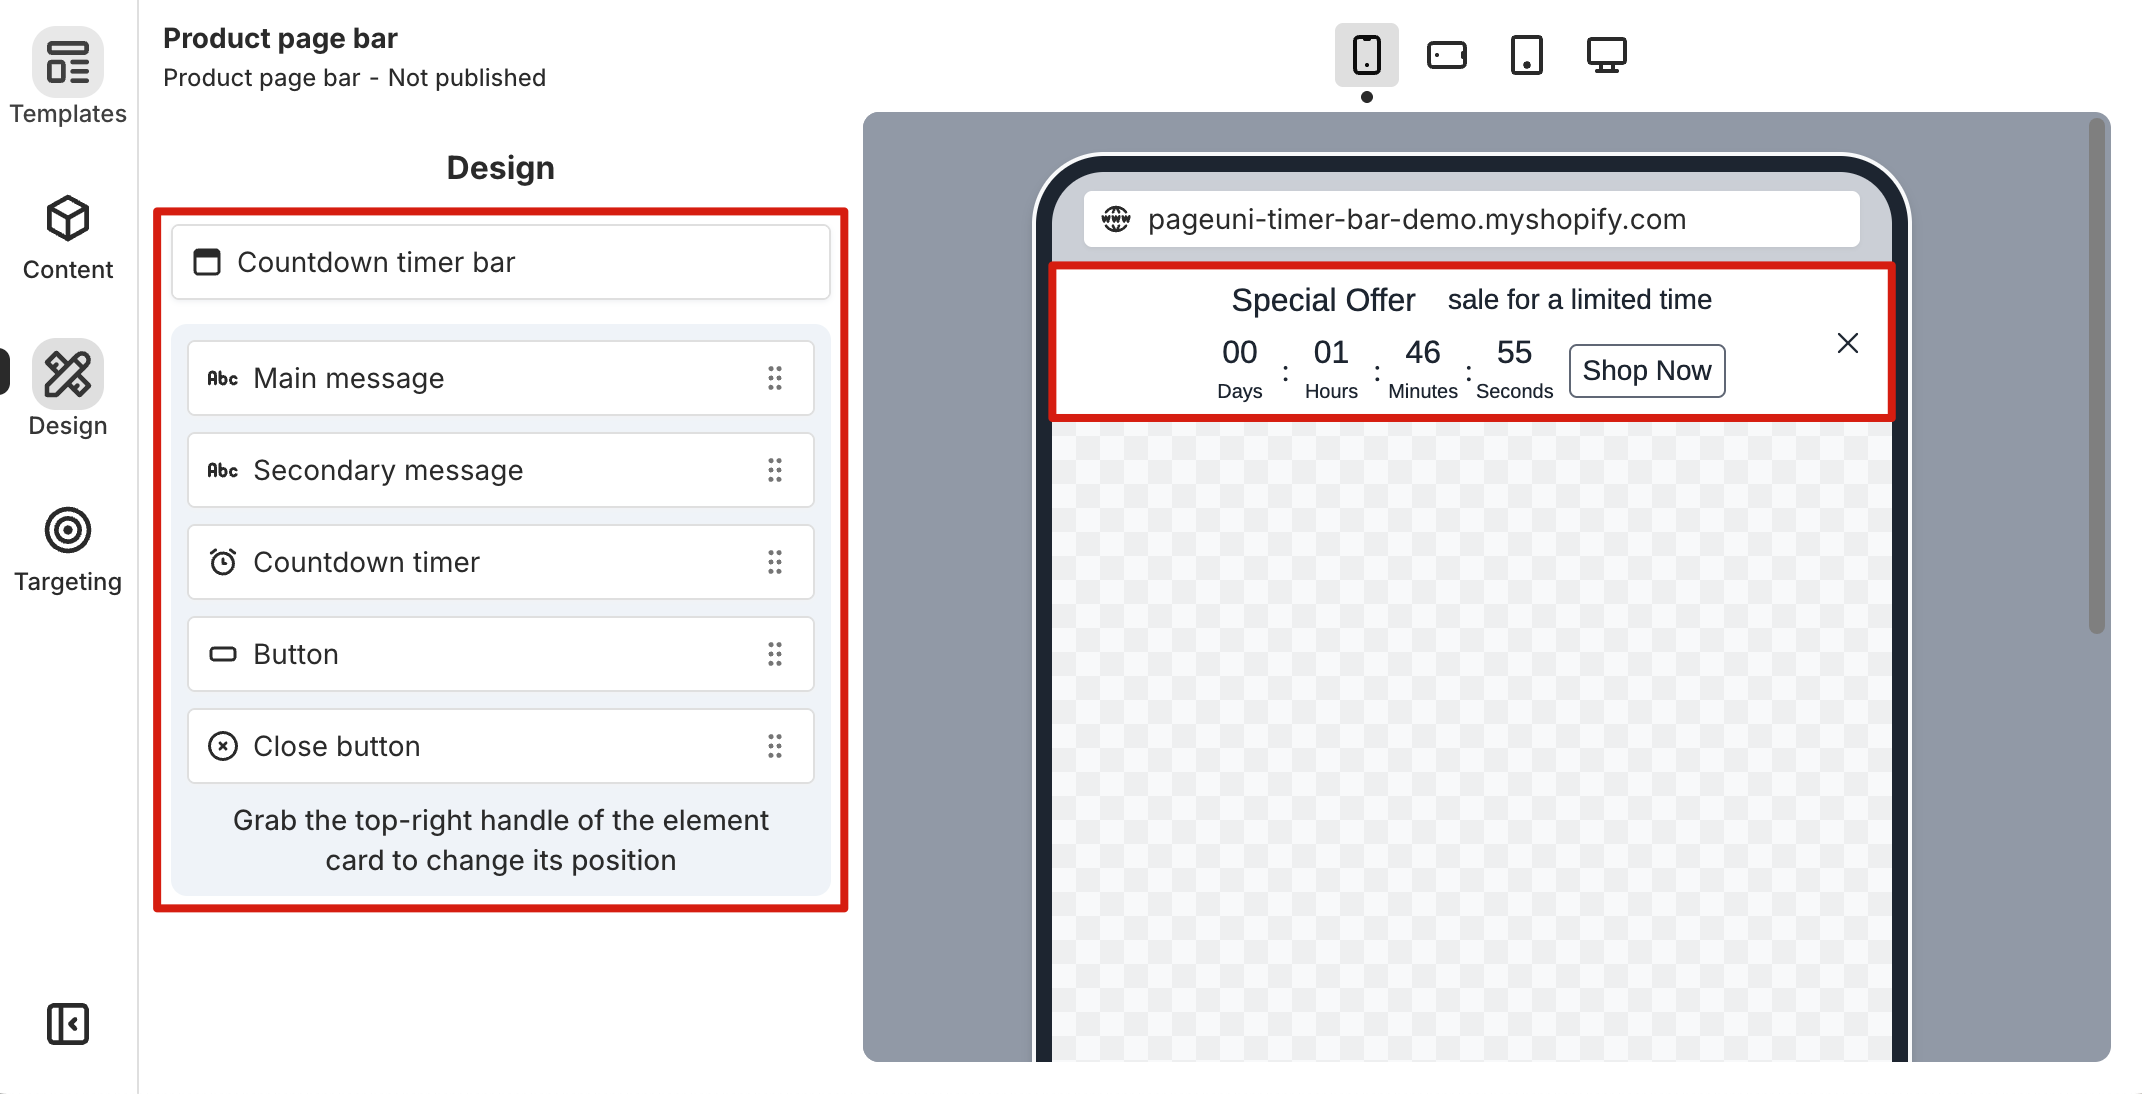
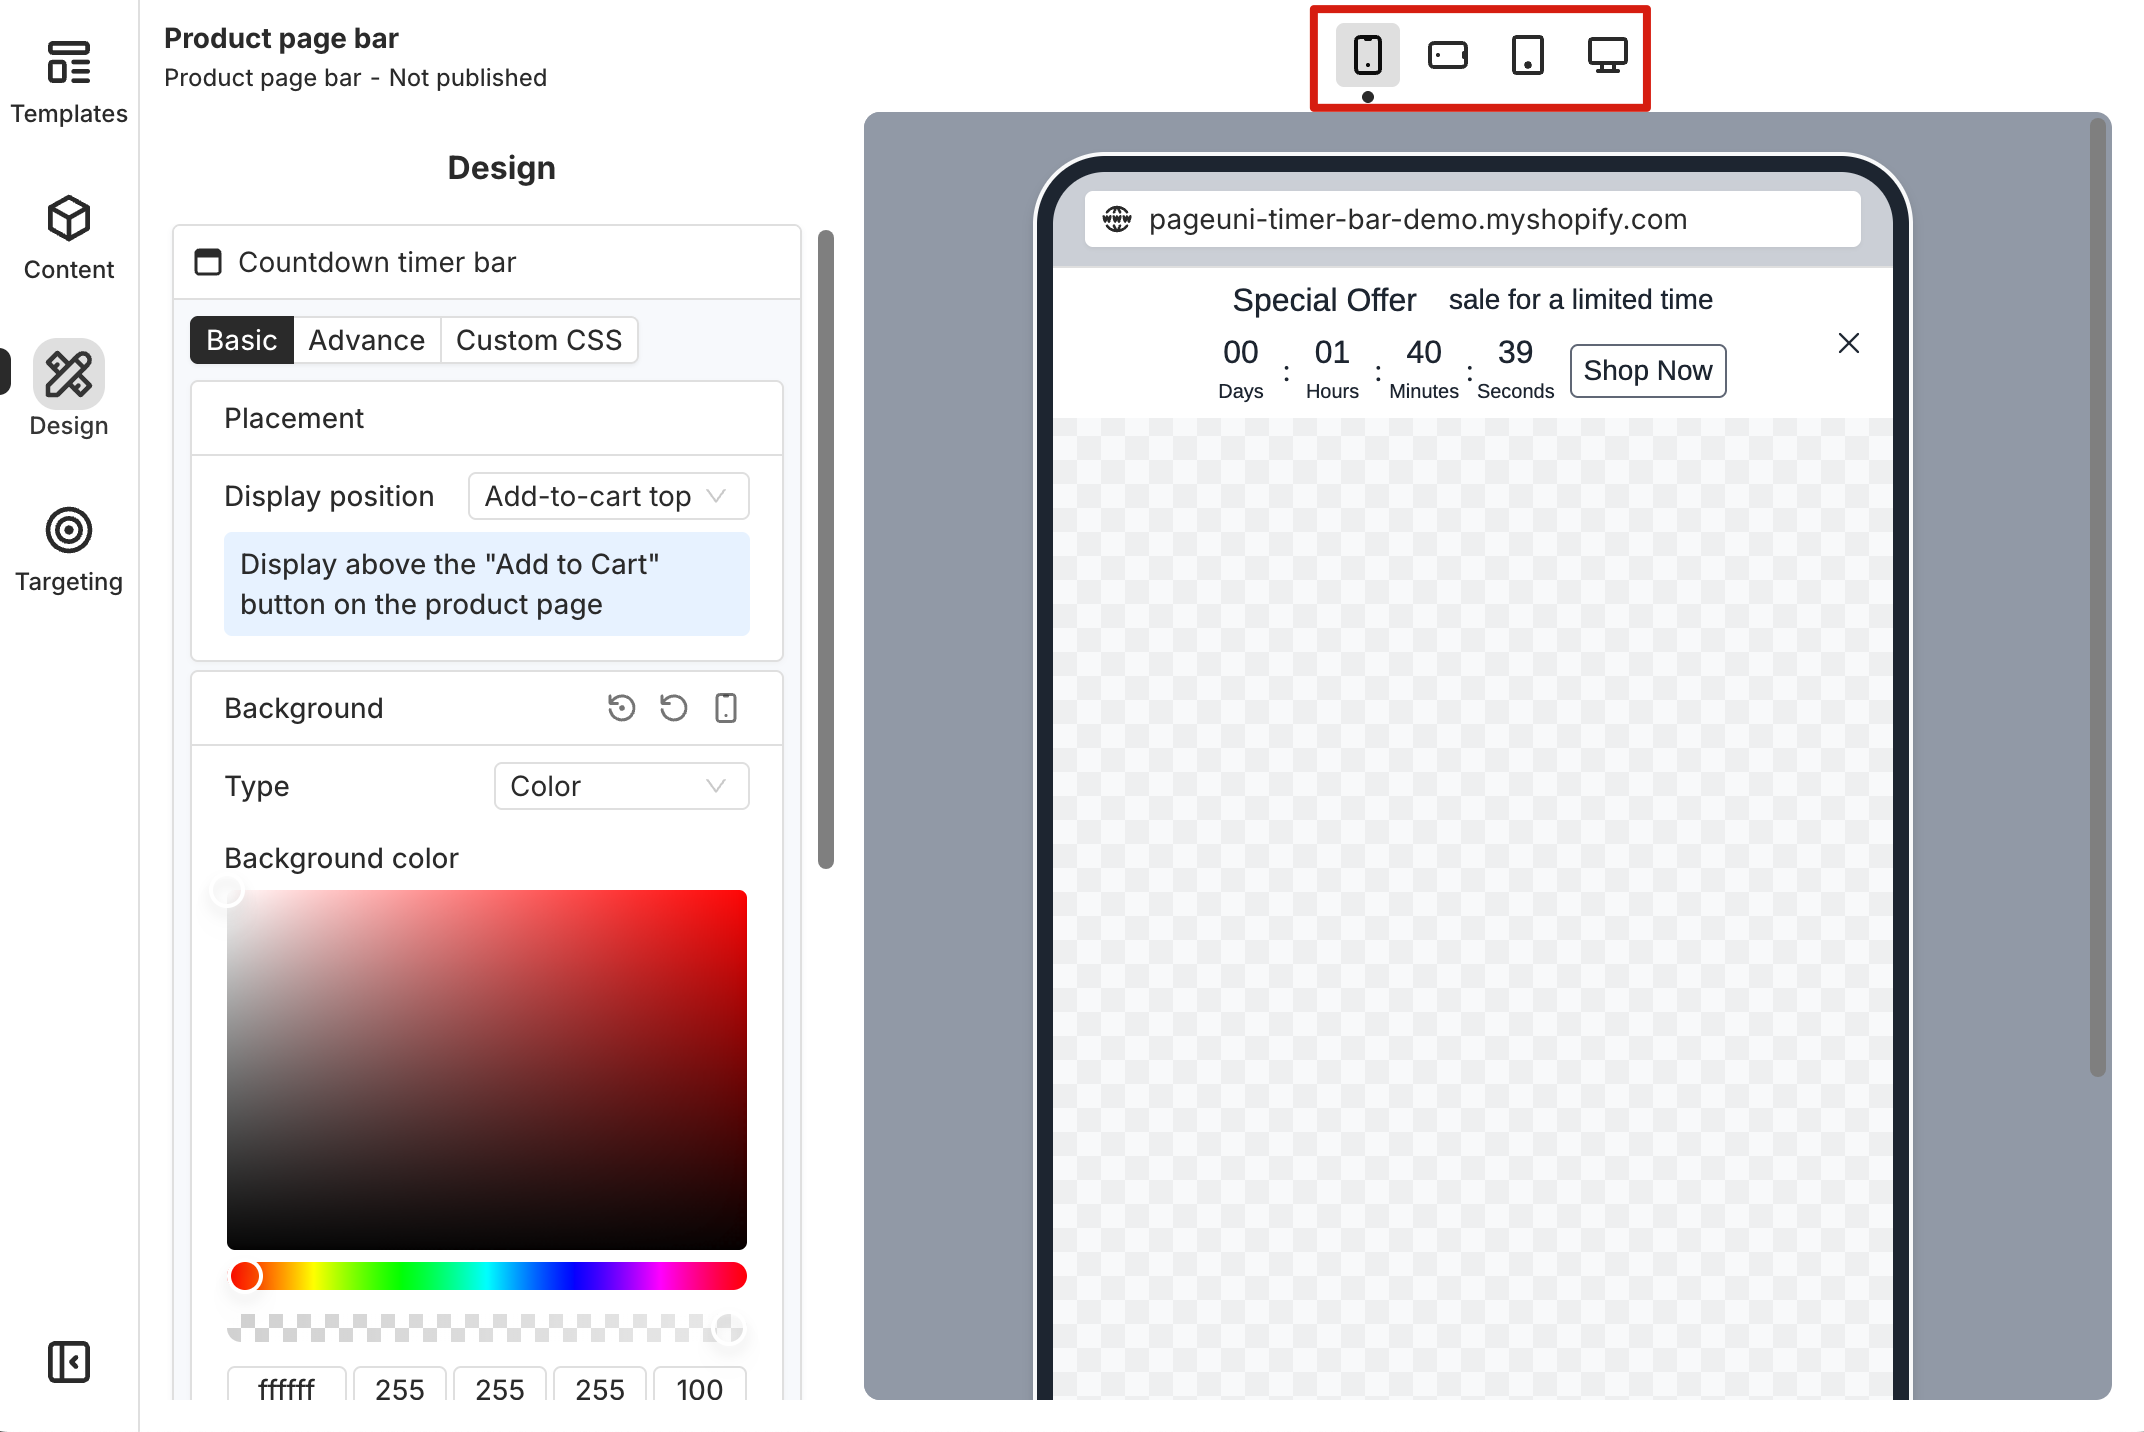
To customize your timer bar design, click the Design tab in the left sidebar. You can fine-tune the design of both the timer bar and its elements.
In the Design sidebar, you’ll see the timer bar and its elements listed. Select the one you want to customize and adjust its design as needed. Alternatively, you can click the element directly in the preview area to start customizing it.
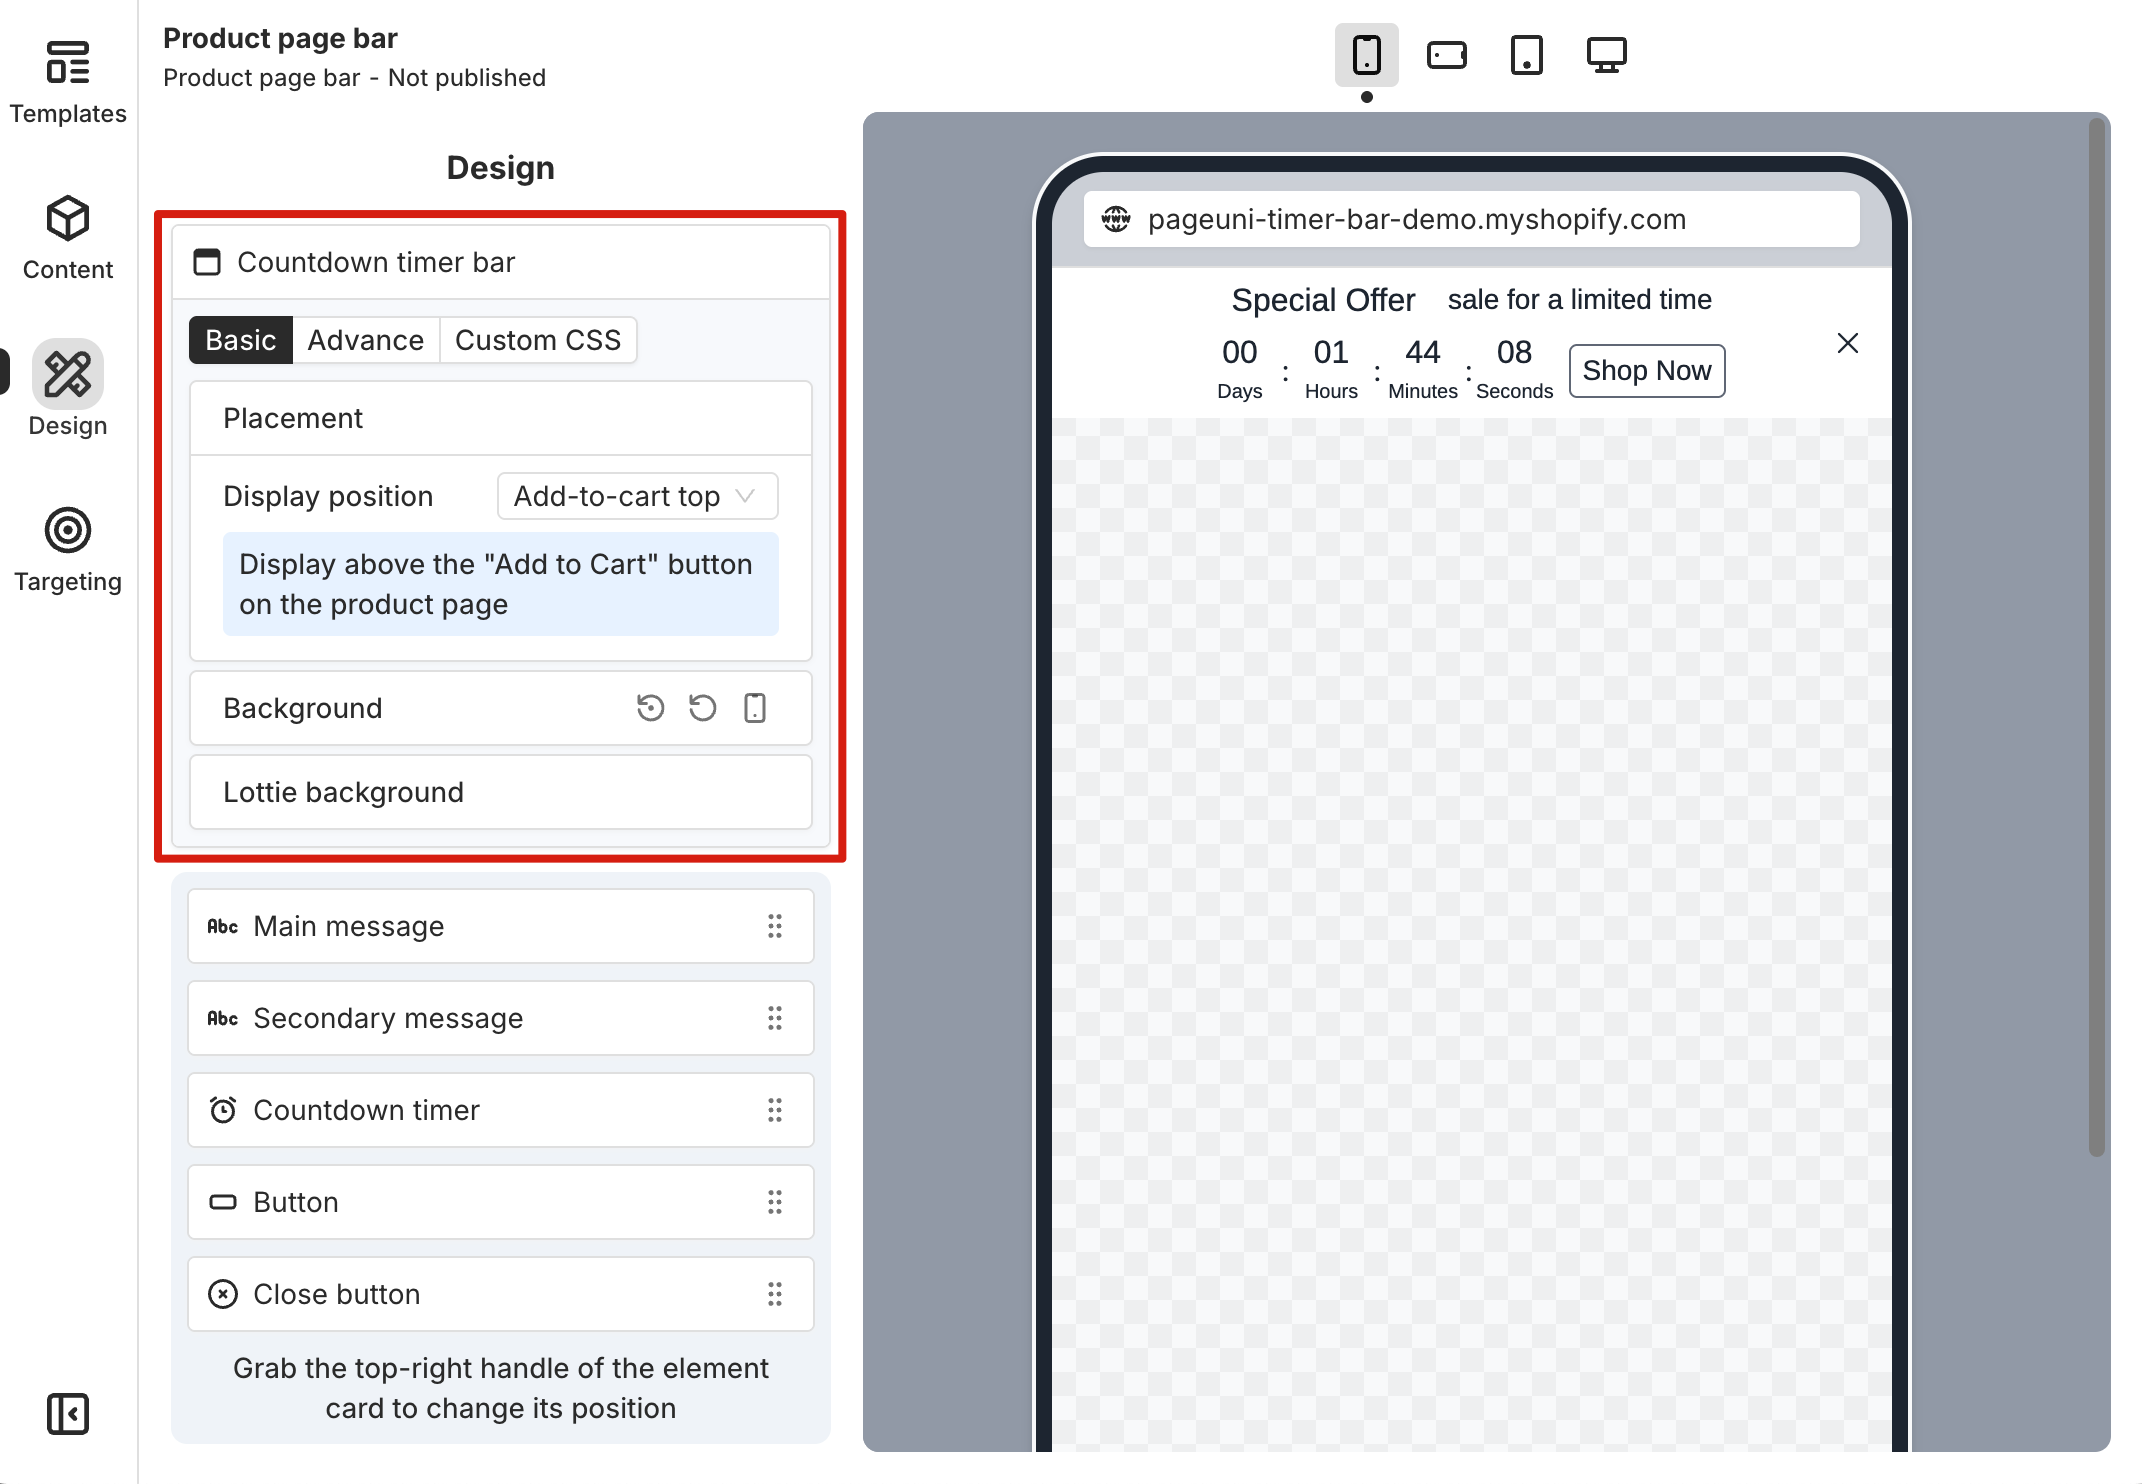
Select the timer bar to customize its settings, such as placement, background, and more. Custom CSS is also supported here—if the built-in design options don’t fully meet your needs, you can fine-tune the appearance of your timer bar using CSS.
Each element comes with basic and advanced design options. In most cases, adjusting the settings in the Basic tab is enough to create a timer bar that meets your needs. If you want more control, click the Advance tab on the selected element’s card. There, you can fine-tune options like Visibility, Background, Spacing, Border, and more.
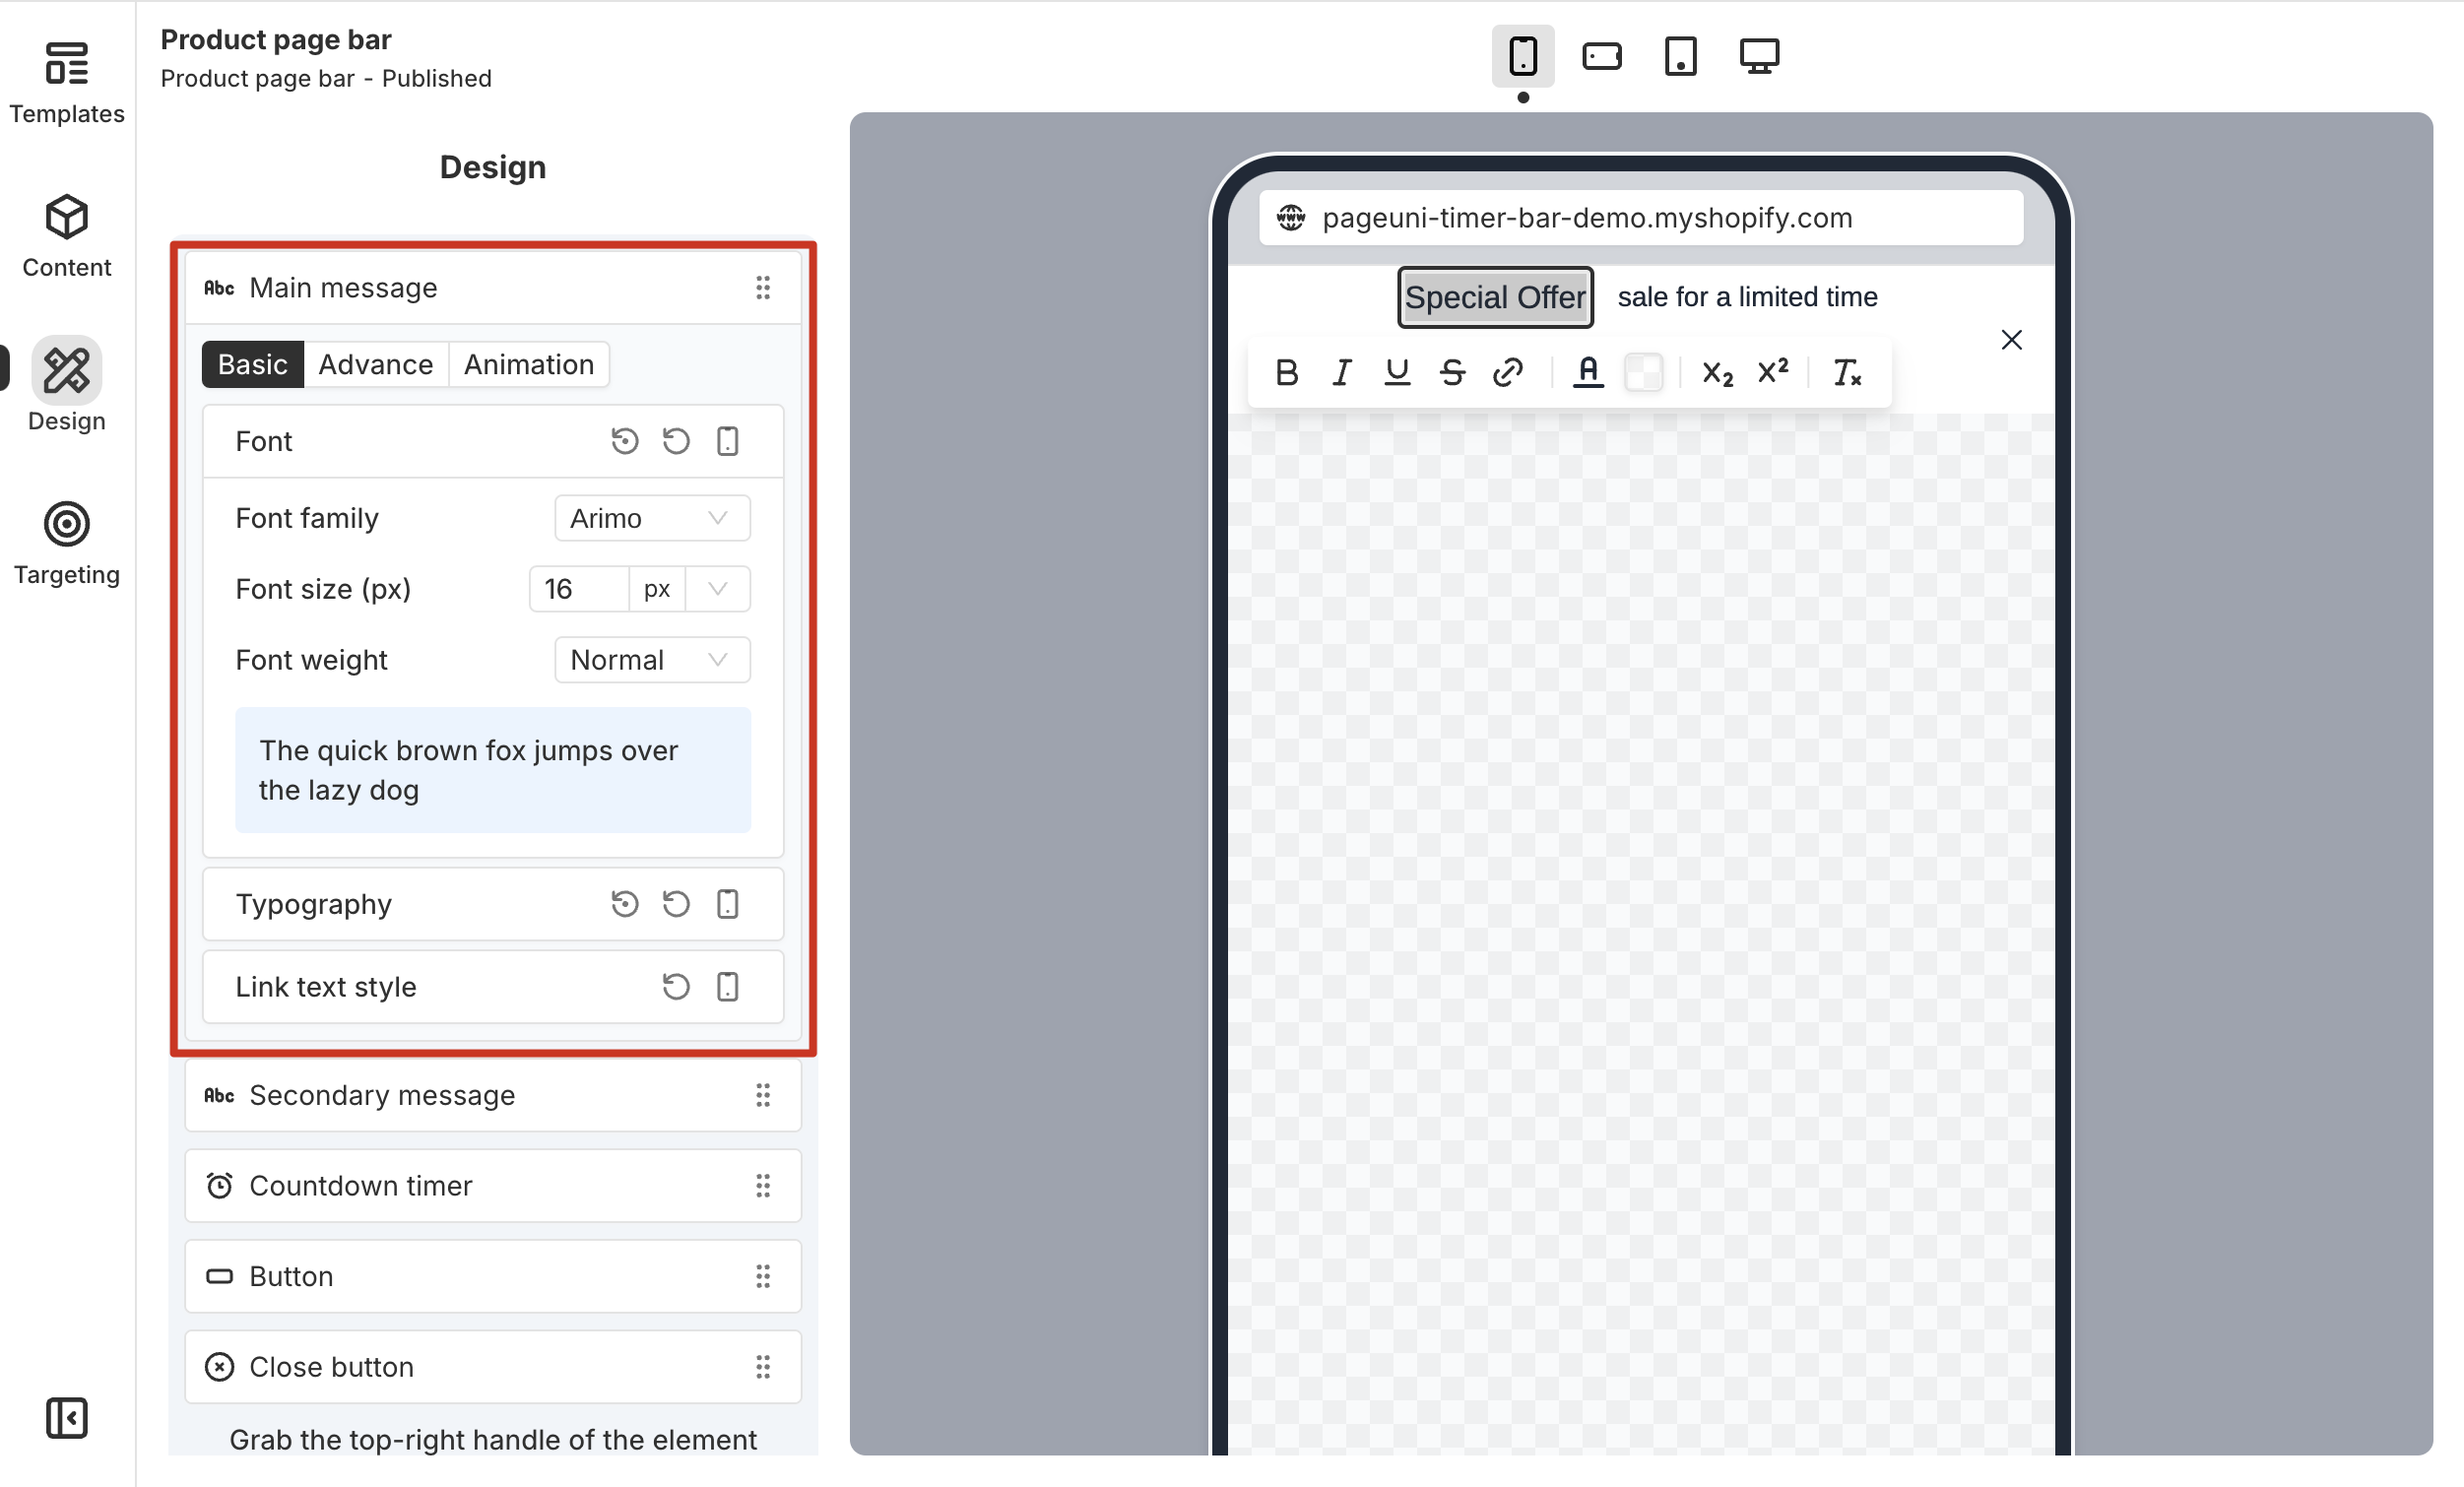
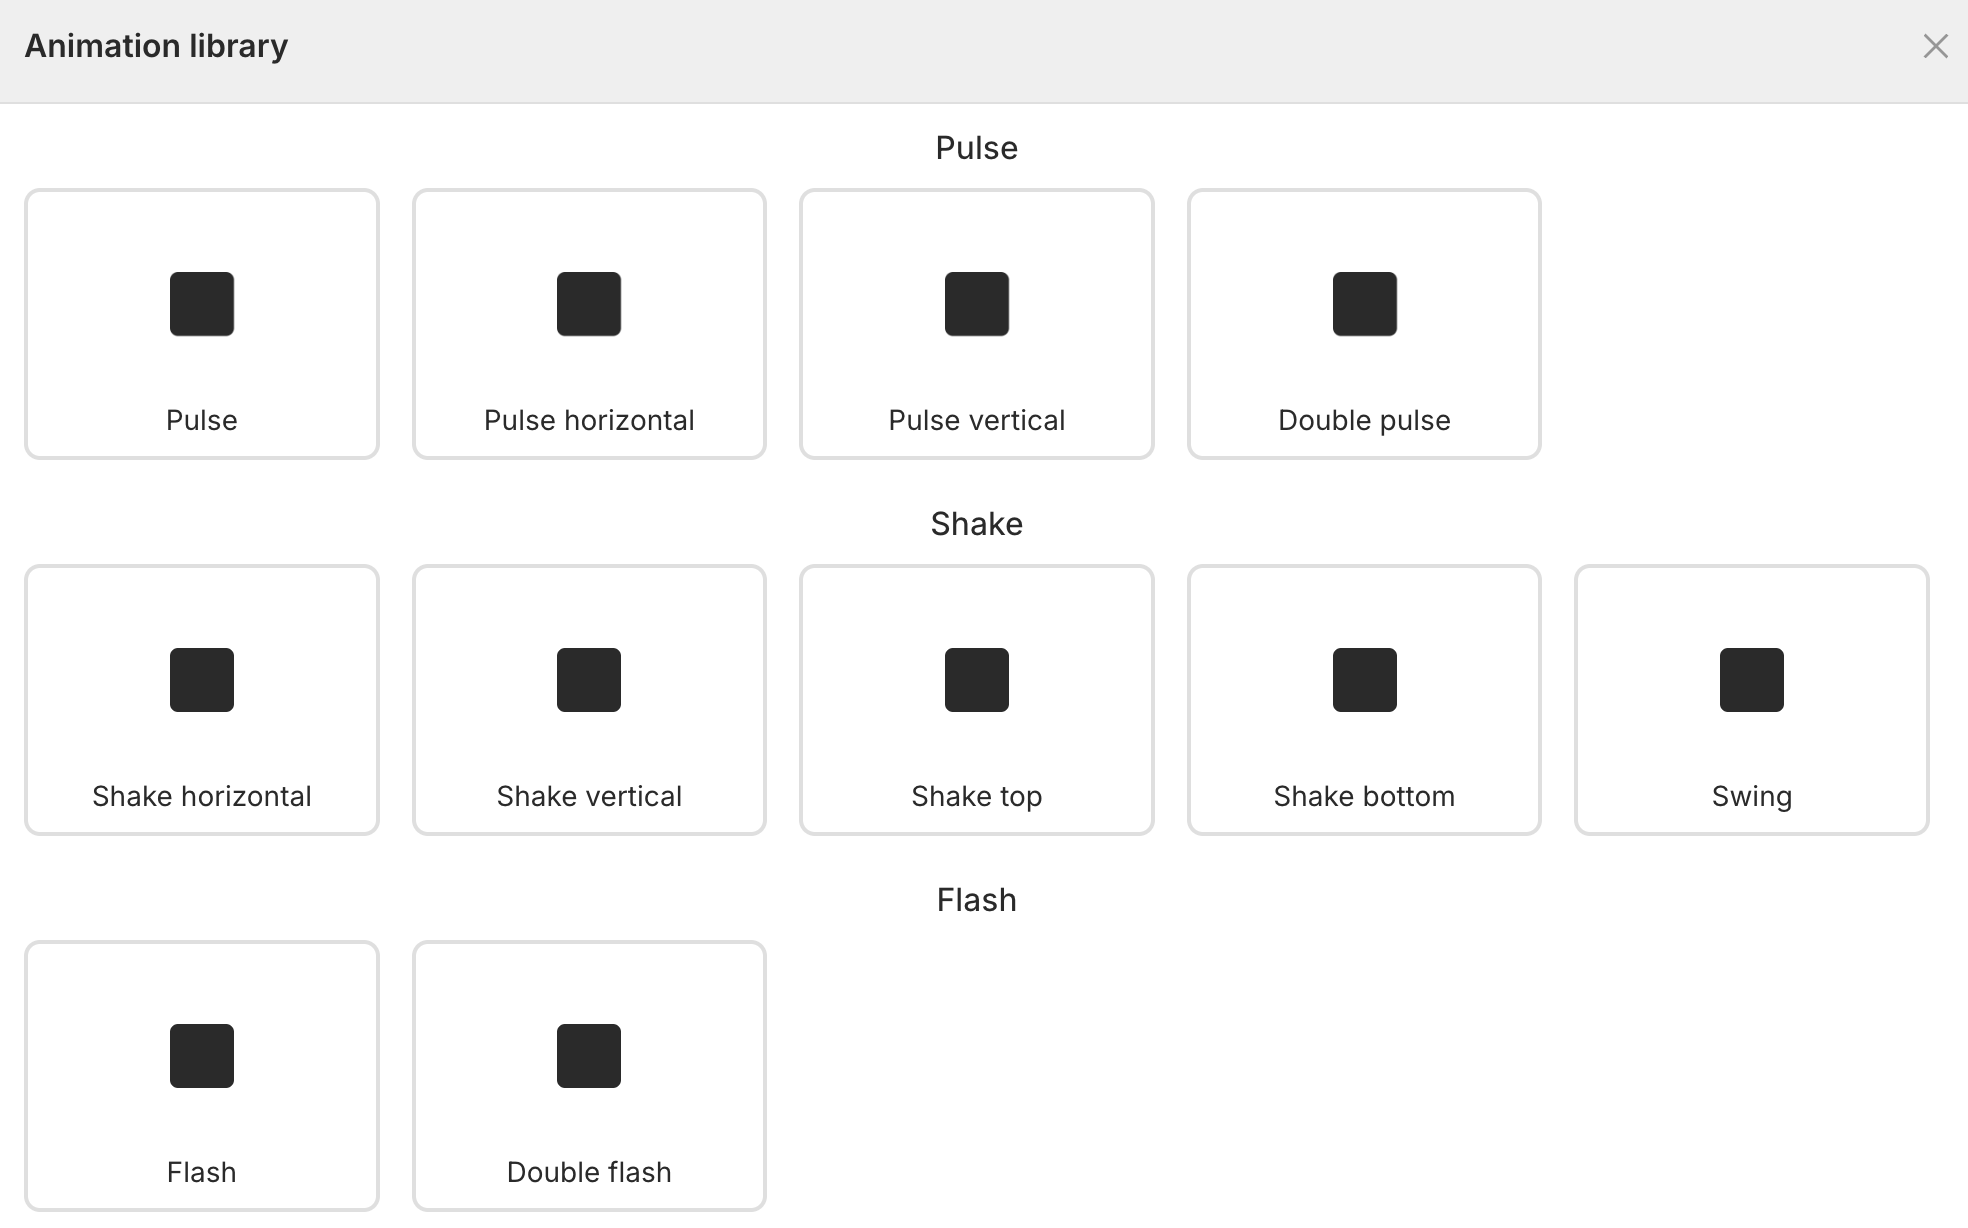
You can also add animations to timer bar elements. Click the Animation tab in an element card to open its animation settings. From there, choose an animation from the animation library—the selected animation will appear in the preview area. You can try adding an animation to your CTA to make it more eye-catching and motivate customers to interact with it.
Most design customizations follow responsive and mobile-first principles. You can preview and edit your timer bar for different device sizes. When you make changes under a specific device view, those changes will apply to that device and all larger ones.
For example, if you set the timer bar background color to red under the Mobile device, it will also appear red on the Tablet and Desktop. However, if you switch to the Tablet device and change the background to black, the new color will apply to the Tablet and Desktop, while Mobile and Mobile Landscape will still show red.
For more details on design customization, check out these articles.
Targeting
Targeting helps you reach the right customers by displaying your timer bar based on factors like geolocation, device types, browsing context, and other traits. This boosts engagement and makes your campaigns more effective.
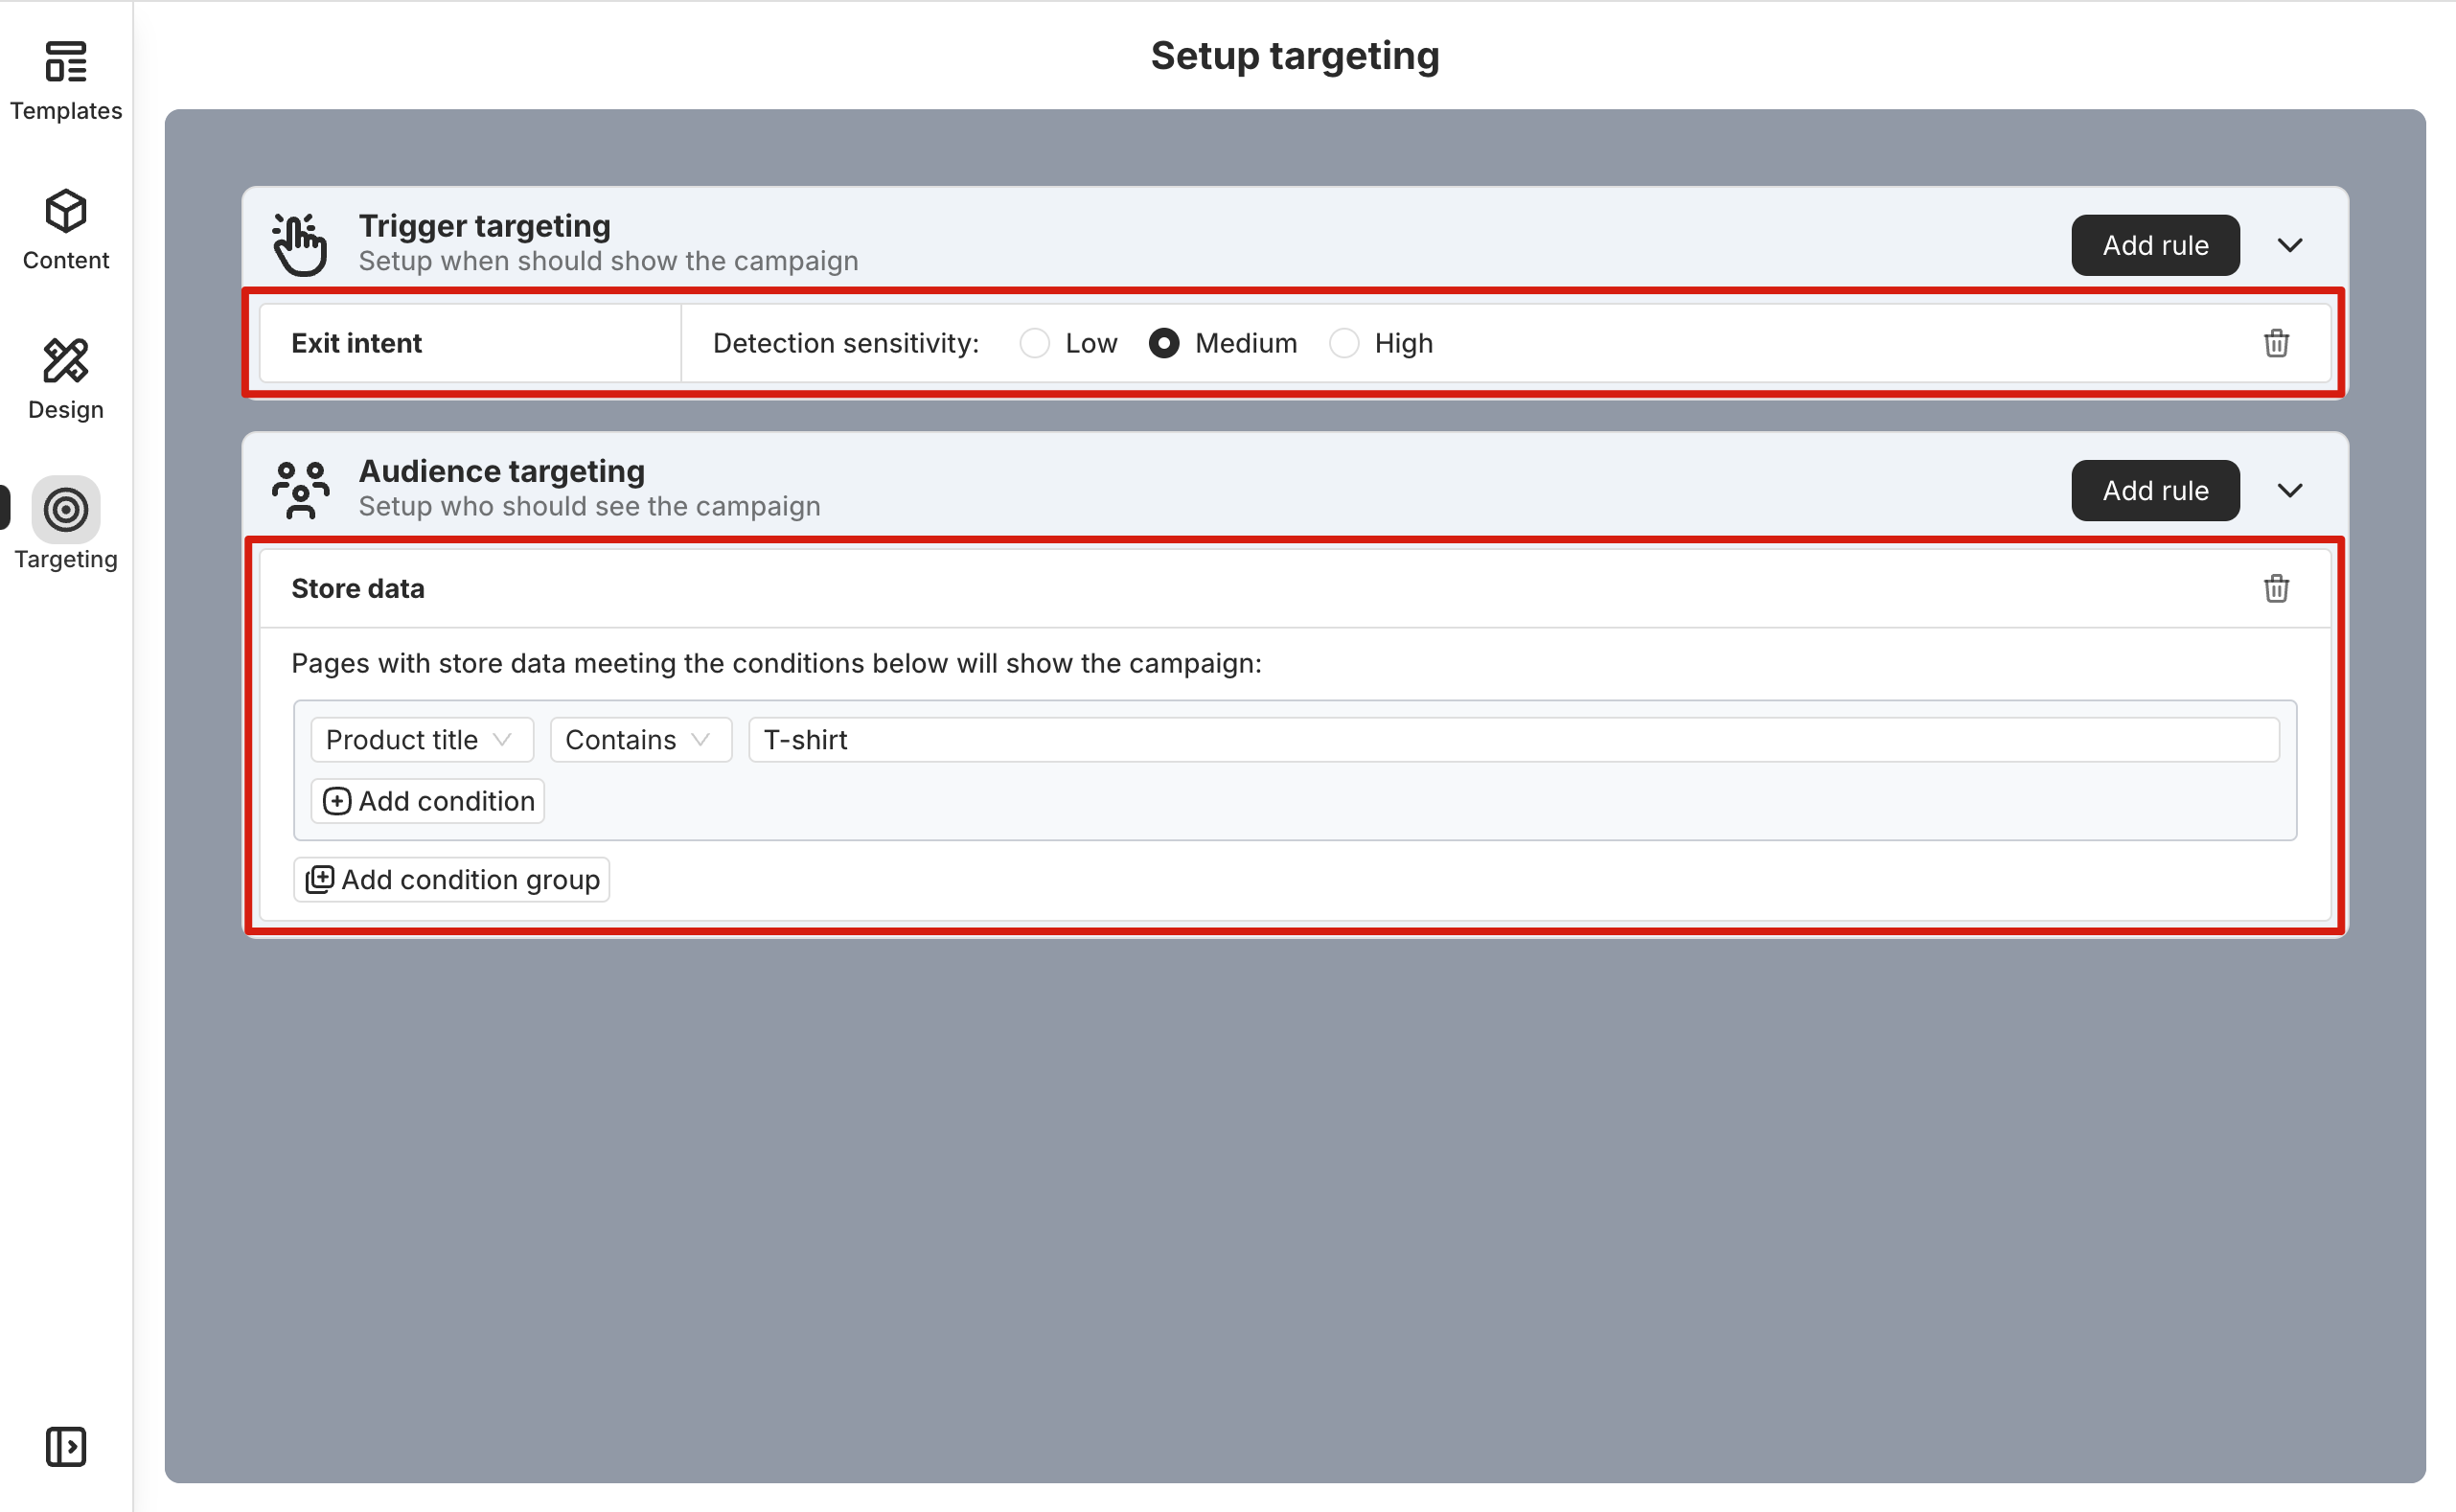
PageUni Countdown Timer offers powerful targeting features—including major categories like trigger targeting and audience targeting, as well as specific types such as exit intent, geolocation, and advanced options like store data, traffic source, and more.
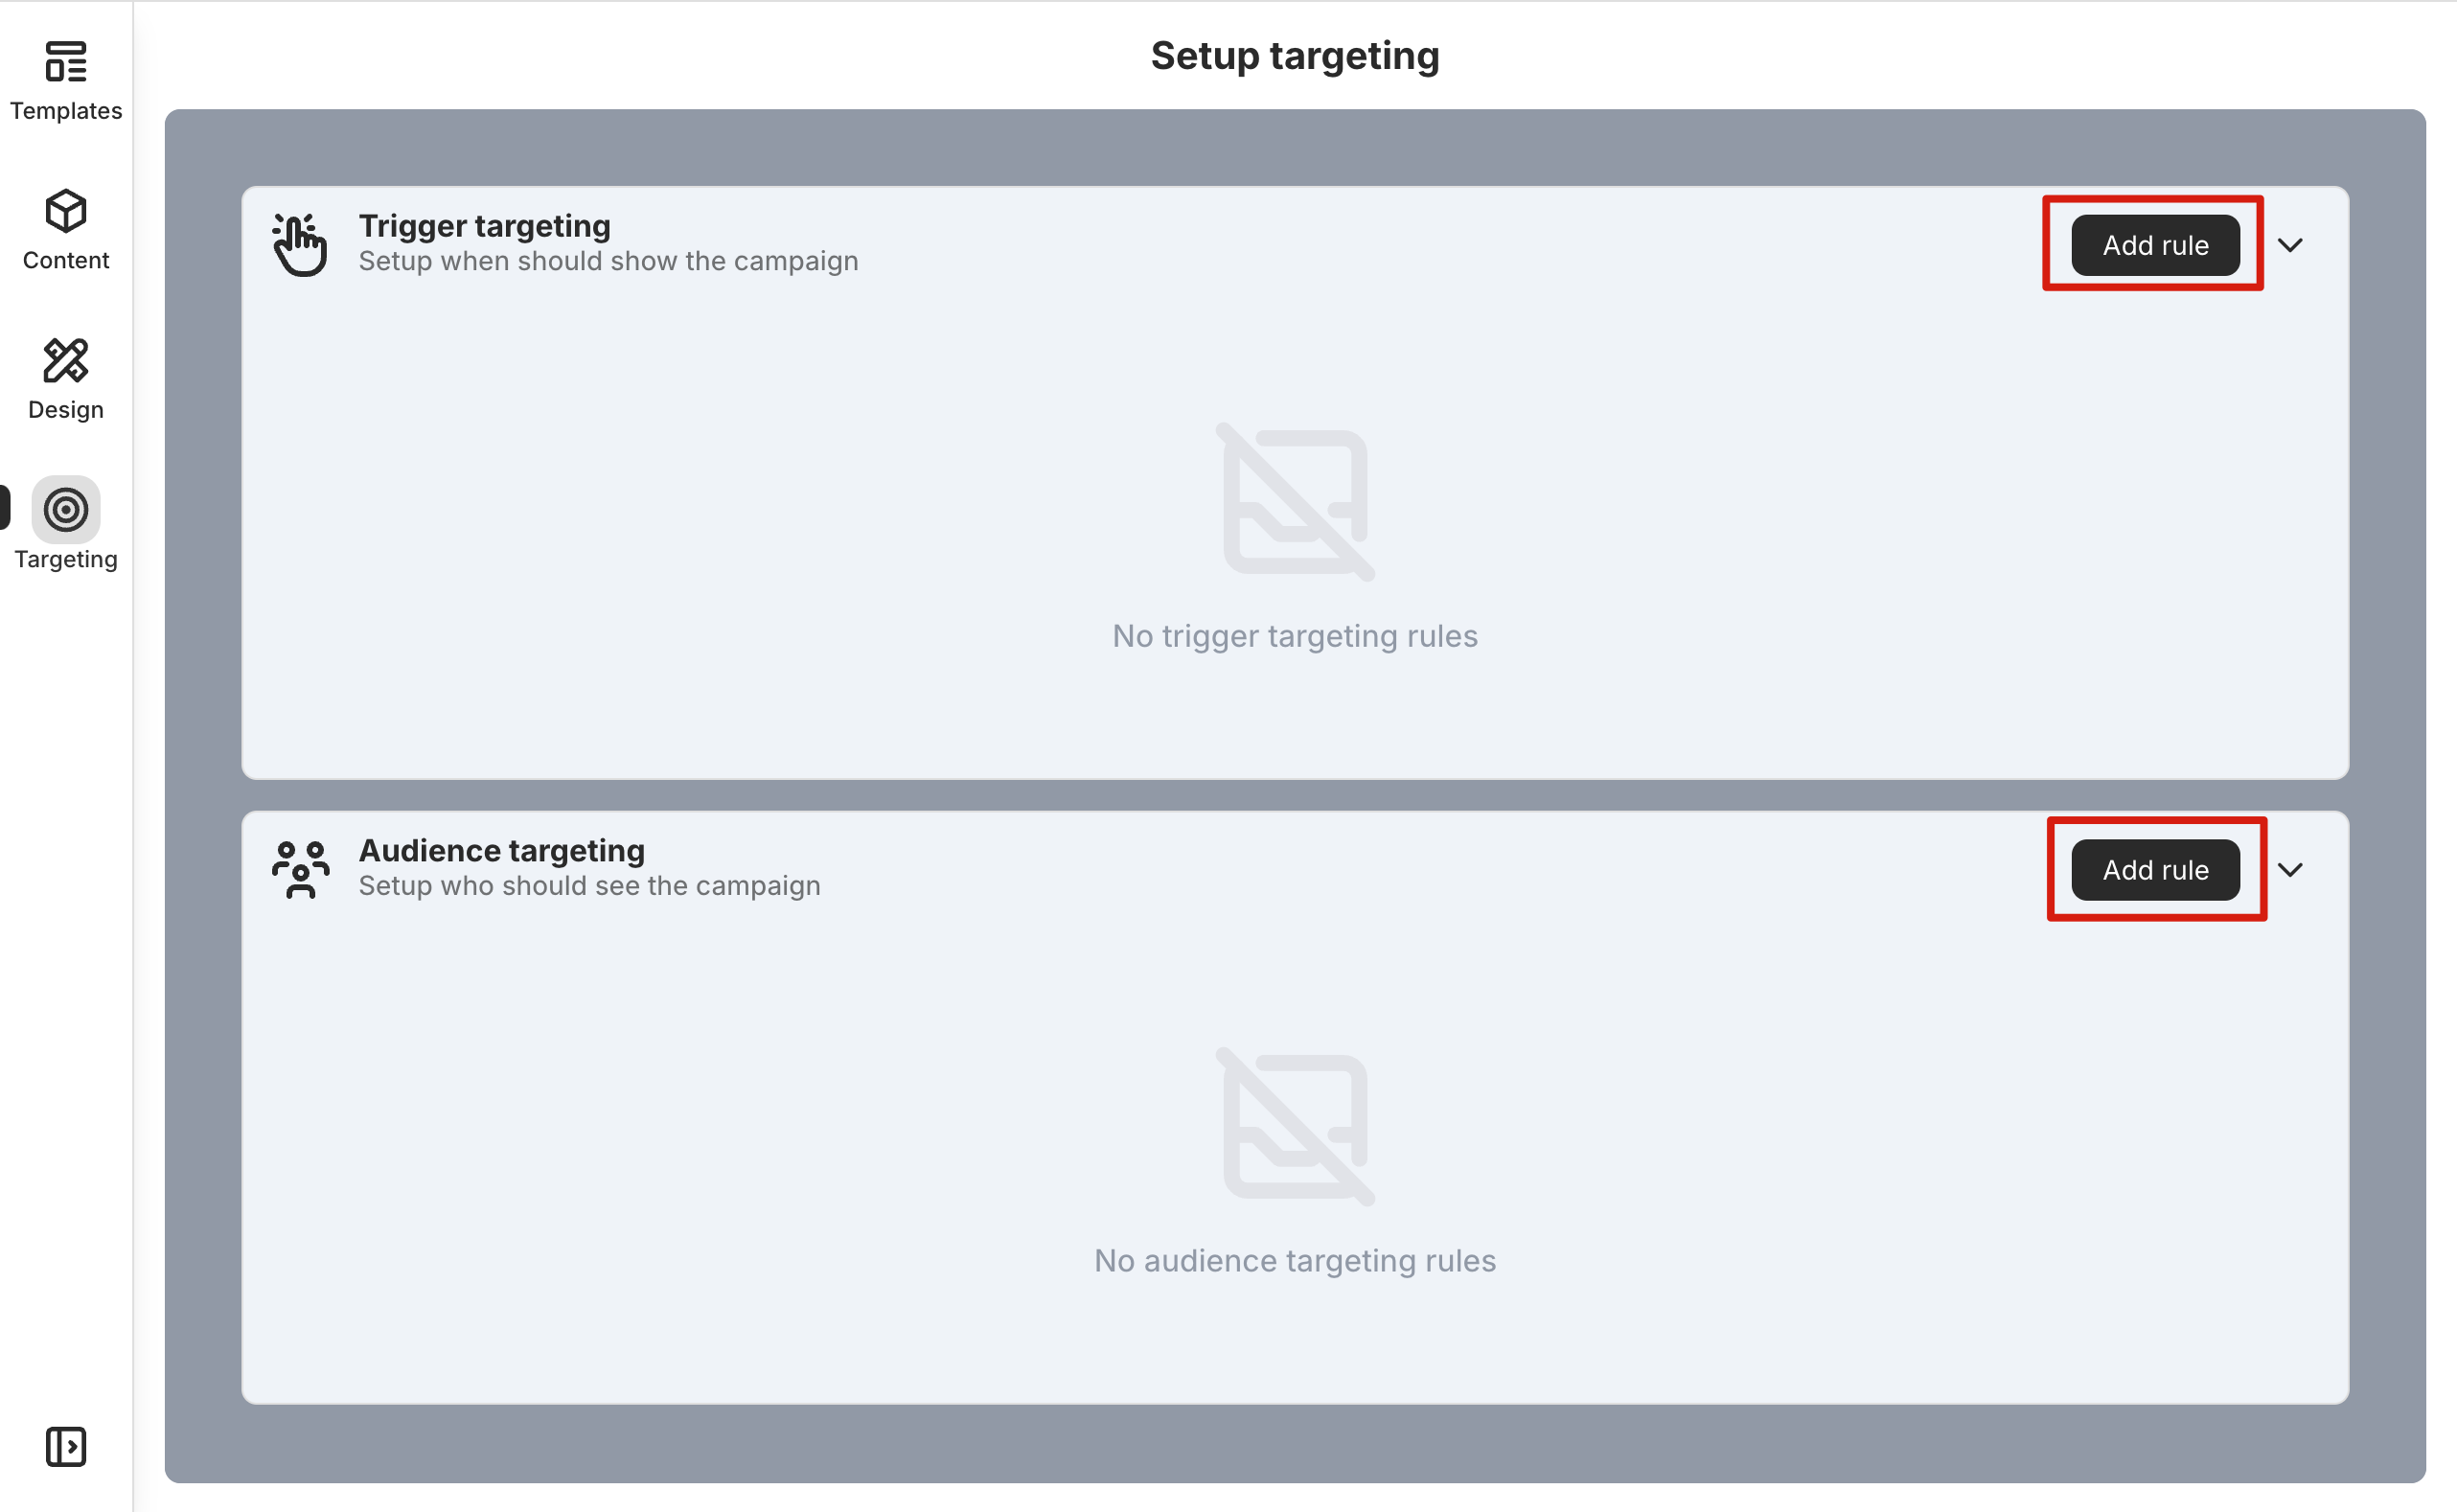
Click the Targeting tab on the left to open the targeting settings. Depending on your needs, you can add either a trigger targeting rule or an audience targeting rule.
Once you’ve added a targeting rule, you can further configure and adjust it within the rule card.
For more details on targeting, check out these articles.
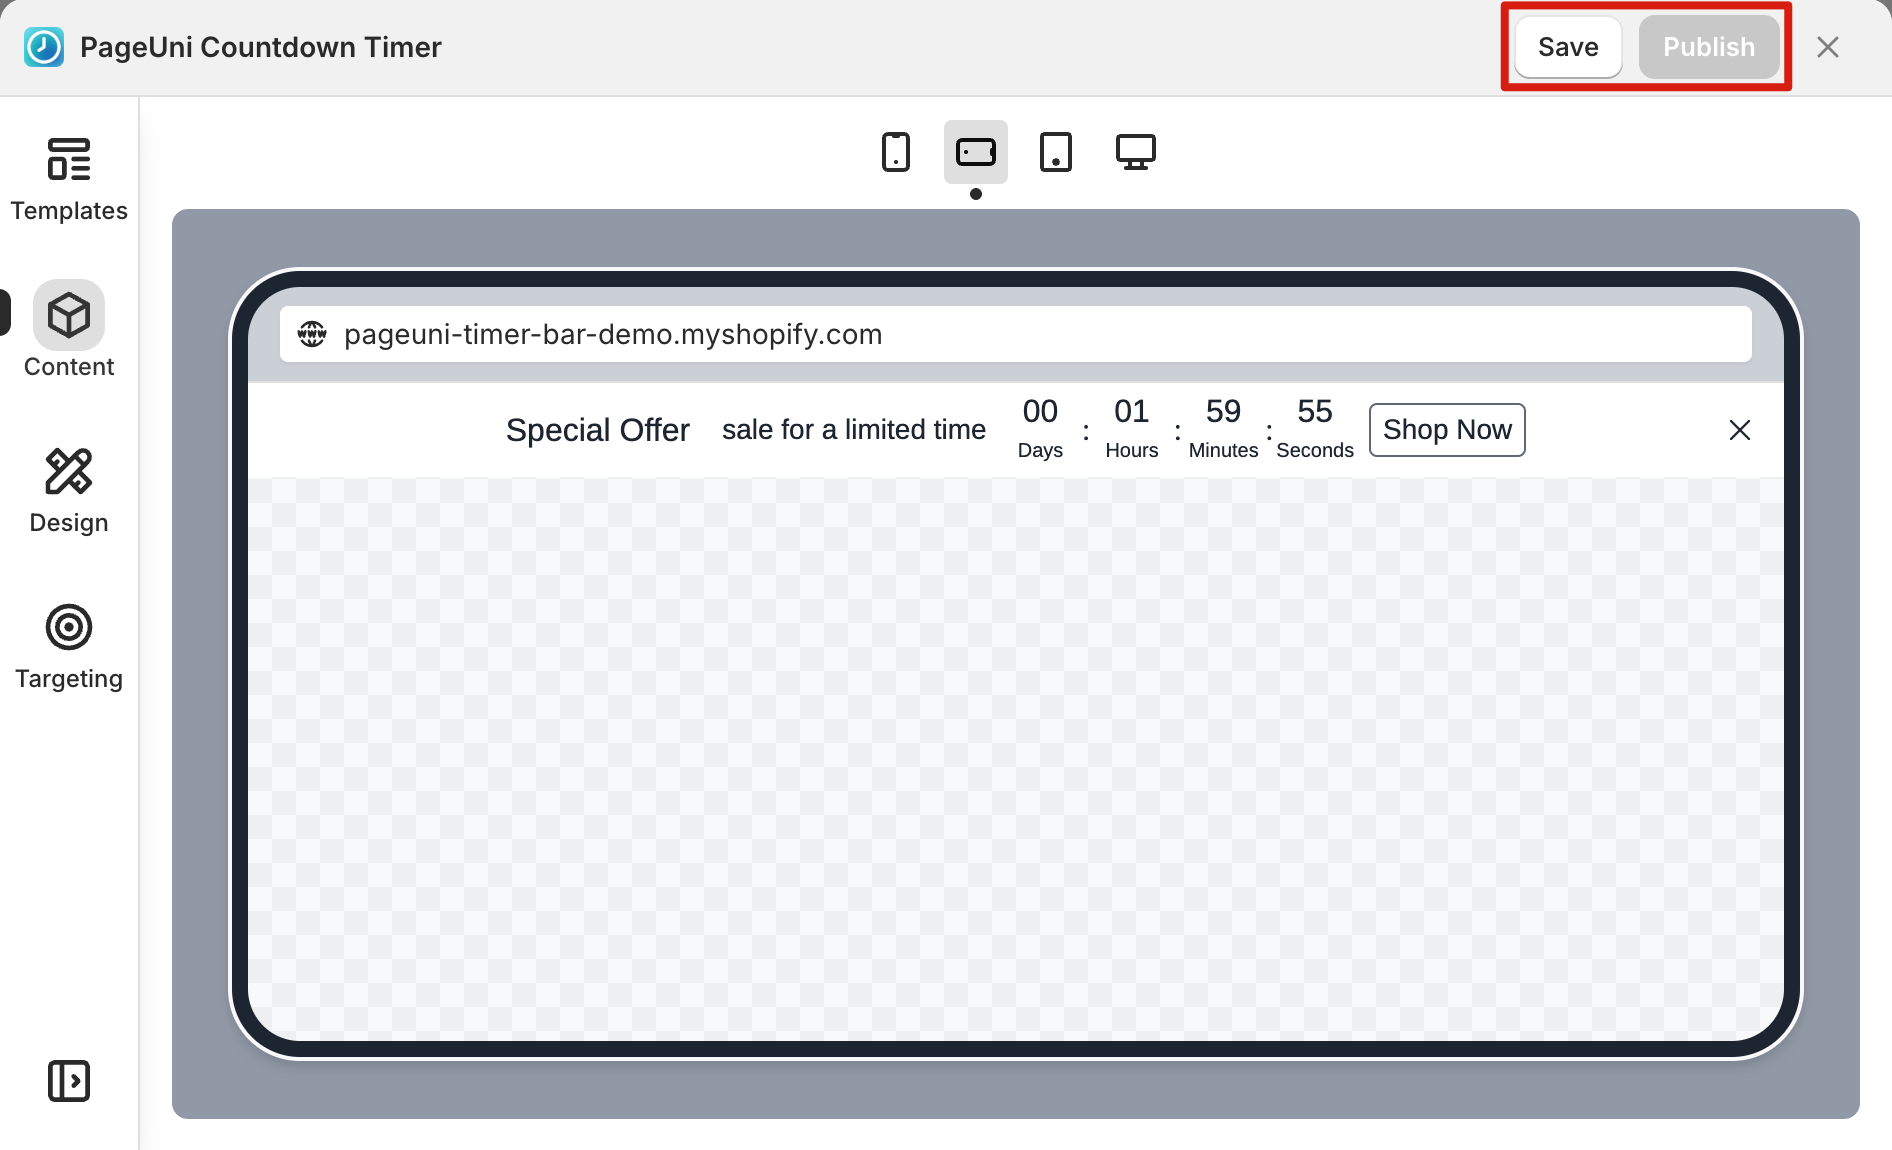
Save & Publish
You can save your timer bar campaign at any time after making changes. Once it’s saved, you can publish it to online store. Published timer bars will display on your store pages. If you edit the campaign later, your updates won’t be visible on the store until you save and publish the updated version.
Click the Save and Publish buttons in the top right corner to perform the corresponding actions.